
Your mission — do you have to determine to just accept it — is to construct a Button element in 4 frameworks, however, solely use one button.css file!
This concept is essential to me. I’ve been engaged on a element library known as AgnosticUI the place the aim is constructing UI parts that aren’t tied to anybody specific JavaScript framework. AgnosticUI works in React, Vue 3, Angular, and Svelte. In order that’s precisely what we’ll do at present on this article: construct a button element that works throughout all these frameworks.
The supply code for this text is out there on GitHub on the the-little-button-that-could-series department.
Desk of contents
Why a monorepo?EstablishingFramework-specific workspacesWhat have we simply performed?Ending touchesUpdating every element to take a mode propertyCode fullHomeworkPotential pitfallsConclusion
Why a monorepo?
We’re going to arrange a tiny Yarn workspaces-based monorepo. Why? Chris truly has a good define of the advantages in one other put up. However right here’s my very own biased record of advantages that I really feel are related for our little buttons endeavor:
Coupling
We’re attempting to construct a single button element that makes use of only one button.css file throughout a number of frameworks. So, by nature, there’s some purposeful coupling occurring between the assorted framework implementations and the single-source-of-truth CSS file. A monorepo setup offers a handy construction that facilitates copying our single button.css element into numerous framework-based initiatives.
Workflow
Let’s say the button wants a tweak — just like the “focus-ring” implementation, or we screwed up the usage of aria within the element templates. Ideally, we’d prefer to appropriate issues in a single place fairly than making particular person fixes in separate repositories.
Testing
We wish the comfort of firing up all 4 button implementations on the identical time for testing. As this type of undertaking grows, it’s protected to imagine there will likely be extra correct testing. In AgnosticUI, for instance, I’m at present utilizing Storybook and infrequently kick off all of the framework Storybooks, or run snapshot testing throughout your entire monorepo.
I like what Leonardo Losoviz has to say in regards to the monorepo strategy. (And it simply so occurs to align with with every part we’ve talked about to this point.)
I imagine the monorepo is especially helpful when all packages are coded in the identical programming language, tightly coupled, and counting on the identical tooling.
Establishing
Time to dive into code — begin by making a top-level listing on the command-line to accommodate the undertaking after which cd into it. (Can’t consider a reputation? mkdir buttons && cd buttons will work superb.)
First off, let’s initialize the undertaking:
$ yarn init
yarn init v1.22.15
query title (articles): littlebutton
query model (1.0.0):
query description: my little button undertaking
query entry level (index.js):
query repository url:
query creator (Rob Levin):
query license (MIT):
query personal:
success Saved package deal.json
That provides us a package deal.json file with one thing like this:
{
“title”: “littlebutton”,
“model”: “1.0.0”,
“description”: “my little button undertaking”,
“principal”: “index.js”,
“creator”: “Rob Levin”,
“license”: “MIT”
}
Creating the baseline workspace
We are able to set the primary one up with this command:
mkdir -p ./littlebutton-css
Subsequent, we have to add the 2 following strains to the monorepo’s top-level package deal.json file in order that we hold the monorepo itself personal. It additionally declares our workspaces:
// …
“personal”: true,
“workspaces”: [“littlebutton-react”, “littlebutton-vue”, “littlebutton-svelte”, “littlebutton-angular”, “littlebutton-css”]
Now descend into the littlebutton-css listing. We’ll once more wish to generate a package deal.json with yarn init. Since we’ve named our listing littlebutton-css (the identical as how we specified it in our workspaces in package deal.json) we are able to merely hit the Return key and settle for all of the prompts:
$ cd ./littlebutton-css && yarn init
yarn init v1.22.15
query title (littlebutton-css):
query model (1.0.0):
query description:
query entry level (index.js):
query repository url:
query creator (Rob Levin):
query license (MIT):
query personal:
success Saved package deal.json
At this level, the listing construction ought to appear like this:
├── littlebutton-css
│ └── package deal.json
└── package deal.json
We’ve solely created the CSS package deal workspace at this level as we’ll be producing our framework implementations with instruments like vite which, in flip, generate a package deal.json and undertaking listing for you. We should keep in mind that the title we select for these generated initiatives should match the title we’ve specified within the package deal.json for our earlier workspaces to work.
Baseline HTML & CSS
Let’s keep within the ./littlebutton-css workspace and create our easy button element utilizing vanilla HTML and CSS information.
contact index.html ./css/button.css
Now our undertaking listing ought to appear like this:
littlebutton-css
├── css
│ └── button.css
├── index.html
└── package deal.json
Let’s go forward and join some dots with some boilerplate HTML in ./index.html:
<!doctype html>
<html lang=”en”>
<head>
<meta charset=”utf-8″>
<title>The Little Button That May</title>
<meta title=”description” content material=””>
<meta title=”viewport” content material=”width=device-width, initial-scale=1″>
<hyperlink rel=”stylesheet” href=”css/button.css”>
</head>
<physique>
<principal>
<button class=”btn”>Go</button>
</principal>
</physique>
</html>
And, simply so we now have one thing visible to check, we are able to add a little bit colour in ./css/button.css:
.btn {
colour: hotpink;
}
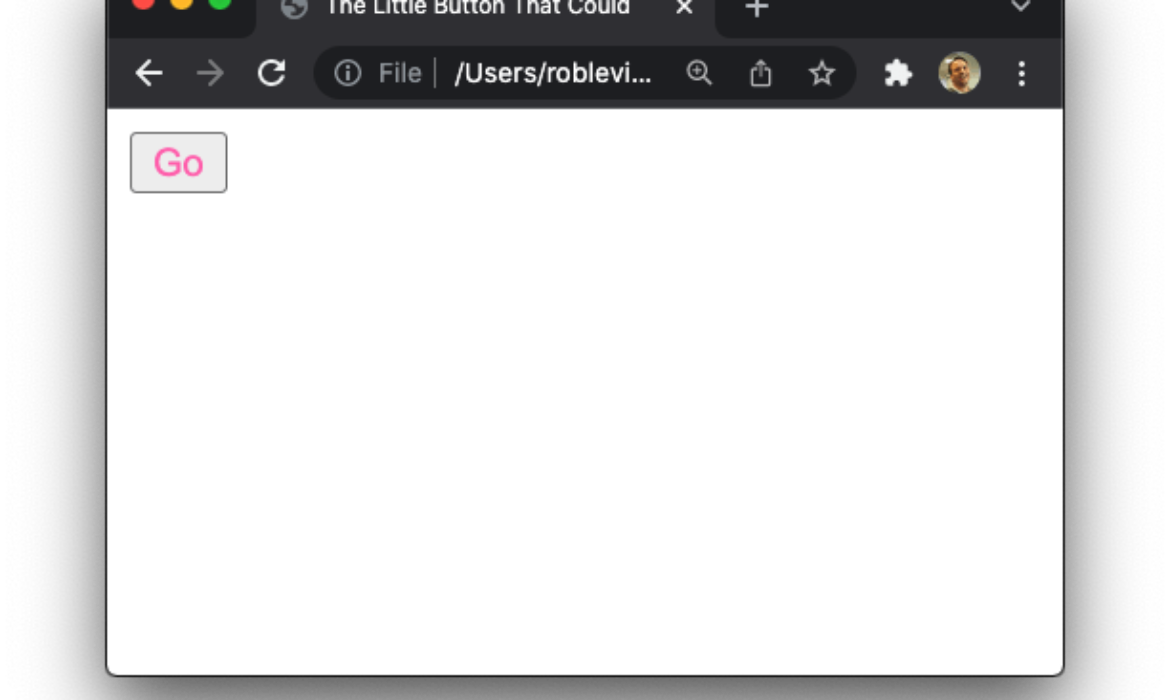
Now open up that index.html web page within the browser. In the event you see an unsightly generic button with hotpink textual content… success!
Framework-specific workspaces
So what we simply completed is the baseline for our button element. What we wish to do now’s summary it a bit so it’s extensible for different frameworks and such. For instance, what if we wish to use the button in a React undertaking? We’re going to wish workspaces in our monorepo for each. We’ll begin with React, then comply with swimsuit for Vue 3, Angular, and Svelte.
React
We’re going to generate our React undertaking utilizing vite, a really light-weight and blazingly quick builder. Be forewarned that when you try to do that with create-react-app, there’s an excellent probability you’ll run into conflicts later with react-scripts and conflicting webpack or Babel configurations from different frameworks, like Angular.
To get our React workspace going, let’s return into the terminal and cd again as much as the top-level listing. From there, we’ll use vite to initialize a brand new undertaking — let’s name it littlebutton-react — and, after all, we’ll choose react because the framework and variant on the prompts:
$ yarn create vite
yarn create v1.22.15
[1/4] 🔍 Resolving packages…
[2/4] 🚚 Fetching packages…
[3/4] 🔗 Linking dependencies…
[4/4] 🔨 Constructing contemporary packages…
success Put in “create-vite@2.6.6” with binaries:
– create-vite
– cva
✔ Undertaking title: … littlebutton-react
✔ Choose a framework: › react
✔ Choose a variant: › react
Scaffolding undertaking in /Customers/roblevin/workspace/opensource/guest-posts/articles/littlebutton-react…
Performed. Now run:
cd littlebutton-react
yarn
yarn dev
✨ Performed in 17.90s.
We initialize the React app with these instructions subsequent:
cd littlebutton-react
yarn
yarn dev
With React put in and verified, let’s substitute the contents of src/App.jsx to accommodate our button with the next code:
import “./App.css”;
const Button = () => {
return <button>Go</button>;
};
operate App() {
return (
<div className=”App”>
<Button />
</div>
);
}
export default App;
Now we’re going to jot down a small Node script that copies our littlebutton-css/css/button.css proper into our React utility for us. This step might be probably the most attention-grabbing one to me as a result of it’s each magical and ugly on the identical time. It’s magical as a result of it means our React button element is actually deriving its kinds from the identical CSS written within the baseline undertaking. It’s ugly as a result of, nicely, we’re reaching up out of 1 workspace and grabbing a file from one other. ¯_(ツ)_/¯
Add the next little Node script to littlebutton-react/copystyles.js:
const fs = require(“fs”);
let css = fs.readFileSync(“../littlebutton-css/css/button.css”, “utf8”);
fs.writeFileSync(“./src/button.css”, css, “utf8”);
Let’s place a node command to run that in a package deal.json script that occurs earlier than the dev script in littlebutton-react/package deal.json. We’ll add a syncStyles and replace the dev to name syncStyles earlier than vite:
“syncStyles”: “node copystyles.js”,
“dev”: “yarn syncStyles && vite”,
Now, anytime we fireplace up our React utility with yarn dev, we’ll first be copying the CSS file over. In essence, we’re “forcing” ourselves to not diverge from the CSS package deal’s button.css in our React button.
However we wish to additionally leverage CSS Modules to stop title collisions and world CSS leakage, so we now have another step to do to get that wired up (from the identical littlebutton-react listing):
contact src/button.module.css
Subsequent, add the next to the brand new src/button.module.css file:
.btn {
composes: btn from ‘./button.css’;
}
I discover composes (also referred to as composition) to be one of many coolest options of CSS Modules. In a nutshell, we’re copying our HTML/CSS model of button.css over wholesale then composing from our one .btn model rule.
With that, we are able to return to our src/App.jsx and import the CSS Modules kinds into our React element with this:
import “./App.css”;
import kinds from “./button.module.css”;
const Button = () => {
return <button className={kinds.btn}>Go</button>;
};
operate App() {
return (
<div className=”App”>
<Button />
</div>
);
}
export default App;
Whew! Let’s pause and attempt to run our React app once more:
yarn dev
If all went nicely, it’s best to see that very same generic button, however with hotpink textual content. Earlier than we transfer on to the following framework, let’s transfer again as much as our top-level monorepo listing and replace its package deal.json:
{
“title”: “littlebutton”,
“model”: “1.0.0”,
“description”: “toy undertaking”,
“principal”: “index.js”,
“creator”: “Rob Levin”,
“license”: “MIT”,
“personal”: true,
“workspaces”: [“littlebutton-react”, “littlebutton-vue”, “littlebutton-svelte”, “littlebutton-angular”],
“scripts”: {
“begin:react”: “yarn workspace littlebutton-react dev”
}
}
Run the yarn command from the top-level listing to get the monorepo-hoisted dependencies put in.
The one change we’ve made to this package deal.json is a brand new scripts part with a single script to start out the React app. By including begin:react we are able to now run yarn begin:react from our top-level listing and it’ll fireplace up the undertaking we simply inbuilt ./littlebutton-react with out the necessity for cd‘ing — tremendous handy!
We’ll sort out Vue and Svelte subsequent. It seems that we are able to take a reasonably related strategy for these as they each use single file parts (SFC). Mainly, we get to combine HTML, CSS, and JavaScript all into one single file. Whether or not you just like the SFC strategy or not, it’s actually enough sufficient for constructing out presentational or primitive UI parts.
Vue
Following the steps from vite’s scaffolding docs we’ll run the next command from the monorepo’s top-level listing to initialize a Vue app:
yarn create vite littlebutton-vue –template vue
This generates scaffolding with some offered directions to run the starter Vue app:
cd littlebutton-vue
yarn
yarn dev
This could fireplace up a starter web page within the browser with some heading like “Good day Vue 3 + Vite.” From right here, we are able to replace src/App.vue to:
<template>
<div id=”app”>
<Button class=”btn”>Go</Button>
</div>
</template>
<script>
import Button from ‘./parts/Button.vue’
export default {
title: ‘App’,
parts: {
Button
}
}
</script>
And we’ll substitute any src/parts/* with src/parts/Button.vue:
<template>
<button :class=”lessons”><slot /></button>
</template>
<script>
export default {
title: ‘Button’,
computed: {
lessons() {
return {
[this.$style.btn]: true,
}
}
}
}
</script>
<model module>
.btn {
colour: slateblue;
}
</model>
Let’s break this down a bit:
:class=”lessons” is utilizing Vue’s binding to name the computed lessons technique.The lessons technique, in flip, is using CSS Modules in Vue with the this.$model.btn syntax which can use kinds contained in a <model module> tag.
For now, we’re hardcoding colour: slateblue merely to check that issues are working correctly throughout the element. Attempt firing up the app once more with yarn dev. In the event you see the button with our declared check colour, then it’s working!
Now we’re going to jot down a Node script that copies our littlebutton-css/css/button.css into our Button.vue file just like the one we did for the React implementation. As talked about, this element is a SFC so we’re going to have to do that a little bit in a different way utilizing a easy common expression.
Add the next little Node.js script to littlebutton-vue/copystyles.js:
const fs = require(“fs”);
let css = fs.readFileSync(“../littlebutton-css/css/button.css”, “utf8”);
const vue = fs.readFileSync(“./src/parts/Button.vue”, “utf8”);
// Take every part between the beginning and shutting model tag and substitute
const styleRegex = /<model module>([sS]*?)</model>/;
let withSynchronizedStyles = vue.substitute(styleRegex, `<model module>n${css}n</model>`);
fs.writeFileSync(“./src/parts/Button.vue”, withSynchronizedStyles, “utf8”);
There’s a bit extra complexity on this script, however utilizing substitute to repeat textual content between opening and shutting model tags by way of regex isn’t too dangerous.
Now let’s add the next two scripts to the scripts clause within the littlebutton-vue/package deal.json file:
“syncStyles”: “node copystyles.js”,
“dev”: “yarn syncStyles && vite”,
Now run yarn syncStyles and have a look at ./src/parts/Button.vue once more. You must see that our model module will get changed with this:
<model module>
.btn {
colour: hotpink;
}
</model>
Run the Vue app once more with yarn dev and confirm you get the anticipated outcomes — sure, a button with hotpink textual content. In that case, we’re good to maneuver on to the following framework workspace!
Svelte
Per the Svelte docs, we must always kick off our littlebutton-svelte workspace with the next, ranging from the monorepo’s top-level listing:
npx degit sveltejs/template littlebutton-svelte
cd littlebutton-svelte
yarn && yarn dev
Verify you possibly can hit the “Good day World” begin web page at http://localhost:5000. Then, replace littlebutton-svelte/src/App.svelte:
<script>
import Button from ‘./Button.svelte’;
</script>
<principal>
<Button>Go</Button>
</principal>
Additionally, in littlebutton-svelte/src/principal.js, we wish to take away the title prop so it appears to be like like this:
import App from ‘./App.svelte’;
const app = new App({
goal: doc.physique
});
export default app;
And eventually, add littlebutton-svelte/src/Button.svelte with the next:
<button class=”btn”>
<slot></slot>
</button>
<script>
</script>
<model>
.btn {
colour: saddlebrown;
}
</model>
One very last thing: Svelte seems to call our app: “title”: “svelte-app” within the package deal.json. Change that to “title”: “littlebutton-svelte” so it’s in line with the workspaces title in our top-level package deal.json file.
As soon as once more, we are able to copy our baseline littlebutton-css/css/button.css into our Button.svelte. As talked about, this element is a SFC, so we’re going to have to do that utilizing a common expression. Add the next Node script to littlebutton-svelte/copystyles.js:
const fs = require(“fs”);
let css = fs.readFileSync(“../littlebutton-css/css/button.css”, “utf8”);
const svelte = fs.readFileSync(“./src/Button.svelte”, “utf8”);
const styleRegex = /<model>([sS]*?)</model>/;
let withSynchronizedStyles = svelte.substitute(styleRegex, `<model>n${css}n</model>`);
fs.writeFileSync(“./src/Button.svelte”, withSynchronizedStyles, “utf8”);
That is tremendous just like the copy script we used with Vue, isn’t it? We’ll add related scripts to our package deal.json script:
“dev”: “yarn syncStyles && rollup -c -w”,
“syncStyles”: “node copystyles.js”,
Now run yarn syncStyles && yarn dev. If all is sweet, we as soon as once more ought to see a button with hotpink textual content.
If that is beginning to really feel repetitive, all I’ve to say is welcome to my world. What I’m displaying you right here is basically the identical course of I’ve been utilizing to construct my AgnosticUI undertaking!
Angular
You most likely know the drill by now. From the monorepo’s top-level listing, set up Angular and create an Angular app. If we have been making a full-blown UI library we’d possible use ng generate library and even nx. However to maintain issues as simple as doable we’ll arrange a boilerplate Angular app as follows:
npm set up -g @angular/cli ### until you have already got put in
ng new littlebutton-angular ### select no for routing and CSS
? Would you want so as to add Angular routing? (y/N) N
❯ CSS
SCSS [ https://sass-lang.com/documentation/syntax#scss ]
Sass [ https://sass-lang.com/documentation/syntax#the-indented-syntax ]
Much less [ http://lesscss.org ]
cd littlebutton-angular && ng serve –open
With the Angular setup confirmed, let’s replace some information. cd littlebutton-angular, delete the src/app/app.element.spec.ts file, and add a button element in src/parts/button.element.ts, like this:
import { Element } from ‘@angular/core’;
@Element({
selector: ‘little-button’,
templateUrl: ‘./button.element.html’,
styleUrls: [‘./button.component.css’],
})
export class ButtonComponent {}
Add the next to src/parts/button.element.html:
<button class=”btn”>Go</button>
And put this within the src/parts/button.element.css file for testing:
.btn {
colour: fuchsia;
}
In src/app/app.module.ts:
import { NgModule } from ‘@angular/core’;
import { BrowserModule } from ‘@angular/platform-browser’;
import { AppComponent } from ‘./app.element’;
import { ButtonComponent } from ‘../parts/button.element’;
@NgModule({
declarations: [AppComponent, ButtonComponent],
imports: [BrowserModule],
suppliers: [],
bootstrap: [AppComponent],
})
export class AppModule {}
Subsequent, substitute src/app/app.element.ts with:
import { Element } from ‘@angular/core’;
@Element({
selector: ‘app-root’,
templateUrl: ‘./app.element.html’,
styleUrls: [‘./app.component.css’],
})
export class AppComponent {}
Then, substitute src/app/app.element.html with:
<principal>
<little-button>Go</little-button>
</principal>
With that, let’s run yarn begin and confirm our button with fuchsia textual content renders as anticipated.
Once more, we wish to copy over the CSS from our baseline workspace. We are able to do this by including this to littlebutton-angular/copystyles.js:
const fs = require(“fs”);
let css = fs.readFileSync(“../littlebutton-css/css/button.css”, “utf8”);
fs.writeFileSync(“./src/parts/button.element.css”, css, “utf8”);
Angular is good in that it makes use of ViewEncapsulation that defaults to to emulate which mimics, in line with the docs,
[…] the habits of shadow DOM by preprocessing (and renaming) the CSS code to successfully scope the CSS to the element’s view.This principally means we are able to actually copy over button.css and use it as-is.
Lastly, replace the package deal.json file by including these two strains within the scripts part:
“begin”: “yarn syncStyles && ng serve”,
“syncStyles”: “node copystyles.js”,
With that, we are able to now run yarn begin as soon as extra and confirm our button textual content colour (which was fuchsia) is now hotpink.
What have we simply performed?
Let’s take a break from coding and take into consideration the larger image and what we’ve simply performed. Mainly, we’ve arrange a system the place any modifications to our CSS package deal’s button.css will get copied over into all of the framework implementations because of our copystyles.js Node scripts. Additional, we’ve included idiomatic conventions for every of the frameworks:
SFC for Vue and SvelteCSS Modules for React (and Vue throughout the SFC <model module> setup)ViewEncapsulation for Angular
In fact I state the plain that these aren’t the one methods to do CSS in every of the above frameworks (e.g. CSS-in-JS is a well-liked selection), however they’re actually accepted practices and are working fairly nicely for our larger aim — to have a single CSS supply of fact to drive all framework implementations.
If, for instance, our button was in use and our design staff determined we wished to alter from 4px to 3px border-radius, we may replace the one file, and any separate implementations would keep synced.
That is compelling when you have a polyglot staff of builders that get pleasure from working in a number of frameworks, or, say an offshore staff (that’s 3× productive in Angular) that’s being tasked to construct a back-office utility, however your flagship product is inbuilt React. Or, you’re constructing an interim admin console and also you’d like to experiment with utilizing Vue or Svelte. You get the image.
Ending touches
OK, so we now have the monorepo structure in a extremely great place. However there’s a couple of issues we are able to do to make it much more helpful so far as the developer expertise goes.
Higher begin scripts
Let’s transfer again as much as our top-level monorepo listing and replace its package deal.json scripts part with the next so we are able to kick any framework implementation with out cd‘ing:
// …
“scripts”: {
“begin:react”: “yarn workspace littlebutton-react dev”,
“begin:vue”: “yarn workspace littlebutton-vue dev “,
“begin:svelte”: “yarn workspace littlebutton-svelte dev”,
“begin:angular”: “yarn workspace littlebutton-angular begin”
},
Higher baseline kinds
We are able to additionally present a greater set of baseline kinds for the button so it begins from a pleasant, impartial place. Right here’s what I did within the littlebutton-css/css/button.css file.
View Full Snippet
.btn {
–button-dark: #333;
–button-line-height: 1.25rem;
–button-font-size: 1rem;
–button-light: #e9e9e9;
–button-transition-duration: 200ms;
–button-font-stack:
system-ui,
-apple-system,
BlinkMacSystemFont,
“Segoe UI”,
Roboto,
Ubuntu,
“Helvetica Neue”,
sans-serif;
show: inline-flex;
align-items: middle;
justify-content: middle;
white-space: nowrap;
user-select: none;
look: none;
cursor: pointer;
box-sizing: border-box;
transition-property: all;
transition-duration: var(–button-transition-duration);
colour: var(–button-dark);
background-color: var(–button-light);
border-color: var(–button-light);
border-style: strong;
border-width: 1px;
font-family: var(–button-font-stack);
font-weight: 400;
font-size: var(–button-font-size);
line-height: var(–button-line-height);
padding-block-start: 0.5rem;
padding-block-end: 0.5rem;
padding-inline-start: 0.75rem;
padding-inline-end: 0.75rem;
text-decoration: none;
text-align: middle;
}
/* Respect customers decreased movement preferences */
@media (prefers-reduced-motion) {
.btn {
transition-duration: 0.001ms !vital;
}
}
Let’s check this out! Fireplace up every of the 4 framework implementations with the brand new and improved begin scripts and make sure the styling modifications are in impact.
One CSS file replace proliferated to 4 frameworks — fairly cool, eh!?
Set a main mode
We’re going so as to add a mode prop to every of our button’s and implement main mode subsequent. A main button could possibly be any colour however we’ll go along with a shade of inexperienced for the background and white textual content. Once more, within the baseline stylesheet:
.btn {
–button-primary: #14775d;
–button-primary-color: #fff;
/* … */
}
Then, simply earlier than the @media (prefers-reduced-motion) question, add the next btn-primary to the identical baseline stylesheet:
.btn-primary {
background-color: var(–button-primary);
border-color: var(–button-primary);
colour: var(–button-primary-color);
}
There we go! Some developer conveniences and higher baseline kinds!
Updating every element to take a mode property
Now that we’ve added our new main mode represented by the .btn-primary class, we wish to sync the kinds for all 4 framework implementations. So, let’s add some extra package deal.json scripts to our prime stage scripts:
“sync:react”: “yarn workspace littlebutton-react syncStyles”,
“sync:vue”: “yarn workspace littlebutton-vue syncStyles”,
“sync:svelte”: “yarn workspace littlebutton-svelte syncStyles”,
“sync:angular”: “yarn workspace littlebutton-angular syncStyles”
You’ll want to respect JSON’s comma guidelines! Relying on the place you place these strains inside your scripts: {…}, you’ll wish to be certain that there aren’t any lacking or trailing commas.
Go forward and run the next to totally synchronize the kinds:
yarn sync:angular && yarn sync:react && yarn sync:vue && yarn sync:svelte
Working this doesn’t change something as a result of we haven’t utilized the first class but, however it’s best to no less than see the CSS has been copied over when you go have a look at the framework’s button element CSS.
React
In the event you haven’t already, double-check that the up to date CSS obtained copied over into littlebutton-react/src/button.css. If not, you possibly can run yarn syncStyles. Be aware that when you neglect to run yarn syncStyles our dev script will do that for us after we subsequent begin the applying anyway:
“dev”: “yarn syncStyles && vite”,
For our React implementation, we moreover want so as to add a composed CSS Modules class in littlebutton-react/src/button.module.css that’s composed from the brand new .btn-primary:
.btnPrimary {
composes: btn-primary from ‘./button.css’;
}
We’ll additionally replace littlebutton-react/src/App.jsx:
import “./App.css”;
import kinds from “./button.module.css”;
const Button = ({ mode }) => {
const primaryClass = mode ? kinds[`btn${mode.charAt(0).toUpperCase()}${mode.slice(1)}`] : ”;
const lessons = primaryClass ? `${kinds.btn} ${primaryClass}` : kinds.btn;
return <button className={lessons}>Go</button>;
};
operate App() {
return (
<div className=”App”>
<Button mode=”main” />
</div>
);
}
export default App;
Fireplace up the React app with yarn begin:react from the top-level listing. If all goes nicely, it’s best to now see your inexperienced main button.
As a word, I’m preserving the Button element in App.jsx for brevity. Be happy to tease out the Button element into its personal file if that bothers you.
Vue
Once more, double-check that the button kinds have been copied over and, if not, run yarn syncStyles.
Subsequent, make the next modifications to the <script> part of littlebutton-vue/src/parts/Button.vue:
<script>
export default {
title: ‘Button’,
props: {
mode: {
sort: String,
required: false,
default: ”,
validator: (worth) => {
const isValid = [‘primary’].contains(worth);
if (!isValid) {
console.warn(`Allowed sorts for Button are main`);
}
return isValid;
},
}
},
computed: {
lessons() {
return {
[this.$style.btn]: true,
[this.$style[‘btn-primary’]]: this.mode === ‘main’,
}
}
}
}
</script>
Now we are able to replace the markup in littlebutton-vue/src/App.vue to make use of the brand new mode prop:
<Button mode=”main”>Go</Button>
Now you possibly can yarn begin:vue from the top-level listing and verify for a similar inexperienced button.
Svelte
Let’s cd into littlebutton-svelte and confirm that the kinds in littlebutton-svelte/src/Button.svelte have the brand new .btn-primary class copied over, and yarn syncStyles if that you must. Once more, the dev script will do this for us anyway on the following startup when you occur to neglect.
Subsequent, replace the Svelte template to cross the mode of main. In src/App.svelte:
<script>
import Button from ‘./Button.svelte’;
</script>
<principal>
<Button mode=”main”>Go</Button>
</principal>
We additionally have to replace the highest of our src/Button.svelte element itself to just accept the mode prop and apply the CSS Modules class:
<button class=”{lessons}”>
<slot></slot>
</button>
<script>
export let mode = “”;
const lessons = [
“btn”,
mode ? `btn-${mode}` : “”,
].filter(cls => cls.size).be part of(” “);
</script>
Be aware that the <kinds> part of our Svelte element shouldn’t be touched on this step.
And now, you possibly can yarn dev from littlebutton-svelte (or yarn begin:svelte from a better listing) to verify the inexperienced button made it!
Angular
Identical factor, completely different framework: verify that the kinds are copied over and run yarn syncStyles if wanted.
Let’s add the mode prop to the littlebutton-angular/src/app/app.element.html file:
<principal>
<little-button mode=”main”>Go</little-button>
</principal>
Now we have to arrange a binding to a lessons getter to compute the proper lessons based mostly on if the mode was handed in to the element or not. Add this to littlebutton-angular/src/parts/button.element.html (and word the binding is occurring with the sq. brackets):
<button [class]=”lessons”>Go</button>
Subsequent, we truly have to create the lessons binding in our element at littlebutton-angular/src/parts/button.element.ts:
import { Element, Enter } from ‘@angular/core’;
@Element({
selector: ‘little-button’,
templateUrl: ‘./button.element.html’,
styleUrls: [‘./button.component.css’],
})
export class ButtonComponent {
@Enter() mode: ‘main’ | undefined = undefined;
public get lessons(): string {
const modeClass = this.mode ? `btn-${this.mode}` : ”;
return [
‘btn’,
modeClass,
].filter(cl => cl.size).be part of(‘ ‘);
}
}
We use the Enter directive to absorb the mode prop, then we create a lessons accessor which provides the mode class if it’s been handed in.
Fireplace it up and search for the inexperienced button!
Code full
In the event you’ve made it this far, congratulations — you’ve reached code full! If one thing went awry, I’d encourage you to cross-reference the supply code over at GitHub on the the-little-button-that-could-series department. As bundlers and packages generally tend to alter abruptly, you would possibly wish to pin your package deal variations to those on this department when you occur to expertise any dependency points.
Take a second to return and examine the 4 framework-based button element implementations we simply constructed. They’re nonetheless sufficiently small to rapidly discover some attention-grabbing variations in how props get handed in, how we bind to props, and the way CSS title collisions are prevented amongst different delicate variations. As I proceed so as to add parts to AgnosticUI (which helps these very same 4 frameworks), I’m regularly pondering which presents one of the best developer expertise. What do you suppose?
Homework
In the event you’re the sort that likes to determine issues out by yourself or enjoys digging in deeper, listed here are concepts.
Button states
The present button kinds don’t account for numerous states, like :hover. I imagine that’s first train.
/* You must actually implement the next states
however I’ll go away it as an train so that you can
determine tips on how to and what values to make use of.
*/
.btn:focus {
/* In the event you elect to take away the define, substitute it
with one other correct affordance and analysis how
to make use of clear outlines to assist home windows
excessive distinction
*/
}
.btn:hover { }
.btn:visited { }
.btn:lively { }
.btn:disabled { }
Variants
Most button libraries assist many button variations for issues like sizes, shapes, and colours. Attempt creating greater than the first mode we have already got. Perhaps a secondary variation? A warning or success? Perhaps stuffed and description? Once more, you possibly can have a look at AgnosticUI’s buttons web page for concepts.
CSS customized properties
In the event you haven’t began utilizing CSS customized properties but, I’d strongly suggest it. You can begin by taking a look at AgnosticUI’s frequent kinds. I closely lean on customized properties in there. Listed here are some nice articles that cowl what customized properties are and the way you would possibly leverage them:
A Full Information to Customized PropertiesA DRY Method to Shade Themes in CSS
Sorts
No… not typings, however the <button> aspect’s sort attribute. We didn’t cowl that in our element however there’s a possibility to increase the element to different use instances with legitimate sorts, like button, submit, and reset. That is fairly simple to do and can drastically enhance the button’s API.
Extra concepts
Gosh, you could possibly accomplish that a lot — add linting, convert it to Typescript, audit the accessibility, and many others.
The present Svelte implementation is affected by some fairly free assumptions as we now have no protection if the legitimate main mode isn’t handed — that will produce a rubbish CSS class:
mode ? `btn-${mode}` : “”,
You possibly can say, “Effectively, .btn-garbage as a category isn’t precisely dangerous.” However it’s most likely a good suggestion to model defensively when and the place doable.
Potential pitfalls
There are some issues you need to be conscious of earlier than taking this strategy additional:
Positional CSS based mostly on the construction of the markup won’t work nicely for the CSS Modules based mostly methods used right here.Angular makes positional methods even more durable because it generates :host aspect representing every element view. This implies you may have these additional parts in between your template or markup construction. You’ll have to work round that.Copying kinds throughout workspace packages is a little bit of an anti-pattern to some of us. I justify it as a result of I imagine the advantages outweigh the prices; additionally, once I take into consideration how monorepos use symlinks and (not-so-failproof) hoisting, I don’t really feel so dangerous about this strategy.You’ll need to subscribe to the decoupled methods used right here, so no CSS-in-JS.
I imagine that each one approaches to software program improvement have their execs and cons and also you finally need to determine if sharing a single CSS file throughout frameworks works for you or your particular undertaking. There are actually different methods you could possibly do that (e.g. utilizing littlebuttons-css as an npm package deal dependency) if wanted.
Conclusion
Hopefully I’ve whet your urge for food and also you’re now actually intrigued to create UI element libraries and/or design methods that aren’t tied to a selected framework. Perhaps you may have a greater thought on tips on how to obtain this — I’d love to listen to your ideas within the feedback!
I’m positive you’ve seen the venerable TodoMVC undertaking and what number of framework implementations have been created for it. Equally, wouldn’t it’s good to have a UI element library of primitives out there for a lot of frameworks? Open UI is making nice strides to correctly standardize native UI element defaults, however I imagine we’ll all the time have to insert ourselves to some extent. Definitely, taking yr to construct a customized design system is rapidly falling out of favor and firms are severely questioning their ROI. Some type of scaffolding is required to make the endeavor sensible.
The imaginative and prescient of AgnosticUI is to have a comparatively agnostic option to construct design methods rapidly that aren’t tied right down to a selected frontend framework. In the event you’re compelled to become involved, the undertaking continues to be very early and approachable and I’d love some assist! Plus, you’re already fairly acquainted with the how the undertaking works now that you just’ve gone via this tutorial!
Tips on how to Make a Element That Helps A number of Frameworks in a Monorepo initially revealed on CSS-Methods. You must get the e-newsletter and grow to be a supporter.


Subscribe to MarketingSolution.
Receive web development discounts & web design tutorials.
Now! Lets GROW Together!