
WPMU DEV’s 5-star safety plugin, Defender, helps you to simply arrange a firewall, block IP addresses with customized blocklists and allowlists, and extra…leaving unwelcome guests unable to step even close to your WordPress web site.
Hackers could be persistent at making an attempt to get into your web site and drop malicious code, determining your credentials, and leaving spam. This tutorial will present you simply how simple it’s to arrange Defender’s IP banning and hold your WordPress web site secure and guarded.
Ban IP addresses and lock out hackers out of your WordPress web site with Defender.
Listed below are the areas we’ll be overlaying (leap to a selected subject by clicking on it):
Robotically Determine Dangerous Performing IP Addresses
Making a Customized Blocklist & Allowlist
Energetic Lockout Shows
Unlocking IP Addresses
Location Banning
Creating Customized Message for Banned Customers
Importing and Exporting Customized Blocklist & Allowlist
Verify Your Lockout Log for Suspicious Exercise
Locked Your self Out? Right here’s How To Get Again In
Most areas of this tutorial are accessible in Defender below the Firewall and IP Banning part until specified otherwise.
Let’s get began with one of the best and strongest function of Defender’s firewall…
1. Robotically Determine Dangerous Performing IP Addresses
Defender mechanically identifies dangerous appearing IP addresses and provides them to a firewall, offering your web site with ongoing safety and safety.
You’ll be able to lock out customers who try numerous failed login makes an attempt. Defender offers you management over the edge and length of the lockout within the Login Safety display (Defender > Firewall > Login Safety).
Defender helps you to set what number of failed login makes an attempt will set off a lockout for a consumer’s IP handle.
You’ll be able to view what number of IP addresses have been briefly blocked within the Energetic Lockouts part of the IP Banning display (Defender > Firewall > IP Banning > Energetic Lockouts). You may also unblock IP addresses right here.
View and launch briefly blocked IP addresses within the Energetic Lockouts part.
You may also allow 404 detection (Defender > Firewall > 404 Detection), and Defender will mechanically block IP addresses that repeatedly request pages in your web site that don’t exist. It would additionally briefly block these offending IP addresses from accessing your web site.
Defender’s 404 detection blocks IP addresses that repeatedly request pages in your web site that don’t exist.
Tip: You should use the 404 detection function together with Defender’s login masking function to right away determine and block IP addresses requesting your web site’s login web page.
Along with Defender’s automated IP blocking options, you can even block IPs manually, as the subsequent part explains.
2. Making a Customized Blocklist & Allowlist
Making a customized blocklist & allowlist with Defender will hold undesirable IPs from accessing your web site, together with IP addresses for admins.
You are able to do this simply by coming into IP addresses within the Defender > IP Banning > IP Addresses part.
IPv4 and IPv6 are each supported for the blocklist and allowlist.
To ban IPs from accessing your web site, choose the primary tab: Blocklist.
Enter IP addresses you’d prefer to completely ban from accessing your web site within the Blocklisted IPs textual content space.
Kind in (or copy and paste) any IPs you need to block–one IP handle per line. These IP addresses will now not have the ability to entry your web site.
Choose the subsequent tab so as to add IP addresses that you simply need to all the time have entry to your WordPress web site to your Allowlist.
Observe that Defender recommends including your personal IP to the Allowlist part to stop being by accident locked out of your web site and even detects and presents your IP handle for you.
Defender recommends including your personal IP to the Allowlist part to stop your self from being by accident locked out.
After including IP addresses to the blocklist and/or allowlist, click on the Save Adjustments button to replace your settings.
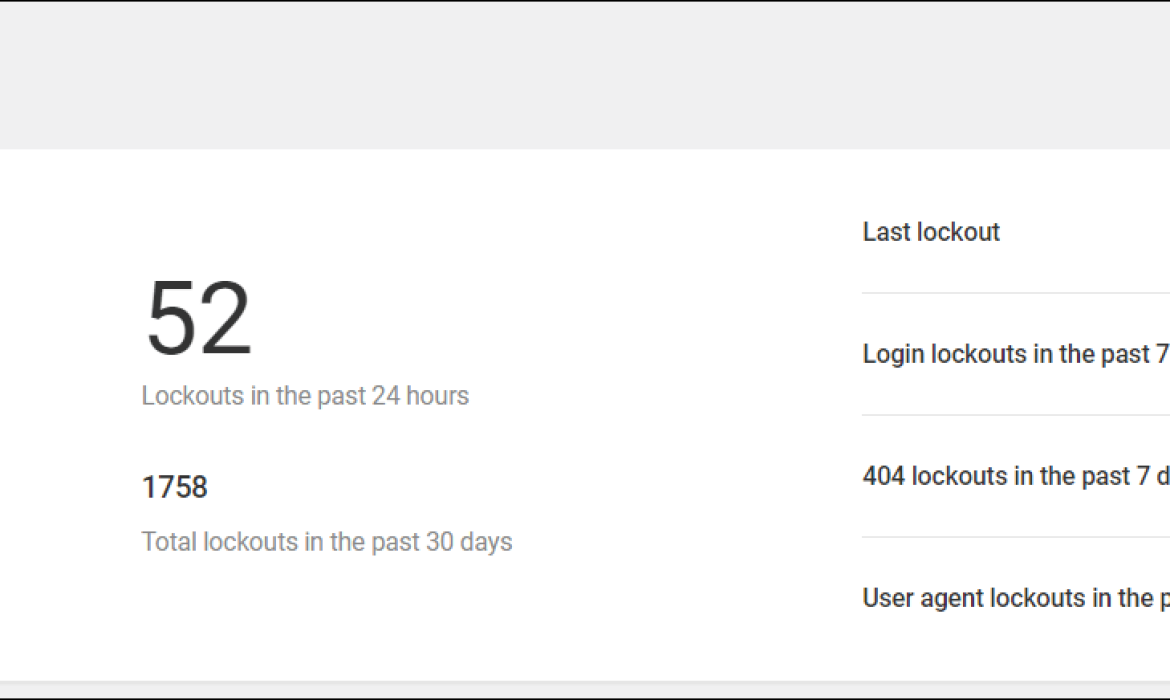
3. Energetic Lockout Shows
The Energetic Lockouts part (Defender > IP Banning > Energetic Lockouts) helps you to simply view what number of IP addresses are blocked from accessing your web site primarily based on the foundations you’ve got set.
Defender helps you to see what number of IP addresses have been blocked.
And if you should unblock any IPs, there’s…
4. Unlocking IP Addresses
If you should unblock a blocked or banned IP handle for any causes, simply click on the the Unlock IPS button in the Energetic Lockouts part.
Click on the button to unlock blocked or banned IP addresses.
It will show all blocked IP addresses and let you unblock these you choose by clicking the Unblock icon.
Unblock IP addresses by clicking on the padlock icon.
The IP can be mechanically unblocked. There’s no must click on any further buttons or save something additional after this.
You may also seek for particular IP addresses within the search space if you happen to’re having problem finding them on the listing, and unblock all IPs with the press of a button.
You may also search IP addresses and unblock all IPs with the press of a button.
5. Location Banning
Along with blocking particular IP addresses, Defender additionally helps you to ban total international locations from accessing your web site.
This function is useful whenever you don’t need or anticipate visitors from particular areas, and need to cease hackers and bots visiting from sure international locations.
All this may be achieved within the Areas part (Defender > IP Banning > Areas).
Defender makes use of the GeoLite2 Database from MaxMind for this function. You have to to arrange a free account to make use of location banning.
Comply with the steps to arrange an account with MaxMind and ban international locations you don’t need accessing your web site.
Comply with the prompts and click on on the hyperlinks offered to arrange your free account. You’ll obtain an e mail with directions on arrange a password.
After logging in, click on the hyperlink for a brand new license key in Defender’s dashboard, create a brand new license key in MaxMind and replica and paste this key into the License Key subject in Defender’s Areas part.
The place a brand new secret is produced.
After pasting in your new license key, hit the Obtain button to allow the choice to Blocklist and Allowlist any nation.
Observe: Enable a couple of minutes for the important thing to register.
As soon as the important thing has registered and have has been activated, you’ll see a drop-down menu displaying a listing of nations as you begin typing.
Choose the international locations you need to blocklist from this dropdown menu and repeat this course of for any international locations you need to allowlist.
Choose the international locations you’d prefer to blocklist or allowlist from the dropdown menu.
Chosen international locations will seem within the field under the blocklist and allowlist areas. To take away any international locations out of your listing, click on on the ‘X’ subsequent to the nation’s identify.
Listing of the international locations added to date.
In the event you make any adjustments on this part, bear in mind to replace your settings by clicking the Save Adjustments button.
6. Creating Customized Messages for Banned Customers
Defender helps you to customise the message that can show to locked out customers.
If you wish to show a message apart from the default that Defender mechanically supplies, simply scroll right down to the Message part (Defender > IP Banning > Message) and enter your customized message in thetext space .
Add a customized message to locked out customers or use the default message offered.
Anybody on the blocklist will now be greeted along with your message.
Defender’s blocked IP message to unwelcome visitors.
7. Importing and Exporting Blocklist & Allowlist
If you wish to export your blocklist and allowlist to make use of on one other web site or import a blocklist or allowlist from one other web site into your web site, Defender makes this fast and simple utilizing the Import and Export options discovered on the backside of the IP Banning display.
Import and export your blocklist and allowlist to be used throughout completely different websites.
Observe that importing IP addresses from exported CSV information is not going to take away any current IPs; these will merely be added to your current lists. Additionally, export information embody each your blocklist and allowlist.
8. Verify Your Lockout Log for Suspicious Exercise
In Defender’s dashboard, head to Firewall > Logs. Right here, you possibly can view all your lockouts and shortly ban, allowlist, or delete the listing, plus simply export exercise logs of IP lockouts.
Defender logs all lockout actions.
You will discover logs utilizing a spread of sorting and filtering capabilities, modify the date vary, and export these as a CSV file.
Use the sorting and filtering options to seek out logged data shortly and simply.
You may also expedite issues utilizing the Bulk Actions function in Firewall > Logs. Choose all gadgets directly or test particular person containers, then use the choices within the dropdown menu and click on the Apply button to ban, allowlist, or delete IP addresses.
Carry out bulk IP handle banning, allowlisting, or deletions utilizing the Bulk Actions function.
To get extra detailed details about the logged occasion, click on on the dropdown arrow subsequent to an merchandise. You’ll even have the choice to allowlist or ban the IP on this part.
See detailed descriptions of logged occasions and ban the IP handle or add it to your allowlist.
And similar to that, all your lockouts at the moment are taken care of.
Locked Your self Out? Right here’s How To Get Again In
Defender provides so many choices to lock out undesirable guests…however, what if you happen to by accident lock your self out attributable to a number of failed login makes an attempt?
If you’re the administrator of the positioning and also you’ve locked your self out, there’s a simple and safe approach to get again in.
In case you have exceeded the variety of legitimate login makes an attempt (set in Defender’s Firewall > Threshold settings), you will notice a display just like the one proven under.
Click on on the Unlock Me button.
By chance locked your self out? Defender’s Unlock Me function helps you to get again in!
Enter the username or the e-mail handle related to the positioning’s login and click on the Unlock Me button once more. An e mail can be despatched to your e mail handle with a hyperlink to unlock your self.
Enter your admin username or e mail and click on the button to regain entry.
Setting Up a Lockout Firewall Can’t Get Any Simpler
Undesirable visitors gained’t get far with Defender’s customized IP handle lockout.
And, as you possibly can see, it’s extra than simply an IP handle lockout function — you possibly can create customized messages, set location banning, view and edit logs, and a lot extra.
For extra recommendations on utilizing Defender, try our articles about discovering & deleting suspicious code and cease hackers of their tracks.
For extra details about utilizing all of the safety features of the plugin, try Defender’s documentation web page.
[Editor’s note: This post was originally published in July 2023 and updated in March 2024 for accuracy.]


Subscribe to MarketingSolution.
Receive web development discounts & web design tutorials.
Now! Lets GROW Together!