
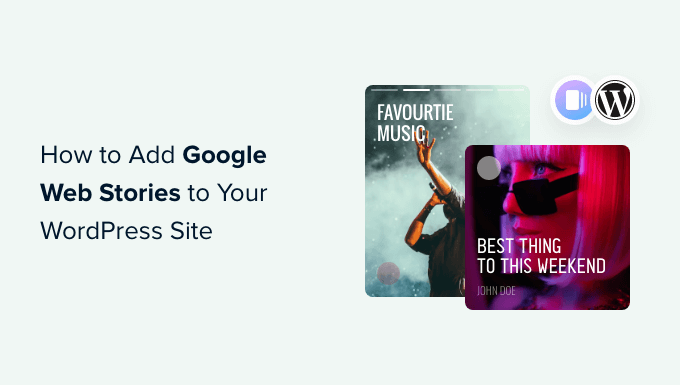
Do you wish to add Google Internet Tales to your WordPress web site?
Tales are a well-liked publishing format utilized by Instagram tales, Fb tales, Snapchat, YouTube shorts, and extra. Google Internet Tales means that you can create and host this type of content material tales by yourself web site.
On this article, we’ll present you how one can simply add Google Internet Tales to your WordPress web site.
What’s Google Internet Tales?
Tales are a well-liked short-form content material type utilized by social media platforms like Instagram, Fb, Snapchat, and even YouTube. They may not all the time be known as the identical factor, however all of them do the identical factor.
They’re tappable interactive slides with wealthy media content material like pictures, music, and movies. All these components make them extremely participating.
Engaged customers usually tend to convert and spend extra time in your WordPress web site, which suggests extra gross sales, conversions, and progress for what you are promoting and model.
Nevertheless, creating tales on third-party social platforms limits your skill to achieve extra audiences.
Google Internet Tales means that you can carry the identical story format to your personal web site. Enabling you to create extremely participating tales out of your WordPress dashboard and publish them in your web site.
Google Internet Tales could be listed and should seem in Google search outcomes and Uncover.
They use the AMP format, assist structured information, and may even be monetized utilizing Google AdSense.
That being mentioned, let’s check out how one can simply add Google Internet Tales to your WordPress web site.
Including Google Internet Tales in WordPress
First, it’s good to set up and activate the Internet Tales plugin. For extra particulars, see our step-by-step information on how one can set up a WordPress plugin.
Internet Tales is a free plugin developed and maintained by Google. It goals to popularize the online tales format and convey it to self-hosted, unbiased web sites.
Upon plugin activation, head over to the Tales » Dashboard web page to create your first story.
You may get began by choosing one of many templates as a place to begin on your story or clicking on the ‘Create New Story’ button to start out from scratch.
We advocate beginning with a template because it offers you a great head begin and is far simpler for newbies.
When you select a template, the plugin will launch the story builder interface. It’s just like the favored drag-and-drop web page builder plugins for WordPress.
You may merely level and click on on any ingredient to edit it, or add new components from the left column.
You may add audio, video, pictures, textual content, headings, stickers, emojis, and extra.
In case you are utilizing a template, you’ll see further pages generated by the template on the backside.
You may transfer between pages by clicking on them. You may also delete a web page or add a brand new web page if wanted.
You may also click on on a web page to set a background coloration or media.
When selecting a background coloration on your web page, you’ll additionally discover the choice so as to add a name to motion button.
Merely add a URL and select between the darkish or gentle themes.
Optionally, you can even add an icon to your name to motion button and make the hyperlink sponsored / nofollow.
Equally, when you have WooCommerce put in, then you can even show merchandise.
Nevertheless, you’ll first have to activate the WooCommerce integration in plugin settings (we present you the way to do that later in our article).
As soon as you’re happy with the story, you’ll be able to swap to the ‘Doc’ tab within the left column to configure publish settings.
From right here, it’s good to add a writer brand (your web site brand or web site icon would work high quality right here) and a poster picture on your story.
Ideally, a poster picture must be in a 3:4 ratio and a minimal of 640 x 853 pixels.
Don’t neglect to offer a title on your story and an outline. This may assist optimize your story for search engine optimization and enhance its discoverability.
Beneath that, you’ll be able to select the way you need pages to be superior. By default, pages will change in 7 seconds, you’ll be able to change that or let customers manually faucet to alter the web page.
Lastly, you’ll be able to select classes and tags on your story. This step is optionally available, however assigning your story to a class and including some tags will assist with search engine optimization.
You at the moment are able to publish your net story. Merely click on on the ‘Publish’ button on the prime proper nook of the display screen.
You’ll be proven a pre-publish guidelines. If all the pieces appears good, then click on on the publish button to place your story reside.
Displaying a Internet Story in WordPress
The plugin will present you an choice so as to add your story to a brand new weblog publish once you publish it.
Nevertheless, you can even add your story to any present publish, web page, or sidebar.
Merely edit the publish or web page the place you wish to show the story and add the Internet Tales block to the publish editor.
Below the block settings, it is possible for you to to decide on a number of tales, newest tales, or a single story.
If you choose the most recent tales or a number of tales choices, then additionally, you will see further show choices to show tales in a circle, carousel, listing, or grid choices.
As soon as you’re happy with the publish, click on on the ‘Replace’ or ‘Publish’ button to avoid wasting your modifications.
Now you can go to your web site to see your net tales in motion.
Right here is the way it seemed on the homepage of our check web site within the multiple-story carousel format.
The online tales are their very own customized publish sort inside WordPress, which suggests you’ll be able to show them simply as you’ll every other web page or publish in WordPress, too.
As an illustration, they’ve their very own archive web page that you need to use as a touchdown web page for guests, or you can spotlight them individually as you’ll a WooCommerce product (which can also be displayed utilizing a customized publish sort).
Including Integrations to Google Internet Tales
The Internet Tales plugin comes with just a few built-in integrations you can activate.
Yow will discover these integrations on the Tales » Settings web page.
Including Google Analytics to Internet Tales
First, you’ll be able to add your Google Analytics profile ID right here. This may mean you can observe your story views in your Google Analytics studies.
Word: Internet tales don’t assist the newer GA4 Google Analytics monitoring. It solely helps Common Analytics monitoring ID which begins with ‘UA.’
In case you are utilizing MonsterInsights, then yow will discover your Google Analytics monitoring ID underneath the Insights » Settings web page.
In case you are not utilizing MonsterInsights, then yow will discover the monitoring ID in Google Analytics.
Simply head to the ‘Admin’ tab and click on on ‘Property Settings.’
Including Customized Fonts to Internet Tales
If you wish to use a selected font in Internet Tales, then you will have to manually add it to your web site utilizing FTP.
Merely add the font file to /wp-content/ folder in your web site. As soon as uploaded, your uploaded font location could be:
http://instance.com/wp-content/font-file-name.ttf
Don’t neglect to exchange instance.com together with your personal area identify and font-file-name.ttf with the precise font file identify.
After that, you’ll be able to copy and paste this URL in Tales » Settings underneath the customized fonts part.
Including Monetization Integrations in Internet Tales
Internet Tales helps Google AdSense and Google Advert Supervisor for monetization choices.
Choose your monetization choice and enter the required data. As an illustration, you will have Writer ID and Advert Slot ID for the advert unit.
Allow Ecommerce Integration for Internet Tales
In case you are utilizing WooCommerce or Shopify to run your on-line retailer, then you’ll be able to allow eCommerce assist for Internet Tales.
This may mean you can add merchandise to your net tales.
Merely scroll all the way down to the Purchasing part underneath Tales » Settings web page and choose your eCommerce platform from the drop-down menu.
For WooCommerce, the plugin will robotically begin displaying your merchandise.
For Shopify, you will have to offer your retailer handle and generate an API entry token.
Should you don’t have one but, simply click on the hyperlink that claims ‘discover ways to get one,’ and you can be taken to directions on how one can generate your Shopify API token.
We hope this text helped you add Google Internet Tales to your WordPress web site. You may additionally wish to see our information on getting extra site visitors to your web site or see our recommendations on monitoring conversions in WordPress.
Should you favored this text, then please subscribe to our YouTube Channel for WordPress video tutorials. You may also discover us on Twitter and Fb.
The publish The best way to Add Google Internet Tales to Your WordPress Website first appeared on WPBeginner.


Subscribe to MarketingSolution.
Receive web development discounts & web design tutorials.
Now! Lets GROW Together!