
When working with CSS Grid, the very first thing to do is to set show: grid on the aspect that we need to be change into a grid container. Then we explicitly outline the grid utilizing a mix of grid-template-columns, grid-template-rows, and grid-template-areas. And from there, the following step is to put gadgets contained in the grid.
That is the basic method that ought to be used and I additionally advocate it. Nonetheless, there’s one other method for creating grids with none specific definition. We name this the implicit grid.
Desk of Contents
“Express, implicit? What the heck is happening right here?”
Dynamic sidebar
Picture grid
Dynamic layouts
Grid patterns
Need extra?
Wrapping up
“Express, implicit? What the heck is happening right here?”
Unusual phrases, proper? Manuel Matuzovic already has a great rationalization of what we might by “implicit” and “specific” in CSS Grid, however let’s dig straight into what the specification says:
The grid-template-rows, grid-template-columns, and grid-template-areas properties outline a set variety of tracks that type the express grid. When grid gadgets are positioned outdoors of those bounds, the grid container generates implicit grid tracks by including implicit grid traces to the grid. These traces along with the express grid type the implicit grid.
So, in plain English, the browser auto-generates further rows and columns in case any parts occur to be positioned outdoors the outlined grid.
What about auto-placement?
Just like the idea of implicit grid, auto-placement is the power of the browser to robotically place the gadgets contained in the grid. We don’t at all times want to provide the place of every merchandise.
By way of totally different use instances, we’re going to see how such options may help us create advanced and dynamic grid with a number of traces of code.
Dynamic sidebar
Right here, now we have three totally different layouts however we solely have one grid configuration that works for all of them.
foremost {
show: grid;
grid-template-columns: 1fr;
}
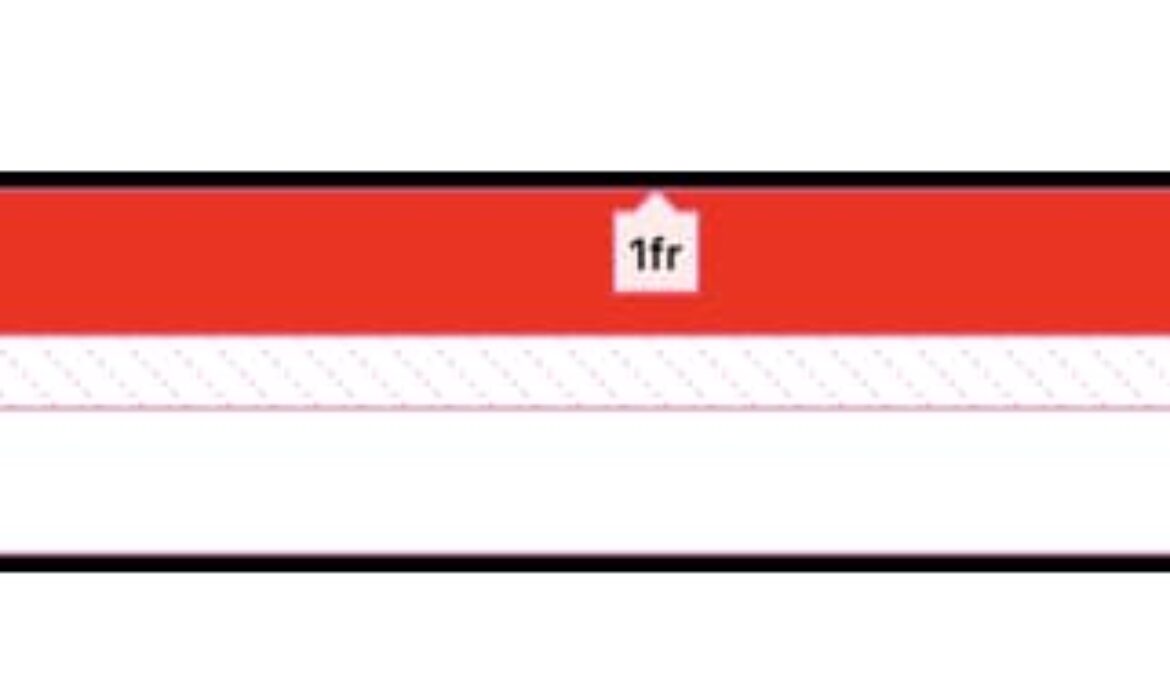
Just one column is taking over all of the free house. That is our “specific” grid. It’s set as much as match one grid merchandise in the primary grid container. That’s all. One column and one row:
However what if we determined to drop one other aspect in there, say an apart (our dynamic sidebar). Because it’s at present (and explicitly) outlined, our grid must alter robotically to discover a place for that aspect. And if we do nothing else with our CSS, right here’s what DevTools tells us is going on.
The aspect takes up your complete column that’s explicitly set on the container. In the meantime, the falls onto a brand new row between implicit grid traces labeled 2 and three. Word that I’m utilizing a 20px hole to assist separate issues visually.
We will transfer the <apart> to a column beside the <part>:
apart {
grid-column-start: 2;
}
And right here’s what DevTools tells us now:
The aspect is between the grid container’s first and second grid column traces. The begins on the second grid column line and ends at a 3rd line we by no means declared.
We place our aspect within the second column however… we don’t have a second column. Bizarre, proper? We by no means declared a second column on the <foremost> grid container, however the browser created one for us! That is the important thing half from the specification we checked out:
When grid gadgets are positioned outdoors of those bounds, the grid container generates implicit grid tracks by including implicit grid traces to the grid.
This highly effective function permits us to have dynamic layouts. If we solely have the <part> aspect, all we get is one column. But when we add an <apart> aspect to the combination, an additional column is created to comprise it.
We may place the <apart> earlier than the <part> as a substitute like this:
apart {
grid-column-end: -2;
}
This creates the implicit column firstly of the grid, not like the earlier code that locations the implicit column on the finish.
We will have both a proper or left sidebar
We will do the identical factor extra simply utilizing the grid-auto-flow property to set any and all implicit tracks to movement in a column course:
Now there’s no have to specify grid-column-start to put the <apart> aspect to the proper of the <part>! In truth, some other grid merchandise we determine to throw in there at any time will now movement in a column course, every one positioned in its personal implicit grid tracks. Good for conditions the place the variety of gadgets within the grid isn’t identified prematurely!
That stated, we do nonetheless want grid-column-end if we need to place it in a column to the left of it as a result of, in any other case, the <apart> will occupy the express column which, in flip, pushes the <part> outdoors the express grid and forces it to take the implicit column.
I do know, I do know. That’s somewhat convoluted. Right here is one other instance we will use to raised perceive this little quirk:
Within the first instance, we didn’t specify any placement. On this case, the browser will first place the <apart> aspect within the specific column because it comes first within the DOM. The <part>, in the meantime, is robotically positioned within the grid column the browser robotically (or implicitly) creates for us.
Within the second instance, we set the <apart> aspect outdoors of the express grid:
apart {
grid-column-end: -2;
}
Now it doesn’t matter that <apart> comes first within the HTML. By reassigning <apart> elsewhere, we’ve made the <part> aspect obtainable to take the express column.
Picture grid
Let’s strive one thing totally different with a grid of photos the place now we have a giant picture and some thumbnails beside it (or underneath it).
Now we have two grid configurations. However guess what? I’m not defining any grid in any respect! All I’m doing is that this:
.grid img:first-child {
grid-area: span 3 / span 3;
}
It’s shocking we solely want one line of code to tug off one thing like this, so let’s dissect what’s occurring and you will notice that it’s simpler than you might suppose. To start with, grid-area is a shorthand property that mixes the next properties right into a single declaration:
grid-row-startgrid-row-endgrid-column-startgrid-column-end
Wait! Isn’t grid-area the property we use to outline named areas as a substitute of the place parts begin and finish on the grid?
Sure, however it additionally does extra. We may write a complete lot extra about grid-area, however on this specific case:
.grid img:first-child {
grid-area: span 3 / span 3;
}
/* …is equal to: */
.grid img:first-child {
grid-row-start: span 3;
grid-column-start: span 3;
grid-row-end: auto;
grid-column-end: auto;
}
We will see the identical factor when cracking open DevTools to broaden the shorthand model:
Which means that the primary picture aspect within the grid must span three columns and three rows. However since we didn’t outline any columns or rows, the browser does it for us.
We’ve basically positioned the primary picture within the HTML to take up a 3⨉3 grid. That signifies that some other photos will probably be positioned robotically in those self same three columns with out the necessity to specify something new.
To summarize, we advised the browser that the primary picture wants take up the house of three columns and three rows that we by no means explicitly outlined when establishing the grid container. The browser set these columns and rows up for us. Consequently, the remaining photos within the HTML movement proper into place utilizing the identical three columns and rows. And because the first picture takes up all three columns within the first row, the remaining photos movement into further rows that every comprise three columns, the place every picture takes up a single column.
All this from one line of CSS! That’s the ability of “implicit” grid” and auto-placement.
For the second grid configuration in that demo, all I’ve achieved is change the automated movement course utilizing grid-auto-flow: column the identical manner we did earlier when inserting an <apart> aspect subsequent to a <part>. This forces the browser to create a fourth column it could use to put the remaining photos. And since now we have three rows, the remaining photos get positioned inside the identical vertical column.
We have to add a number of properties to the photographs to verify they match properly contained in the grid with none overflow:
.grid {
show: grid;
grid-gap: 10px;
}
/* for the second grid configuration */
.horizontal {
grid-auto-flow: column;
}
/* The big 3⨉3 picture */
.grid img:first-child {
grid-area: span 3 / span 3;
}
/* Assist stop stretched or distorted photos */
img {
width: 100%;
top: 100%;
object-fit: cowl;
}
And naturally, we will simply replace the grid to contemplate extra photos by adjusting one worth. That will be the three within the kinds for the massive picture. Now we have this:
.grid img:first-child {
grid-area: span 3 / span 3;
}
However we may add a fourth column just by altering it to 4 as a substitute:
.grid img:first-child {
grid-area: span 4 / span 4;
}
Even higher: let’s set that up as a customized property to make issues even simpler to replace.
Dynamic layouts
The primary use case with the sidebar was our first dynamic format. Now we are going to sort out extra advanced layouts the place the variety of parts will dictate the grid configuration.
On this instance, we will have anyplace from one to 4 parts the place the grid adjusts in manner that properly matches the variety of parts with out leaving any awkward gaps or lacking areas.
When now we have one aspect, we do nothing. The aspect will stretch to fill the one row and column robotically created by the grid.
Bit after we add the second aspect, we create one other (implicit) column utilizing grid-column-start: 2.
After we add a 3rd aspect, it ought to take up the width of two columns — that’s why we used grid-column-start: span 2, however provided that it’s the :last-child as a result of if (and when) we add a fourth aspect, that one ought to solely take up a single column.
Including that up, now we have 4 grid configurations with solely two declarations and the magic of implicit grid:
.grid {
show: grid;
}
.grid :nth-child(2) {
grid-column-start: 2;
}
.grid :nth-child(3):last-child {
grid-column-start: span 2;
}
Let’s strive one other one:
We’re doing nothing for the primary and second instances the place now we have just one or two parts. After we add a 3rd aspect, although, we inform the browser that — so long as it’s the :last-child — it ought to span two columns. After we add a fourth aspect, we inform the browser that aspect must be positioned within the second column.
.grid {
show: grid;
}
.grid :nth-child(3):last-child {
grid-column-start: span 2;
}
.grid :nth-child(4) {
grid-column-start: 2;
}
Are you beginning to get the trick? We give the browser particular directions primarily based on the variety of parts (utilizing :nth-child) and, generally, one instruction can change the format fully.
It ought to be famous that the sizing won’t be the identical after we work with totally different content material:
Since we didn’t outline any sizes for our gadgets, the browser robotically sizes them for us primarily based on their contents and we might find yourself with totally different sizing than what we simply noticed. To beat this, now we have to explicitly specify that every one the columns and rows are equally sized:
grid-auto-rows: 1fr;
grid-auto-columns: 1fr;
Hey, we haven’t performed with these properties but! grid-auto-rows and grid-auto-columns set the dimensions of implicit rows and columns, respectively, in a grid container. Or, as the spec explains it:
The grid-auto-columns and grid-auto-rows properties specify the dimensions of tracks not assigned a measurement by grid-template-rows or grid-template-columns.
Right here is one other instance the place we will go as much as six parts. This time I’ll allow you to dissect the code. Don’t fear, the selectors might look advanced however the logic is fairly simple.
Even with six parts, we solely wanted two declarations. Think about all of the advanced and dynamic layouts we will obtain with a number of traces of code!
What’s occurring with that grid-auto-rows and why does it take three values? Are we defining three rows?
No, we’re not defining three rows. However we are defining three values as a sample for our implicit rows. The logic is as follows:
If now we have one row, it would get sized with the primary worth.If now we have two rows, the primary one will get the primary worth and the second the second worth.If now we have three rows, the three values will get used.If now we have 4 rows (and right here comes the attention-grabbing half), we use the three values for the primary three rows and we reuse the primary worth once more for the fourth row. That’s why it’s a form of sample that we repeat to measurement all of the implicit rows.If now we have 100 rows, they are going to be sized three-by-three to have 2fr 2fr 1fr 2fr 2fr 1fr 2fr 2fr 1fr, and so on.
Not like grid-template-rows which defines the variety of rows and their sizes, grid-auto-rows solely sizes row which will get created alongside the way in which.
If we get again to our instance, the logic is to have equal measurement when two rows are created (we are going to use the 2fr 2fr), but when a 3rd row is created we make it a bit smaller.
Grid patterns
For this final one, we’re going to speak about patterns. You may have most likely seen these two column layouts the place one column is wider than the opposite, and every row alternates the location of these columns.
This type format may be tough too pull off with out figuring out precisely how a lot content material we’re coping with, however CSS Grid’s implicit auto-placement powers makes it a relative cinch.
Take a peek on the code. It might look advanced however let’s break it down as a result of it winds up being fairly simple.
The very first thing to do is to determine the sample. Ask your self: “After what number of parts ought to the sample repeat?” On this case it’s after each 4 parts. So, let’s take a look at utilizing solely 4 parts for now:
Now, let’s outline the grid and arrange the final sample utilizing the :nth-child selector for alternating between parts:
.grid {
show: grid;
grid-auto-columns: 1fr; /* all of the columns are equal */
grid-auto-rows: 100px; /* all of the rows equal to 100px */
}
.grid :nth-child(4n + 1) { /* ?? */ }
.grid :nth-child(4n + 2) { /* ?? */ }
.grid :nth-child(4n + 3) { /* ?? */ }
.grid :nth-child(4n + 4) { /* ?? */ }
We stated that our sample repeats each 4 parts, so we are going to logically use 4n + x the place x ranges from 1 to 4. It’s somewhat simpler to clarify the sample this manner:
4(0) + 1 = 1 = 1st aspect /* we begin with n = 0 */
4(0) + 2 = 2 = 2nd aspect
4(0) + 3 = 3 = third aspect
4(0) + 4 = 4 = 4th aspect
4(1) + 1 = 5 = fifth aspect /* our sample repeat right here at n = 1 */
4(1) + 2 = 6 = sixth aspect
4(1) + 3 = 7 = seventh aspect
4(1) + 4 = 8 = eighth aspect
4(2) + 1 = 9 = ninth aspect /* our sample repeat once more right here at n = 2 */
and so on.
Good, proper? Now we have 4 parts, and repeat the sample on the fifth aspect, the ninth aspect and so forth.
These :nth-child selectors may be difficult! Chris has an excellent useful rationalization of the way it all works, together with recipes for creating totally different patterns.
Now we configure every aspect in order that:
The primary aspect must take two columns and begin at column one (grid-column: 1/span 2).The second aspect is positioned within the third column (grid-column-start: 3).The third aspect is positioned on the first column: (grid-column-start: 1).The fourth aspect takes two columns and begins on the second column: (grid-column: 2/span 2).
Right here that’s in CSS:
.grid {
show: grid;
grid-auto-columns: 1fr; /* all of the columns are equal */
grid-auto-rows: 100px; /* all of the rows are equal to 100px */
}
.grid :nth-child(4n + 1) { grid-column: 1/span 2; }
.grid :nth-child(4n + 2) { grid-column-start: 3; }
.grid :nth-child(4n + 3) { grid-column-start: 1; }
.grid :nth-child(4n + 4) { grid-column: 2/span 2; }
We may cease right here and be achieved… however we will do higher! Particularly, we will take away some declarations and rely grid’s auto-placement powers to do the job for us. That is the trickiest half to grok and requires a number of follow to have the ability to determine what may be eliminated.
The very first thing we will do is replace grid-column: 1 /span 2 and use solely grid-column: span 2 since, by default, the browser will place the primary merchandise into the primary column. We will additionally take away this:
.grid :nth-child(4n + 3) { grid-column-start: 1; }
By inserting the primary, second, and fourth gadgets, the grid robotically locations the third merchandise within the appropriate place. Meaning we’re left with this:
.grid {
show: grid;
grid-auto-rows: 100px; /* all of the rows are equal to 100px */
grid-auto-columns: 1fr; /* all of the columns are equal */
}
.grid :nth-child(4n + 1) { grid-column: span 2; }
.grid :nth-child(4n + 2) { grid-column-start: 2; }
.grid :nth-child(4n + 4) { grid-column: 2/span 2; }
However c’mon we will stroll do higher! We will additionally take away this:
.grid :nth-child(4n + 2) { grid-column-start: 2; }
Why? If we place the fourth aspect within the second column whereas permitting it to take up two full columns, we’re forcing the grid to create a 3rd implicit column, giving us a complete of three columns with out explicitly telling it to. The fourth aspect can’t go into the primary row because the first merchandise can also be taking two columns, so it flows to the following row. This configuration go away us with an empty column within the first row and an empty one within the second row.
I believe you recognize the tip of the story. The browser will robotically place the second and third gadgets in these empty spots. So our code turns into even less complicated:
.grid {
show: grid;
grid-auto-columns: 1fr; /* all of the columns are equal */
grid-auto-rows: 100px; /* all of the rows are equal to 100px */
}
.grid :nth-child(4n + 1) { grid-column: span 2; }
.grid :nth-child(4n + 4) { grid-column: 2/span 2; }
All it takes is 5 declarations to create a really cool and really versatile sample. The optimization half could also be difficult, however you get used to it and acquire some methods with follow.
Why not use grid-template-columns to outline specific columns since we all know the variety of columns?
We will do this! Right here’s the code for it:
.grid {
show: grid;
grid-template-columns: repeat(3, 1fr); /* all of the columns are equal */
grid-auto-rows: 100px; /* all of the rows are equal to 100px */
}
.grid :nth-child(4n + 1),
.grid :nth-child(4n + 4) {
grid-column: span 2;
}
As you possibly can see, the code is unquestionably extra intuitive. We outline three specific grid columns and we inform the browser that the primary and fourth parts have to take two columns. I extremely advocate this method! However the purpose of this text is to discover new concepts and methods that we get from CSS Grid’s implicit and auto-placement powers.
The express method is extra simple, whereas an implicit grid requires you to — pardon the pun — fill within the gaps the place CSS is doing further work behind the scenes. Ultimately, I consider that having a stable understanding of implicit grids will enable you higher perceive the CSS Grid algorithm. In spite of everything, we’re not right here to check what’s apparent — we’re right here to discover wild territories!
Let’s strive one other sample, a bit faster this time:
Our sample repeats each six parts. The third and fourth parts every have to occupy two full rows. If we place the third and the fourth parts, it appears that evidently we don’t want to the touch the others, so let’s strive the next:
.grid {
show: grid;
grid-auto-columns: 1fr;
grid-auto-rows: 100px;
}
.grid :nth-child(6n + 3) {
grid-area: span 2/2; /* grid-row-start: span 2 && grid-column-start: 2 */
}
.grid :nth-child(6n + 4) {
grid-area: span 2/1; /* grid-row-start: span 2 && grid-column-start: 1 */
}
Hmm, no good. We have to place the second aspect within the first column. In any other case, the grid will robotically place it within the second column.
.grid :nth-child(6n + 2) {
grid-column: 1; /* grid-column-start: 1 */
}
Higher, however there’s nonetheless extra work, We have to shift the third aspect to the highest. It’s tempting to strive inserting it within the first row this manner:
.grid :nth-child(6n + 3) {
grid-area: 1/2/span 2;
/* Equal to:
grid-row-start: 1;
grid-row-end: span 2;
grid-column-start: 2
*/
}
However this doesn’t work as a result of it forces all of the 6n + 3 parts to get positioned in the identical space which makes a jumbled format. The actual resolution is to maintain the preliminary definition of the third aspect and add grid-auto-flow: dense to fill the gaps. From MDN:
[The] “dense” packing algorithm makes an attempt to fill in holes earlier within the grid, if smaller gadgets come up later. This may increasingly trigger gadgets to look out-of-order, when doing so would fill in holes left by bigger gadgets. Whether it is omitted, a “sparse” algorithm is used, the place the location algorithm solely ever strikes “ahead” within the grid when inserting gadgets, by no means backtracking to fill holes. This ensures that all the auto-placed gadgets seem “so as”, even when this leaves holes that would have been crammed by later gadgets.I do know this property just isn’t very intuitive however always remember it once you face a placement concern. Earlier than attempting totally different configurations in useless, add it as a result of it could repair your format with no further effort.
Why not at all times add this property by default?
I don’t advocate it as a result of, in some instances, we don’t need that conduct. Word how the MDN’s rationalization there mentions it causes gadgets to movement “out-of-order” to fill holes left by bigger gadgets. Visible order is normally simply as necessary because the supply order, notably on the subject of accessible interfaces, and grid-auto-flow: dense can generally trigger a mismatch between the visible and supply order.
Our closing code is then:
.grid {
show: grid;
grid-auto-columns: 1fr;
grid-auto-flow: dense;
grid-auto-rows: 100px;
}
.grid :nth-child(6n + 2) { grid-column: 1; }
.grid :nth-child(6n + 3) { grid-area: span 2/2; }
.grid :nth-child(6n + 4) { grid-row: span 2; }
One other one? Let’s go!
For this one, I cannot discuss an excessive amount of and as a substitute present you an illustration of the code I’ve used. Attempt to see for those who get how I reached that code:
The gadgets in black are implicitly positioned within the grid. It ought to be famous that we will get the identical format extra methods than how I received there. Can you work these out, too? What about utilizing grid-template-columns? Share your works within the remark part.
I’m gonna go away you with a final sample:
I do have an answer for this one however it’s your flip to follow. Take all that now we have realized and attempt to code this by your self after which examine it with my resolution. Don’t fear for those who finish with one thing verbose — a very powerful factor is discovering a working resolution.
Need extra?
Earlier than we finish I need to share a number of Stack Overflow questions associated to CSS Grid the place I jumped in with solutions that use most of the methods we lined right here collectively. It’s a great record that reveals simply what number of actual use instances and real-world conditions come up the place these items turn out to be useful:
Change the variety of columns and rows in a grid because the variety of gadgets improveCSS Grid – 2×2 grid at all times taking over the total width when doableEasy methods to repeat a CSS grid format sample?Create CSS grid format with pure CSSCSS Grid vs dynamic definition record autoplacementCSS Grid – alternate order of parts solely on DesktopPicture Tile Utilizing CSS GridEasy methods to repair this advanced CSS grid of images primarily based on 4 columns?Repeating grid format with unknown quantity of thingsMaking a repeating CSS Grid formatIs it doable to make each second row in a CSS Grid to have totally different variety of columns?Place gadgets in pairs in two rows utilizing css gridEasy methods to arrange a dynamic grid primarily based on flex or gridCSS advanced grid auto formatCan I stack a right-hand set of columns with CSS Grid as a substitute of Flex?Change grid format relying on variety of parts
Wrapping up
CSS Grid has been round for years, however there are nonetheless a number of little-known and used methods that aren’t broadly mentioned. The implicit grid and auto-placement options are two of them!
And sure, this may get difficult! It has taken me a number of time to grok the logic behind implicit grids and I nonetheless battle with auto-placement. If you wish to spend extra time wrapping your head round specific and implicit grids, listed here are a few further explanations and examples price trying out:
Article
on
Oct 22, 2018
Understanding the distinction between grid-template and grid-auto
Article
on
Jul 28, 2017
A Assortment of Fascinating Details about CSS Grid Structure
Equally, you may need to examine grid-auto-columns within the CSS-Methods Almanac as a result of Mojtaba Seyedi goes into nice element and consists of extremely useful visuals to assist clarify the conduct.
Like I stated after we began, the strategies we lined right here aren’t meant to interchange the frequent methods you already know for constructing grids. I’m merely exploring other ways that may be useful in some instances.
Exploring CSS Grid’s Implicit Grid and Auto-Placement Powers initially revealed on CSS-Methods. It’s best to get the publication.


Subscribe to MarketingSolution.
Receive web development discounts & web design tutorials.
Now! Lets GROW Together!