
Nuxt is a JavaScript framework that extends the prevailing performance of Vue.js with options like server-side rendering, static web page technology, file-based routing, and automated code splitting amongst different issues.
I’ve been having fun with utilizing frameworks like Nuxt and Subsequent as a result of they provide not solely extra options, however higher efficiency and a greater developer expertise than the underlying libraries alone with out having to be taught quite a lot of new ideas. Due to this, many builders are beginning to default to those frameworks when creating new tasks versus their single-page utility (SPA)) ancestors that originally paved the best way for his or her success within the first place.
Within the spirit of those abstractions, I’m additionally a giant fan of serverless/managed providers that do quite a lot of the heavy lifting of constructing out back-end options and performance for issues like authentication, file storage, knowledge, compute, and an API layer. Companies and instruments like Supabase, Firebase, Netlify, AWS Amplify, and Hasura all allow historically front-end builders to increase their private capabilities and skillsets so as to add these numerous necessary items of back-end performance with out having to turn out to be back-end builders themselves.
On this tutorial, we’ll be constructing a multi-user app from scratch with Nuxt and Supabase, whereas pulling in Tailwind CSS for styling.
Why I’ve been liking Supabase
Supabase is an open supply different to Firebase that permits you to create a real-time back-end in minutes. On the time of this writing, Supabase has assist for options like file storage, real-time API + Postgres database, authentication, and shortly, serverless capabilities.
Postgres
One of many causes I like Supabase as a result of is that it’s straightforward to arrange. Plus, it provides Postgres as its knowledge layer.
I’ve been constructing apps for 10 years. One of many largest limitations that I’ve encountered in NoSQL Backend-as-a-Service (BaaS) choices is how robust it’s for builders to scale their apps and achieve success. With NoSQL, it’s a lot tougher to mannequin knowledge, do migrations, and modify knowledge entry patterns after you’ve began to construct your app. Enabling issues like relationships can also be a lot harder to grok within the NoSQL world.
Supabase leverages Postgres to allow a particularly wealthy set of performant querying capabilities out of the field with out having to jot down any extra back-end code. Actual time can also be baked in by default.
Auth
It’s very easy to arrange authorization guidelines on particular tables, enabling authorization and high quality grained entry controls with out quite a lot of effort.
While you create a venture, Supabase mechanically offers you a Postgres SQL database, consumer authentication, and an API endpoint. From there you may simply implement extra options, like real-time subscriptions and file storage.
A number of authentication suppliers
One other factor I like about Supabase is the number of authentication suppliers that come prepared to make use of with it proper out of the field. Supabase permits the entire following sorts of authentication mechanisms:
Ssername and passwordMagic e-mail linkGoogleFacebookAppleDiscordGitHubTwitterAzureGitLabBitbucket
The app components
Most purposes, whereas having various traits of their implementation particulars, typically leverage an analogous set of performance tied collectively. These often are:
consumer authenticationclient-side identification managementroutingfile storagedatabaseAPI layerAPI authorization
Understanding learn how to construct a full-stack app that implements all of those options lays the bottom for builders to then proceed constructing out many different various kinds of purposes that depend on this identical or comparable set of performance. The app that we’re constructing on this tutorial implements most of those options.
Unauthenticated customers can view others posts in an inventory after which view the publish particulars by clicking and navigating to that particular person publish. Customers can enroll with their e-mail deal with and obtain a magic hyperlink to register. As soon as they’re signed in, they can view hyperlinks to create and edit their very own posts as effectively. We may even present a profile view for customers to see their consumer profile and signal out.
Now that we’ve reviewed the app, let’s begin constructing!
Beginning our Supabase app
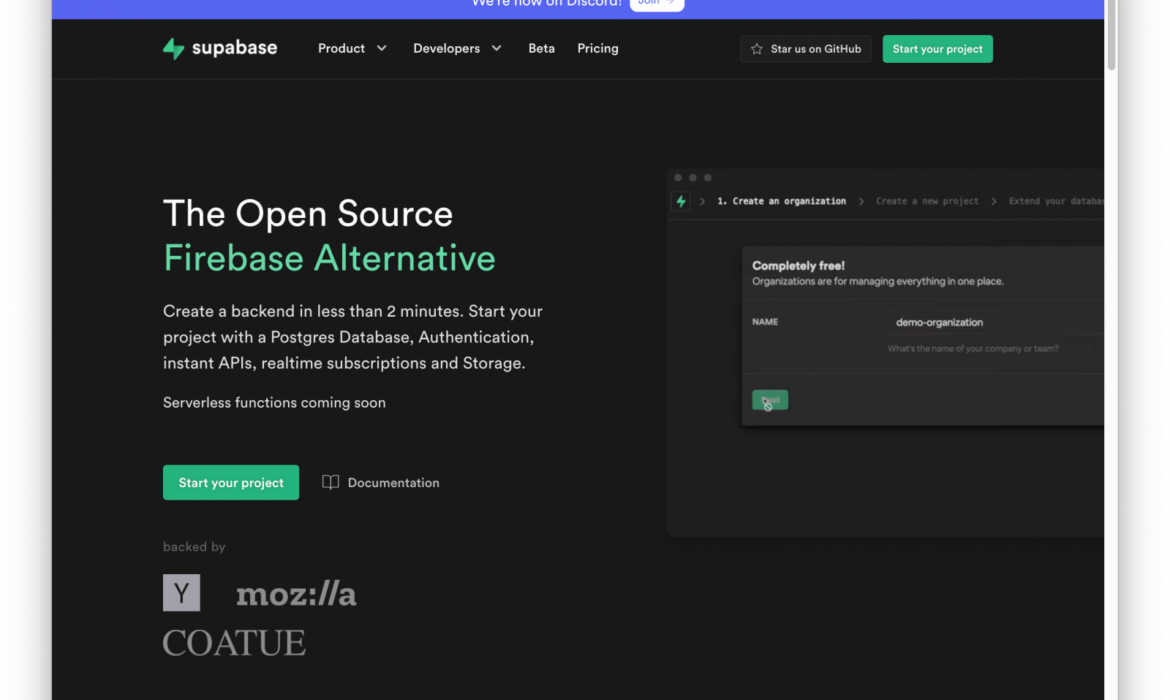
The very first thing we’ll have to do is create the Supabase app. Head over to Supabase.io and click on Begin Your Challenge. Authenticate and create a brand new venture below the group that’s supplied to you in your account.
Give the venture a Title and Password and click on Create new venture. It’ll take roughly two minutes to your venture to spin up.
Creating the desk
As soon as the venture is prepared, we create the desk for our app together with the entire permissions we’ll want. To take action, click on on the SQL hyperlink within the left-hand menu.
Click on on Question-1 below Open queries and paste the next SQL question into the supplied textual content space and click on Run:
CREATE TABLE posts (
id bigint generated by default as identification major key,
user_id uuid references auth.customers not null,
user_email textual content,
title textual content,
content material textual content,
inserted_at timestamp with time zone default timezone(‘utc’::textual content, now()) not null
);
alter desk posts allow row degree safety;
create coverage “People can create posts.” on posts for
insert with test (auth.uid() = user_id);
create coverage “People can replace their very own posts.” on posts for
replace utilizing (auth.uid() = user_id);
create coverage “People can delete their very own posts.” on posts for
delete utilizing (auth.uid() = user_id);
create coverage “Posts are public.” on posts for
choose utilizing (true);
This creates the posts desk for the database of our app. It has additionally permits some row-level permissions on the database:
Any consumer can question for an inventory of posts or particular person posts.Solely signed in customers can create a publish. Authorization guidelines state that their consumer ID should match the consumer ID handed into the arguments.Solely the proprietor of a publish can replace or delete it.
Now, if we click on on the Desk editor hyperlink, we must always see our new desk created with the correct schema.
That’s all we’d like for the Supabase venture! We will transfer on to our native growth setting to start constructing out the entrance finish with Nuxt.
Challenge setup
Let’s get began constructing the entrance finish. Open up a terminal in an empty listing and create the Nuxt app:
yarn create nuxt-app nuxt-supabase
Right here, we’re prompted with the next questions:
? Challenge title: nuxt-supabase
? Programming language: JavaScript
? Bundle supervisor: (your choice)
? UI framework: Tailwind CSS
? Nuxt.js modules: n/a
? Linting instruments: n/a
? Testing framework: None
? Rendering mode: Common (SSR / SSG)
? Deployment goal: Server (Node.js internet hosting)
? Growth instruments: n/a
? What’s your GitHub username? (your username)
? Model management system: Git
As soon as the venture has been created, become the brand new listing:
cd nuxt-supabase
Configuration and dependencies
Now that the venture has been initialized, we have to set up some dependencies for each Supabase, in addition to Tailwind CSS. We additionally have to configure the Nuxt venture to acknowledge and use these instruments.
Tailwind CSS
Let’s begin with Tailwind. Set up the Tailwind dependencies utilizing both npm or Yarn:
npm set up -D tailwindcss@newest postcss@newest autoprefixer@newest @tailwindcss/typography
Subsequent, run the next command to create a tailwind.config.js file:
npx tailwind init
Subsequent, add a brand new folder named belongings/css to the venture listing and a file in it named tailwind.css. Right here’s some code we will throw in there to import what we’d like from Tailwind:
/* belongings/css/tailwind.css */
@tailwind base;
@tailwind elements;
@tailwind utilities;
Subsequent, add the @nuxtjs/tailwindcss module to the buildModules part of the nuxt.config.js file (this may increasingly have already been up to date by the Tailwind CLI):
buildModules: [
‘@nuxtjs/tailwindcss’
],
Tailwind is now arrange and we will start utilizing the utility lessons straight in our HTML! 🎉
Markdown editor and parser
Subsequent, let’s set up and configure a Markdown editor and parser that permits customers to jot down weblog posts with formatting and wealthy textual content enhancing options. We’re utilizing marked together with the Vue SimpleMDE library to make this occur.
npm set up vue-simplemde marked
Subsequent, we have to outline a brand new Vue element to make use of the brand new Markdown editor in our HTML. So, create a brand new plugins folder and add a brand new file in it named simplemde.js. Right here’ the code we’d like in there to import what we’d like:
/* plugins/simplemde.js */
import Vue from ‘vue’
import VueSimplemde from ‘vue-simplemde’
import ‘simplemde/dist/simplemde.min.css’
Vue.element(‘vue-simplemde’, VueSimplemde)
Subsequent, open nuxt.config.js and replace the css globals in order that they embody the simplemde CSS in addition to the plugins array:
css: [
‘simplemde/dist/simplemde.min.css’,
],
plugins: [
{ src: ‘~plugins/simplemde.js’, mode: ‘client’ },
],
Now, we will use vue-simplemde straight in our HTML any time we’d like to make use of the element!
Configuring Supabase
The very last thing we have to configure is for the Supabase shopper. That is the API we use to work together with the Supabase back-end for authentication and knowledge entry.
First, set up the Supabase JavaScript library:
npm set up @supabase/supabase-js
Subsequent, let’s create one other plugin that injects a $supabase variable into the scope of our app so we will entry it any time and anyplace we’d like it. We have to get the API endpoint and public API key for our venture, which we will get from the Supabase dashboard within the Settings tab.
Click on the Settings icon within the Supabase menu, then choose API to find the knowledge.
Now let’s create a brand new shopper.js file within the plugins folder with the next code in there:
/* plugins/shopper.js */
import { createClient } from ‘@supabase/supabase-js’
const supabase = createClient(
“https://yoururl.supabase.co”,
“your-api-key”
)
export default (_, inject) => {
inject(‘supabase’, supabase)
}
Now we will replace the plugins array in nuxt.config.js with the brand new plugin:
plugins: [
{ src: ‘~plugins/client.js’ },
{ src: ‘~plugins/simplemde.js’, mode: ‘client’ },
],
That’s the very last thing we have to do to arrange our venture. Mow we will begin writing some code!
Creating the format
Our app wants format element to carry the navigation in addition to some fundamental styling that shall be utilized to the entire different pages.
To make use of a format, Nuxt seems to be for a layouts listing for a default format that’s utilized to all pages. We will override layouts on a page-by-page foundation if we have to customise one thing particular. We’re sticking to the default format for the whole lot on this tutorial for the sake of simplicity.
We’d like that layouts folder, so add it to the venture listing and add a default.vue file in it with the next markup for the default format:
<!– layouts/default.vue –>
<template>
<div>
<nav class=”p-6 border-b border-gray-300″>
<NuxtLink to=”/” class=”mr-6″>
Dwelling
</NuxtLink>
<NuxtLink to=”/profile” class=”mr-6″>
Profile
</NuxtLink>
<NuxtLink to=”/create-post” class=”mr-6″ v-if=”authenticated”>
Create publish
</NuxtLink>
<NuxtLink to=”/my-posts” class=”mr-6″ v-if=”authenticated”>
My Posts
</NuxtLink>
</nav>
<div class=”py-8 px-16″>
<Nuxt />
</div>
</div>
</template>
<script>
export default {
knowledge: () => ({
authenticated: false,
authListener: null
}),
async mounted() {
/* When the app masses, test to see if the consumer is signed in */
/* additionally create a listener for when somebody indicators in or out */
const { knowledge: authListener } = this.$supabase.auth.onAuthStateChange(
() => this.checkUser()
)
this.authListener = authListener
this.checkUser()
},
strategies: {
async checkUser() {
const consumer = await this.$supabase.auth.consumer()
if (consumer) {
this.authenticated = true
} else {
this.authenticated = false
}
}
},
beforeUnmount() {
this.authListener?.unsubscribe()
}
}
</script>
The format has two hyperlinks which are proven by default, and two others which are solely displayed if a consumer is signed in.
To fetch the signed in consumer at any time (or to see if they’re authenticated), we’re utilizing the supabase.auth.consumer() methodology. If a consumer is signed in, their profile is returned. If they aren’t, the return worth is null.
The house web page
Subsequent, let’s replace the house web page. When the consumer opens the app, we need to present an inventory of posts and permit them to click on on and navigate to learn the publish. If there aren’t any posts, we present them a message as an alternative.
On this element, we’re making our first name to the Supabase back-end to fetch knowledge — on this case, we’re calling an array that incorporates all posts. See how the Supabase API interacts together with your knowledge, which to me, could be very intuitive:
/* instance of learn how to fetch knowledge from Supabase */
const { knowledge: posts, error } = await this.$supabase
.from(‘posts’)
.choose(‘*’)
Supabase provides filters and modifiers that make it easy to implement a wealthy set of varied knowledge entry patterns and choice units of your knowledge. As an example, if we need to replace that final question to solely question for customers with a particular consumer ID, we may do that:
const { knowledge: posts, error } = await this.$supabase
.from(‘posts’)
.choose(‘*’)
.filter(‘user_id’, ‘eq’, ‘some-user-id’)
Replace the template file for the homepage, pages/index.vue, with the next markup and question for displaying a loop of posts:
<!– pages/index.vue –>
<template>
<fundamental>
<div v-for=”publish in posts” :key=”publish.id”>
<NuxtLink key={publish.id} :to=”`/posts/${publish.id}`”>
<div class=”cursor-pointer border-b border-gray-300 mt-8 pb-4″>
<h2 class=”text-xl font-semibold”>{{ publish.title }}</h2>
<p class=”text-gray-500 mt-2″>Writer: {{ publish.user_email }}</p>
</div>
</NuxtLink>
</div>
<h1 v-if=”loaded && !posts.size” class=”text-2xl”>No posts…</h1>
</fundamental>
</template>
<script>
export default {
async created() {
const { knowledge: posts, error } = await this.$supabase
.from(‘posts’)
.choose(‘*’)
this.posts = posts
this.loaded = true
},
knowledge() {
return {
loaded: false,
posts: []
}
}
}
</script>
Person profile
Now let’s create the profile web page with a brand new profile.vue file within the pages with the next code:
<!– pages/profile.vue –>
<template>
<fundamental class=”m-auto py-20″ model=”width: 700px”>
<!– if the consumer isn’t signed in, present the register type –>
<div v-if=”!profile && !submitted” class=”flex flex-col”>
<h2 class=”text-2xl”>Enroll / register</h2>
<enter v-model=”e-mail” placeholder=”E-mail” class=”border py-2 px-4 rounded mt-4″ />
<button
@click on=”signIn”
class=”mt-4 py-4 px-20 w-full bg-blue-500 text-white font-bold”
>Submit</button>
</div>
<!– if the consumer is signed in, present them their profile –>
<div v-if=”profile”>
<h2 class=”text-xl”>Whats up, {{ profile.e-mail }}</h2>
<p class=”text-gray-400 my-3″>Person ID: {{ profile.id }}</p>
<button
@click on=”signOut”
class=”mt-4 py-4 px-20 w-full bg-blue-500 text-white font-bold”
>Signal Out</button>
</div>
<div v-if=”submitted”>
<h1 class=”text-xl text-center”>Please test your e-mail to register</h1>
</div>
</fundamental>
</template>
<script>
export default {
knowledge: () => ({
profile: null,
submitted: false,
e-mail: ”
}),
strategies: {
async signOut() {
/* signOut deletes the consumer’s session */
await this.$supabase.auth.signOut()
this.profile = null
},
async signIn() {
/* signIn sends the consumer a magic hyperlink */
const { e-mail } = this
if (!e-mail) return
const { error, knowledge } = await this.$supabase.auth.signIn({
e-mail
})
this.submitted = true
},
},
async mounted() {
/* when the element masses, fetch the consumer’s profile */
const profile = await this.$supabase.auth.consumer()
this.profile = profile
}
}
</script>
Within the template, we now have a number of completely different view states:
If the consumer isn’t signed in, present them the register type.If the consumer is signed in, present them their profile data and an indication out button.If the consumer has submitted the register type, present them a message to test their e-mail.
This app makes use of magic hyperlink authentication due to its simplicity. There isn’t a separate course of for signing up and signing in. All of the consumer must do is submit their e-mail deal with and they’re despatched a hyperlink to register. As soon as they click on on the hyperlink, a session is ready of their browser by Supabase, and they’re redirected to the app.
Making a publish
Subsequent, let’s create the web page with the shape that permits customers to create and save new posts. Meaning a brand new create-post.vue file within the pages listing with some code for the publish editor:
<!– pages/create-post.vue –>
<template>
<fundamental>
<div id=”editor”>
<h1 class=”text-3xl font-semibold tracking-wide mt-6″>Create new publish</h1>
<enter
title=”title”
placeholder=”Title”
v-model=”publish.title”
class=”border-b pb-2 text-lg my-4 focus:outline-none w-full font-light text-gray-500 placeholder-gray-500 y-2″
/>
<client-only>
<vue-simplemde v-model=”publish.content material”></vue-simplemde>
</client-only>
<button
sort=”button”
class=”mb-4 w-full bg-blue-500 text-white font-semibold px-8 py-4″
@click on=”createPost”
>Create Put up</button>
</div>
</fundamental>
</template>
<script>
export default {
knowledge() {
return {
publish: {}
}
},
strategies: {
async createPost() {
const {title, content material} = this.publish
if (!title || !content material) return
const consumer = this.$supabase.auth.consumer()
const { knowledge } = await this.$supabase
.from(‘posts’)
.insert([
{ title, content, user_id: user.id, user_email: user.email }
])
.single()
this.$router.push(`/posts/${knowledge.id}`)
}
}
}
</script>
This code is utilizing the vue-simplemde element we registered as a plugin in an earlier step! It’s wrapped in a client-only element that renders the element solely on client-side — vue-simplemde is a client-side-only plugin so it’s pointless for it to be on the server.
The createPost operate creates a brand new publish within the Supabase database, after which redirects us to view the person publish in a web page we now have but to create. Let’s create it now!
Dynamic routes for viewing particular person posts
To create a dynamic route in Nuxt, we have to add an underscore earlier than .vue within the file title (or earlier than the title of the listing).
If a consumer navigates to a web page, say /posts/123. We need to use publish ID 123 to fetch the information for the publish. Within the app, we will then entry the route parameters within the web page by referencing route.params.
So, let’s add yet one more new folder, pages/posts, with a brand new file named in it, _id.vue:
<!– pages/posts/_id.vue –>
<template>
<fundamental>
<div>
<h1 class=”text-5xl mt-4 font-semibold tracking-wide”>{{ publish.title }}</h1>
<p class=”text-sm font-light my-4″>by {{ publish.user_email }}</p>
<div class=”mt-8 prose” >
<div v-html=”compiledMarkdown”></div>
</div>
</div>
</fundamental>
</template>
<script>
import marked from ‘marked’
export default {
computed: {
compiledMarkdown: operate () {
return marked(this.publish.content material, { sanitize: true })
}
},
async asyncData({ route, $supabase }) {
/* use the ID from the route parameter to fetch the publish */
const { knowledge: publish } = await $supabase
.from(‘posts’)
.choose()
.filter(‘id’, ‘eq’, route.params.id)
.single()
return {
publish
}
}
}
</script>
When the web page is loaded, the route parameter is used to fetch the publish metadata.
Managing posts
The final piece of performance we would like is to permit customers the power to edit and delete their very own posts, however as a way to do this, we must always present them with a web page that shows their very own posts as an alternative of everybody’s.
That’s proper, we’d like one other new file, this time known as my-posts.vue, within the pages listing. It’s going to fetches solely the posts of the present authenticated consumer:
<!– pages/my-posts.vue –>
<template>
<fundamental>
<div v-for=”publish in posts” :key=”publish.id”>
<div class=”cursor-pointer border-b border-gray-300 mt-8 pb-4″>
<h2 class=”text-xl font-semibold”>{{ publish.title }}</h2>
<p class=”text-gray-500 mt-2″>Writer: {{ publish.user_email }}</p>
<NuxtLink :to=”`/edit-post?id=${publish.id}`” class=”text-sm mr-4 text-blue-500″>Edit Put up</NuxtLink>
<NuxtLink :to=”`/posts/${publish.id}`” class=”text-sm mr-4 text-blue-500″>View Put up</NuxtLink>
<button
class=”text-sm mr-4 text-red-500″
@click on=”deletePost(publish.id)”
>Delete Put up</button>
</div>
</div>
<h1 v-if=”loaded && !posts.size” class=”text-2xl”>No posts…</h1>
</fundamental>
</template>
<script>
export default {
async created() {
this.fetchPosts()
},
knowledge() {
return {
posts: [],
loaded: false
}
},
strategies: {
async fetchPosts() {
const consumer = this.$supabase.auth.consumer()
if (!consumer) return
/* fetch solely the posts for the signed in consumer */
const { knowledge: posts, error } = await this.$supabase
.from(‘posts’)
.choose(‘*’)
.filter(‘user_id’, ‘eq’, consumer.id)
this.posts = posts
this.loaded = true
},
async deletePost(id) {
await this.$supabase
.from(‘posts’)
.delete()
.match({ id })
this.fetchPosts()
}
}
}
</script>
The question on this web page for fetching the posts makes use of a filter, passing within the consumer ID of the signed in consumer. There’s additionally a button for deleting a publish and a button for enhancing a publish. If a publish is deleted, we then refetch the posts to replace the UI. If a consumer desires to edit a publish, we redirect them to the edit-post.vue web page that we’re creating subsequent.
Modifying a publish
The final web page we need to create permits customers to edit a publish. This web page is similar to the create-post.vue web page, the principle distinction being we fetch the publish utilizing the id retrieved from the route parameter. So, create that file and drop it into the pages folder with this code:
<!– pages/edit-post.vue –>
<template>
<fundamental>
<div id=”editor”>
<h1 class=”text-3xl font-semibold tracking-wide mt-6″>Create new publish</h1>
<enter
title=”title”
placeholder=”Title”
v-model=”publish.title”
class=”border-b pb-2 text-lg my-4 focus:outline-none w-full font-light text-gray-500 placeholder-gray-500 y-2″
/>
<client-only>
<vue-simplemde v-model=”publish.content material”></vue-simplemde>
</client-only>
<button
sort=”button”
class=”mb-4 w-full bg-blue-500 text-white font-semibold px-8 py-4″
@click on=”editPost”
>Edit Put up</button>
</div>
</fundamental>
</template>
<script>
export default {
async created() {
/* when the web page masses, fetch the publish utilizing the route id parameter */
const id = this.$route.question.id
const { knowledge: publish } = await this.$supabase
.from(‘posts’)
.choose()
.filter(‘id’, ‘eq’, id)
.single()
if (!publish) this.$router.push(‘/’)
this.publish = publish
},
knowledge() {
return {
publish: {}
}
},
strategies: {
async editPost() {
/* when the consumer edits a publish, redirect them again to their posts */
const { title, content material } = this.publish
if (!title || !content material) return
await this.$supabase
.from(‘posts’)
.replace([
{ title, content }
])
.match({ id: this.publish.id })
this.$router.push(‘/my-posts’)
}
}
}
</script>
Testing it out
That’s the entire code, we must always have the ability to try it out! We will take a look at regionally with the next command:
npm run dev
When the app masses, join a brand new account utilizing the magic hyperlink enabled within the profile web page. When you’ve signed up, take a look at the whole lot out by including, enhancing, and deleting posts.
Wrapping up
Fairly good, proper? That is the kind of ease and ease I used to be speaking about initially of this tutorial. We spun up a brand new app with Supabase, and with a number of dependencies, just a little configuration, and a handful of templates, we made a fully-functional app that lets people create and handle weblog publish — full with a again finish that helps authentication, identification administration, and routing!
What we now have is baseline performance, however you may most likely see what a excessive ceiling there may be to do extra right here. And I hope you do! With all the precise components in place, you may take what we made and lengthen it with your individual enhancements and styling.
The publish Utilizing Nuxt and Supabase for a Multi-Person Running a blog App appeared first on CSS-Methods. You’ll be able to assist CSS-Methods by being an MVP Supporter.


Subscribe to MarketingSolution.
Receive web development discounts & web design tutorials.
Now! Lets GROW Together!