
The clicking occasion is sort of easy and simple to make use of; you hear for the occasion and run code when the occasion is fired. It really works on nearly each HTML factor there may be, a core function of the DOM API.
As typically the case with the DOM and JavaScript, there are nuances to think about. Some nuances with the press occasion are usually not a lot a priority. They’re minor and possibly most individuals would by no means even discover them within the majority of use circumstances.
Take, for instance, the press occasion listening to the grandfather of interactive components, the <button> factor. There are nuances related to button clicks and these nuances, just like the distinction between a “click on” from a mouse pointer and “click on” from the keyboard. Seen this fashion, a click on shouldn’t be all the time a “click on” the way in which it’s usually outlined. I even have run into conditions (although not many) the place distinguishing between these two varieties of clicks is useful.
How can we distinguish between various kinds of clicks? That’s what we’re diving into!
First issues first
The <button> factor, as described by MDN, is just:
The HTML factor represents a clickable button, used to submit types or anyplace in a doc for accessible, customary button performance. By default, HTML buttons are offered in a mode resembling the platform the consumer agent runs on, however you may change buttons’ look with CSS.
The half we’ll cowl is clearly the “anyplace in a doc for accessible, customary button performance” a part of that description. As it’s possible you’ll know, a button factor can have native performance inside a kind, for instance it might probably submit a kind in some conditions. We’re solely actually regarding ourselves over the essential clicking operate of the factor. So take into account only a easy button positioned on the web page for particular performance when somebody interacts with it.
Take into account that I stated “interacts with it” as a substitute of simply clicking it. For historic and usefulness causes, one can “click on” the button by placing concentrate on it with tabbing after which utilizing the Area or Enter key on the keyboard. It is a little bit of overlap with keyboard navigation and accessibility; this native function existed manner earlier than accessibility was a priority. But the legacy function does assist an ideal cope with accessibility for apparent causes.
Within the instance above, you may click on the button and its textual content label will change. After a second the unique textual content will reset. You can even click on some other place throughout the pen, tab to place concentrate on the button, after which use Area or Enter to “click on” it. The identical textual content seems and resets as effectively. There isn’t a JavaScript to deal with the keyboard performance; it’s a local function of the browser. Essentially, on this instance the button is just conscious of the press occasion, however not the way it occurred.
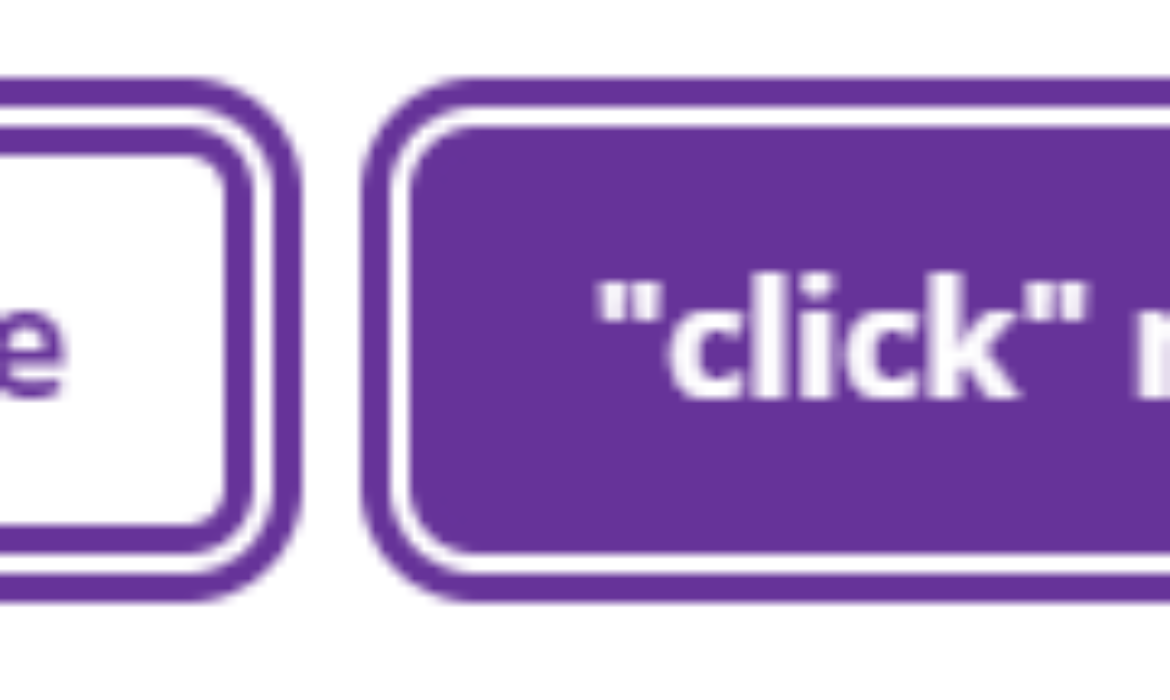
One attention-grabbing distinction to think about is the habits of a button throughout completely different browsers, particularly the way in which it’s styled. The buttons in these examples are set to shift colours on its lively state; so that you click on it and it turns purple. Take into account this picture that exhibits the states when interacting with the keyboard.
Keyboard Interplay States
The primary is the static state, the second is when the button has focus from a keyboard tabbing onto it, the third is the keyboard interplay, and the fourth is the results of the interplay. With Firefox you’ll solely see the primary two and final states; when interacting with both Enter or Area keys to “click on” it you don’t see the third state. It stays with the second, or “centered”, state throughout the interplay after which shifts to the final one. The textual content adjustments as anticipated however the colours don’t. Chrome provides us a bit extra as you’ll see the primary two states the identical as Firefox. If you happen to use the Area key to “click on” the button you’ll see the third state with the colour change after which the final. Curiously sufficient, with Chrome in case you use Enter to work together with the button you received’t see the third state with the colour change, very like Firefox. In case you might be curious, Safari behaves the identical as Chrome.
The code for the occasion listener is sort of easy:
const button = doc.querySelector(‘#button’);
button.addEventListener(‘click on’, () => {
button.innerText = ‘Button Clicked!’;
window.setTimeout(() => {
button.innerText = ‘”click on” me’;
}, 2000);
});
Now, let’s take into account one thing right here with this code. What in case you discovered your self in a scenario the place you wished to know what brought on the “click on” to occur? The clicking occasion is often tied to a pointer system, usually the mouse, and but right here the Area or Enter key are triggering the identical occasion. Different kind components have related performance relying on context, however any components that aren’t interactive by default would require an extra keyboard occasion to work. The button factor doesn’t require this extra occasion listener.
I received’t go too far into causes for eager to know what triggered the press occasion. I can say that I’ve sometimes bumped into conditions the place it was useful to know. Generally for styling causes, typically accessibility, and typically for particular performance. Typically completely different context or conditions present for various causes.
Take into account the next not as The Manner™ however extra of an exploration of those nuances we’re speaking about. We’ll discover dealing with the assorted methods to work together with a button factor, the occasions generated, and leveraging particular options of those occasions. Hopefully the next examples can present some useful data from the occasions; or probably unfold out to different HTML components, as wanted.
Which is which?
One easy method to know a keyboard versus mouse click on occasion is leveraging the keyup and mouseup occasions, taking the press occasion out of the equation.
Now, if you use the mouse or the keyboard, the modified textual content displays which occasion is which. The keyboard model will even inform you of a Area versus Enter key getting used.
Right here’s the brand new code:
const button = doc.querySelector(‘#button’);
operate reset () {
window.setTimeout(() => {
button.innerText = ‘”click on” me’;
}, 2000);
}
button.addEventListener(‘mouseup’, (e) => {
if (e.button === 0) {
button.innerText = ‘MouseUp Occasion!’;
reset();
}
});
button.addEventListener(‘keyup’, (e) => {
if (e.code === ‘Area’ || e.code === ‘Enter’) {
button.innerText = `KeyUp Occasion: ${e.code}`;
reset();
}
});
A bit verbose, true, however we’ll get to a slight refactor in a bit. This instance will get the purpose throughout a few nuance that must be dealt with. The mouseup and keyup occasions have their very own options to account for on this scenario.
With the mouseup occasion, about each button on the mouse may set off this occasion. We often wouldn’t need the appropriate mouse button triggering a “click on” occasion on the button, for example. So we search for the e.button with the worth of 0 to determine the first mouse button. That manner it really works the identical as with the press occasion but we all know for a reality it was the mouse.
With the keyup occasion, the identical factor occurs the place about each key on the keyboard will set off this occasion. So we take a look at the occasion’s code property to attend for the Area or Enter key to be pressed. So now it really works the identical as the press occasion however we all know the keyboard was used. We even know which of the 2 keys we’re anticipating to work on the button.
One other take to find out which is which
Whereas the earlier instance works, it looks as if a bit an excessive amount of code for such a easy idea. We actually simply need to know if the “click on” got here from a mouse or a keyboard. Most often we most likely wouldn’t care if the supply of the press was both the Area or Enter keys. However, if we do care, we will benefit from the keyup occasion properties to notice which is which.
Buried within the varied specs in regards to the click on occasion (which leads us to the UI Occasions specification) there are specific properties assigned to the occasion regarding the mouse location, together with properties similar to screenX/screenY and clientX/clientY. Some browsers have extra, however I need to concentrate on the screenX/screenY properties for the second. These two properties basically provide the X and Y coordinates of the mouse click on in relation to the upper-left of the display. The clientX/clientY properties do the identical, however the origin is the upper-left of the browser’s viewport.
This trick depends on the truth that the press occasion gives these coordinates despite the fact that the occasion was triggered by the keyboard. When a button with the press occasion is “clicked” by the Area or Enter key it nonetheless must assign a worth to these properties. Since there’s no mouse location to report, if it falls again to zero because the default.
Right here’s our new code:
const button = doc.querySelector(‘#button’);
button.addEventListener(‘click on’, (e) => {
button.innerText = e.screenX + e.screenY === 0 || e.offsetX + e.offsetY === 0 ?
‘Keyboard Click on Occasion!’ : ‘Mouse Click on Occasion!’;
window.setTimeout(() => {
button.innerText = ‘”click on” me’;
}, 2000);
});
Again to simply the press occasion, however this time we search for these properties to find out whether or not it is a keyboard or mouse “click on.” We take each screenX and screenY properties, add them collectively, and see in the event that they equal zero; which makes for a simple check. The chances of the button being within the fast upper-left of the display to be clicked must be fairly low. It could possibly be potential if one tried to make such an effort of a pixel-perfect click on in such an odd location, however I might assume it’s a secure assumption that it received’t occur underneath regular circumstances.
Now, one may discover the added e.offsetX + e.offsetY === 0 half. I’ve to clarify that bit…
Enter the dreaded browser inconsistencies
Whereas creating and testing this code, the all-too-often drawback of cross-browser assist reared its ugly head. It seems that despite the fact that most browsers set the screenX and screenY values on a keyboard-caused click on occasion to zero, Safari decides to be completely different. It applies a correct worth to screenX and screenY as if the button was clicked by a mouse. This throws a wrench into my code which is likely one of the enjoyable points of coping with completely different browsers — they’re made by completely different teams of various folks creating completely different outcomes to the identical use circumstances.
However, alas, I wanted an answer as a result of I didn’t essentially need to rely solely on the keyup occasion for this model of the code. I imply, we may if we wished to, in order that’s nonetheless an choice. It’s simply that I favored the concept of treating this as a possible studying train to find out what’s taking place and make changes for variations in browsers like we’re seeing right here.
Testing what Safari is doing on this case, it seems to be utilizing the offsetX and offsetY properties within the occasion to find out the placement of the “click on” after which making use of math to find out the screenX and screenY values. That’s an enormous over-simplification, but it surely type of checks out. The offset properties would be the location of the press based mostly on the upper-left of the button. On this context, Safari applies zero to offsetX and offsetY, which might clearly be seen because the upper-left of the button. From there it treats that location of the button because the willpower for the display properties based mostly on the space from the upper-left of the button to the upper-left of the display.
The opposite traditional browsers technically additionally apply zero to offestX and offsetY, and could possibly be used instead of screenX and screenY. I selected to not go that route. It’s actually potential to click on a button that occurs to be on the absolute top-left of the display is relatively troublesome whereas clicking the top-left of a button. But, Safari is completely different so the checks in opposition to the display and offsets is the consequence. The code, as written, hopes for zeroes on the display properties and, if they’re there, it strikes ahead assuming a keyboard-caused click on. If the display properties collectively are bigger then zero, it checks the offset properties simply in case. We will take into account this the Safari examine.
This isn’t very best, but it surely wouldn’t be the primary time I needed to create branching logic as a consequence of browser inconsistencies.
Within the hope that the habits of those properties won’t change sooner or later, we’ve an honest method to decide if a button’s click on occasion occurred by mouse or keyboard. But expertise marches on offering us new options, new necessities, and new challenges to think about. The assorted units accessible to us has began the idea of the “pointer” as a way to work together with components on the display. At the moment, such a pointer could possibly be a mouse, a pen, or a contact. This creates yet one more nuance that we’d need to be take into account; figuring out the sort of pointer concerned within the click on.
Which one out of many?
Now is an efficient time to speak about Pointer Occasions. As described by MDN:
A lot of at this time‘s net content material assumes the consumer’s pointing system will likely be a mouse. Nonetheless, since many units assist different varieties of pointing enter units, similar to pen/stylus and contact surfaces, extensions to the present pointing system occasion fashions are wanted. Pointer occasions tackle that want.
So now let’s take into account having a necessity for realizing what sort of pointer was concerned in clicking that button. Counting on simply the press occasion doesn’t actually present this data. Chrome does have an attention-grabbing property within the click on occasion, sourceCapabilities. This property in flip has a property named firesTouchEvents that could be a boolean. This data isn’t all the time accessible since Firefox and Safari don’t assist this but. But the pointer occasion is accessible a lot all over the place, even IE11 of all browsers.
This occasion can present attention-grabbing information about contact or pen occasions. Issues like stress, contact measurement, tilt, and extra. For our instance right here we’re simply going to concentrate on pointerType, which tells us the system sort that brought on the occasion.
Clicking on the button will now let you know the pointer that was used. The code for that is fairly easy:
const button = doc.querySelector(‘#button’);
button.addEventListener(‘pointerup’, (e) => {
button.innerText = `Pointer Occasion: ${e.pointerType}`;
window.setTimeout(() => {
button.innerText = ‘”click on” me’;
}, 2000);
});
Actually, not that a lot completely different than the earlier examples. We hear for the pointerup occasion on the button and output the occasion’s pointerType. The distinction now could be there isn’t any occasion listener for a click on occasion. So tabbing onto the button and utilizing area or enter key does nothing. The clicking occasion nonetheless fires, however we’re not listening for it. At this level we solely have code tied to the button that solely responds to the pointer occasion.
That clearly leaves a spot in performance, the keyboard interactivity, so we nonetheless want to incorporate a click on occasion. Since we’re already utilizing the pointer occasion for the extra conventional mouse click on (and different pointer occasions) we’ve to lock down the press occasion. We have to solely enable the keyboard itself to set off the press occasion.
The code for that is much like the “Which Is Which” instance up above. The distinction being we use pointerup as a substitute of mouseup:
const button = doc.querySelector(‘#button’);
operate reset () {
window.setTimeout(() => {
button.innerText = ‘”click on” me’;
}, 2000);
}
button.addEventListener(‘pointerup’, (e) => {
button.innerText = `Pointer Occasion: ${e.pointerType}`;
reset();
});
button.addEventListener(‘click on’, (e) => e.offsetX + e.offsetY === 0) Click on Occasion!’;
reset();
);
Right here we’re utilizing the screenX + screenY (with the extra offset examine) methodology to find out if the press was attributable to the keyboard. This fashion a mouse click on could be dealt with by the pointer occasion. If one wished to know if the important thing used was area or enter, then the keyup instance above could possibly be used. Even then, the keyup occasion could possibly be used as a substitute of the press occasion relying on the way you wished to method it.
Anoher take to find out which one out of many
Within the ever-present have to refactor for cleaner code, we will strive a unique method to code this.
Yep, works the identical as earlier than. Now the code is:
const button = doc.querySelector(‘#button’);
operate btn_handler (e) {
if (e.sort === ‘click on’ && e.screenX + e.screenY > 0 && e.offsetX + e.offsetY > 0) {
return false;
} else if (e.pointerType) {
button.innerText = `Pointer Occasion: ${e.pointerType}`;
} else if (e.screenX + e.screenY === 0) {
button.innerText = ‘Keyboard Click on Occasion!’;
} else {
button.innerText = ‘One thing clicked this?’;
}
window.setTimeout(() => {
button.innerText = ‘”click on” me’;
}, 2000);
}
button.addEventListener(‘pointerup’, btn_handler);
button.addEventListener(‘click on’, btn_handler);
One other scaled down model to think about: this time we’ve lowered our code right down to a single handler methodology that each pointerup and click on occasions name. First we detect if the mouse “click on” brought on the occasion; if it does, we want to ignore it in favor of the pointer occasion. That is checked with a check reverse of the keyboard check; is the sum of screenX and screenY bigger than zero? This time there’s an alteration to the offset examine by doing the identical because the display check, is the sum of these properties bigger than zero as effectively?
Then the strategy checks for the pointer occasion, and upon discovering that, it stories which pointer sort occurred. In any other case, the strategy checks for keyboard interactions and stories accordingly. If neither of these are the wrongdoer, it simply stories that one thing brought on this code to run.
So right here we’ve an honest variety of examples on deal with button interactions whereas reporting the supply of these interactions. But, that is simply one of many handful of kind components that we’re so accustomed to utilizing in initiatives. How does related code work with different components?
Checking checkboxes
Certainly, related code does work very a lot the identical manner with checkboxes.
There are a couple of extra nuances, as you may count on by now. The conventional utilization of <enter sort=”checkbox”> is a associated label factor that’s tied to the enter through the for attribute. One main function of this mixture is that clicking on the label factor will examine the associated checkbox.
Now, if we had been to connect occasion listeners for the press occasion on each components, we get again what needs to be apparent outcomes, even when they’re a bit unusual. For instance, we get one click on occasion fired when clicking the checkbox. If we click on the label, we get two click on occasions fired as a substitute. If we had been to console.log the goal of these occasions, we’ll see on the double occasion that one is for the label (which is smart as we clicked it), however there’s a second occasion from the checkbox. Although I do know these needs to be the anticipated outcomes, it’s a bit unusual as a result of we’re anticipating outcomes from consumer interactions. But the outcomes embrace interactions attributable to the browser.
So, the subsequent step is to take a look at what occurs if we had been to hear for pointerup, similar to a few of the earlier examples, in the identical situations. In that case, we don’t get two occasions when clicking on the label factor. This additionally is smart as we’re not listening for the press occasion that’s being fired from the checkbox when the label is clicked.
There’s yet one more situation to think about. Do not forget that we’ve the choice to put the checkbox contained in the label factor, which is widespread with custom-built checkboxes for styling functions.
<label for=”publication”>
<enter sort=”checkbox” />
Subscribe to my publication
</label>
On this case, we actually solely have to put an occasion listener on the label and never the checkbox itself. This reduces the variety of occasion listeners concerned, and but we get the identical outcomes. Clicks occasions are fired as a single occasion for clicking on the label and two occasions in case you click on on the checkbox. The pointerup occasions do the identical as earlier than as effectively, single occasions if clicking on both factor.
These are all issues to think about when attempting to imitate the habits of the earlier examples with the button factor. Fortunately, there’s not an excessive amount of to it. Right here’s an instance of seeing what sort of interplay was achieved with a checkbox kind factor:
This instance contains each varieties of checkbox situations talked about above; the highest line is a checkbox/label mixture with the for attribute, and the underside one is a checkbox contained in the label. Clicking both one will output a message under them stating which kind of interplay occurred. So click on on one with a mouse or use the keyboard to navigate to them after which work together with Area or Enter; similar to the button examples, it ought to let you know which interplay sort causes it.
To make issues simpler by way of what number of occasion listeners I wanted, I wrapped the checkboxes with a container div that really responds to the checkbox interactions. You wouldn’t essentially must do it this fashion, but it surely was a handy manner to do that for my wants. To me, the enjoyable half is that the code from the final button instance above simply copied over to this instance.
const checkbox_container = doc.querySelector(‘#checkbox_container’);
const checkbox_msg = doc.querySelector(‘#checkbox_msg’);
operate chk_handler (e) {
if (e.sort === ‘click on’ && e.screenX + e.screenY > 0 && e.offsetX + e.offsetY > 0) {
return false;
} else if (e.pointerType) {
checkbox_msg.innerText = `Pointer Occasion: ${e.pointerType}`;
} else if (e.screenX + e.screenY === 0) {
checkbox_msg.innerText = ‘Keyboard Click on Occasion!’;
} else {
checkbox_msg.innerText = ‘One thing clicked this?’;
}
window.setTimeout(() => {
checkbox_msg.innerText = ‘ready…’;
}, 2000);
}
checkbox_container.addEventListener(‘pointerup’, chk_handler);
checkbox_container.addEventListener(‘click on’, chk_handler);
Meaning we may probably have the identical methodology being referred to as from the the assorted components that want the identical detecting the pointer sort performance. Technically, we may put a button contained in the checkbox container and it ought to nonetheless work the identical. Ultimately it’s as much as you implement such issues based mostly on the wants of the mission.
Radioing your radio buttons
Fortunately, for radio button inputs, we will nonetheless use the identical code with related HTML constructions. This principally works the identical as a result of checkboxes and radio buttons are basically created the identical manner—it’s simply that radio buttons have a tendency to come back in teams tied collectively whereas checkboxes are people even in a bunch. As you’ll see within the following instance, it really works the identical:
Once more, identical code hooked up to an identical container div to stop having to do numerous occasion listeners for each associated factor.
When a nuance might be a possibility
I felt that “nuance” was a great phrase selection as a result of the issues we coated right here will not be actually “points” with the everyday adverse connotation that phrase tends to have in programming circles. I all the time attempt to see things like studying experiences or alternatives. How can I leverage issues I do know at this time to push a bit of additional forward, or perhaps it’s time to discover outward into new issues to resolve issues I face. Hopefully, the examples above present a considerably completely different manner to take a look at issues relying on the wants of the mission at hand.
We even discovered a possibility to discover a browser inconsistency and discover a workaround to that scenario. Fortunately we don’t run into such issues that a lot with at this time’s browsers, however I may let you know tales about what we went by means of once I first began net improvement.
Regardless of this text focusing extra on kind components due to the press nuance they have a tendency to have with keyboard interactions, some or all of this may be expanded into different components. All of it is determined by the context of the scenario. For instance, I recall having to do a number of occasions on the identical components relying on the context many occasions; typically for accessibility and keyboard navigation causes. Have you ever constructed a {custom} <choose> factor to have a nicer design than the usual one, that additionally responds to keyboard navigation? You’ll see what I imply if you get there.
Simply keep in mind: a “click on” at this time doesn’t all the time must be what we expect a click on has all the time been.
The put up When a Click on is Not Only a Click on appeared first on CSS-Tips. You may assist CSS-Tips by being an MVP Supporter.


Subscribe to MarketingSolution.
Receive web development discounts & web design tutorials.
Now! Lets GROW Together!