
Configs eradicate painstaking handbook changes for particular person websites. As an alternative, you possibly can instantly apply your most well-liked plugin and uptime settings to limitless websites with a click on!
Better of all, they’re all carried out shortly from The Hub and WordPress admin.
Modify any config-supported plugin to your choice, save as a brand new config, apply your customized config to all your Hub-connected websites in a single click on — it’s that straightforward!
This text is your final information to be taught, know, and use configs to your WordPress websites. We’ll be going over:
What Are Configs?
Utilizing Default Configs
Creating Customized Configs
Fast Dev Configs Website Setup
Including Configs in The Hub
Taking Benefit of Uptime Configs
Upon getting configs up and operating, you’ll see for your self how straightforward and helpful it’s to regulate your settings on limitless websites.
Plus, with straightforward config entry from The Hub, WordPress administration simply acquired higher than ever.
Let’s get to it!
What Are Configs?
Configs are by far one of the helpful options you should utilize to assist construct and tweak your WordPress websites.
In a nutshell, they permit you to arrange any supported plugin to your choice, after which save these (non-unique) plugin settings as a brand new config – which you’ll be able to then apply to the remainder of your websites in a single hit.
Assume saving your online game progress, however for WordPress plugins.
Modify any config-supported plugin or device to your choice.
Save your plugin settings as a brand new config.
Apply your config to all of your Hub-connected websites in a click on.
Repeat each time a brand new vital plugin characteristic is added.
You possibly can create new configs in WordPress or The Hub, and so they mechanically sync throughout to the one another.
Observe that you may additionally use configs WITHOUT The Hub, you’ll simply have to save lots of and add them to your websites manually – which can nonetheless save time – however gained’t be as quick as one-click making use of them by way of The Hub.
At the moment configs can be utilized with SmartCrawl, Defender, Smush, Hummingbird, and Uptime (Forminator, Branda, and Automate coming quickly!).
Lastly, you’ve got the choice of utilizing our default configs (that are already arrange and optimized by our skilled crew), or you possibly can create your personal customized configs.
Utilizing Default Configs
We’ll first take a look at the right way to use default configs from the WordPress admin.
They’re an effective way to get began with configs, particularly in the event you’d desire to skip the configuration course of. Our default choices will go well with most customers and are an incredible basis to construct from.
On this walkthrough, I’ll be utilizing Defender.
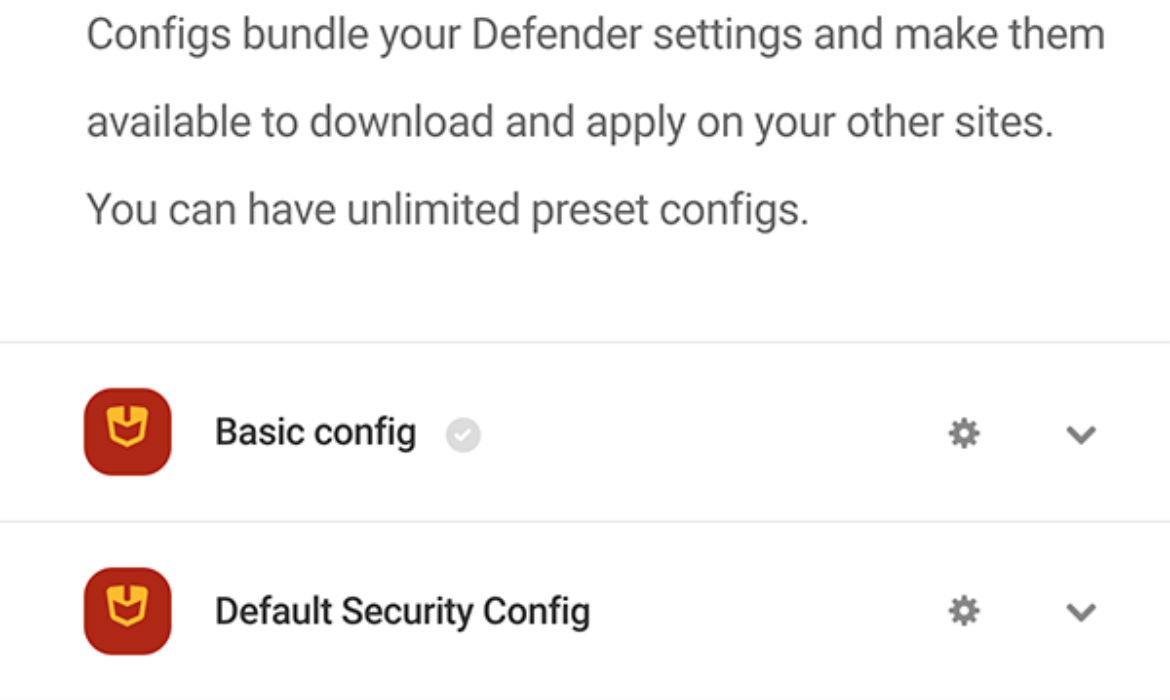
In Defender’s dashboard, you possibly can see that there’s a piece labeled Preset Configs.
It reveals what’s included (Fundamental Config and Default Safety Config), Handle Choices, and Save New.
That is positioned extra in direction of the underside of the web page in Defender’s dashboard.
You possibly can view the main points of every one by clicking on the dropdown arrow, exhibiting you what’s activated and what’s not.
Right here’s a take a look at the Fundamental Config.
A lot of the suggestions are lively.
From right here, it’s a matter of making use of or downloading the config. It’s carried out by clicking the gear icon and Obtain.
As talked about earlier, the obtain choice is principally for non-Hub customers who wish to nonetheless add their configs to different websites.
One-click is all it takes.
By tapping Apply, Defender will be sure to wish to proceed and recommends a backup to your web site.
The entire plugins ask if you wish to proceed earlier than doing so.
If you wish to make this config lively, hit Apply, and also you’re all set!
Now you can transfer to The Hub and apply this identical config to all of your different websites in bulk, however we’ll get to that quickly.
Alright, now that you understand how to make use of default configs, let’s arrange a totally personalized one.
Creating Customized Configs
Making a customized config is a solution to arrange plugin configurations to your requirements and choice.
It may be carried out from WordPress or The Hub, and they are often utilized to limitless WordPress websites.
Let’s set one up in WordPress utilizing Defender once more.
We’ll begin by assuming you’ve already activated related Defender settings and instruments.
When you’ve carried out this it’s so simple as hitting Save New within the Configs part.
Save new will get you a brand new config shortly and simply!
When hitting Save New, a brand new field will seem. That is the place you possibly can add a Title and Description of the config.
Then, click on Save, and the entire configurations you’ve got saved at the moment shall be accessible as a brand new config.
An ideal config for Dev Man.
It should then seem together with your different configs, the place you possibly can activate, edit title and outline, or delete.
As you possibly can see, the newest config is included.
The brand new config can be able to be activated or downloaded and utilized to as many websites as you need.
Should you’re in The Hub, you’ll see that this new config can be accessible right here. It’s beneath My Configs.
The brand new config is ready!
Talking of The Hub, now it’s time to see how straightforward it’s to use configs to limitless websites with a few clicks.
Including Configs in The Hub
From the My Websites space it is best to see the Configs tab.
It’s all simply accessible in The Hub!
When you click on on Configs, you’ll see you possibly can entry both our Default Configs or any customized configs you’ve created in My Configs.
For this instance, we’ll present you the right way to apply a default config, however the course of for making use of customized configs is precisely the identical.
The entire default plugin configurations that include The Hub are included.
Subsequent, you’ll see the choice to Apply to web site(s) and an ellipsis by every plugin and repair.
To use this config to your web site(s), click on Apply to web site(s).
Every config has this feature.
Earlier than making use of, it’s also possible to take a look at what’s within the config by clicking the ellipsis.
When clicking this, you’ll hit Particulars, and it reveals you all that’s included, so you can also make a superb resolution about what websites you wish to apply it to.
For instance, right here is detailed details about the Efficiency Config and Hummingbird Professional.
It reveals the date it was created, what’s lively/inactive, what’s automated, and is damaged up into classes (e.g. Superior Instruments).
Every thing from Settings to Superior Instruments may be seen intimately.
Like what you see, and also you need this config utilized to a selected web site? Or limitless websites? You are able to do that from right here by clicking Apply.
Clicking Apply will get this config in movement.
After hitting Apply, you’re given the choice so as to add configs for one or quite a few websites.
You are able to do this individually or all of sudden by tapping Choose All.
Select as many websites as you wish to apply configs to.
When hitting Choose All, you’ll discover any web site with the plugin not lively gained’t be included.
Plus, it gives you the whole quantity of web sites the config is utilized to.
That is utilized to 4 websites, and one of many websites doesn’t have the plugin lively.
Upon getting the websites, you wish to apply configs to, hit Apply to web site — and also you’re all set!
Need extra comfort?
Configs may also be enabled straight from The Hub Overview.
Right here’s an instance of saving or making use of an Uptime config.
Entry Uptime configs and your different WordPress plugins in a single place.
Should you click on on the ellipsis, it’ll open up a dropdown the place you’ve got an choice to Save Config and Apply Config.
Saving and making use of a config is as straightforward as ever from The Hub Overview.
Fast Configs Website Setup
When you’ve created totally different configs throughout totally different plugins, you possibly can simply add all of them to single websites directly utilizing our fast config web site setup.
From The Hub, go to a web site and click on on the ellipsis within the upper-righthand nook.
From there, you’ll see Fast Setup. Click on on that to get began.
Your configs at the moment are effectively on the way in which.
This brings up a quick information of configs and provides you the choice to Begin Setup.
From right here, it’s a matter of choosing what you wish to arrange by checking the field subsequent to the characteristic.
Any configs which are accessible (together with customized configs), you’ll be capable of choose from the dropdown the place it says Choose Config. Choose from the dropdown the configs you wish to use.
Click on Begin Setup to begin the configs.
Upon getting the DEV configs sorted the way in which you need, click on Begin Setup.
It’s only a matter of selecting what configs to use and the place.
And identical to that, your configs are attributed to your WordPress web site!
Observe: We advocate not utilizing configs for brand-spanking new websites. It’s greatest to get established together with your plugins and options first in order that any performance isn’t disrupted (e.g. in the event you have been to allow a Defender config on a model new web site with masked login activated, you won’t be able to log into the positioning).
Take Benefit of Uptime Configs
Our uptime device means that you can monitor downtime and uptime, configure the notification threshold, and the e-mail recipient who you wish to preserve tabs in your chosen web site.
Uptime configs additionally work barely totally different to our common plugin configs, and customized uptime configs is usually a useful gizmo for companies or freelancers who handle many web sites and wish to prioritize them in a different way.
Set downtime & uptime alerts, the brink, and e-mail recipients.
For instance, you possibly can create particular uptime configs particularly for purchasers who’ve bought your prime tiered plans. On this case, your alerts might be set as much as immediately notify your prime builders.
Alternatively, for decrease paying, much less precedence websites – you would possibly solely have a ten min downtime alert, which is shipped to your intermediate builders.
Then merely save these two distinctive setups as configs, and apply to related websites primarily based on their precedence.
That’s the one instance anyway. The purpose is, you may get inventive with the way you customise this specific config device, and use it to your benefit.
Just like the others, Uptime configs may be present in your default and customized config dashboards.
Uptime is true within the combine with the remainder of the configs.
For extra on Uptime, be sure you take a look at our documentation.
Go Massive and Config
As you possibly can see, configs are a BIG benefit to your WordPress administration. They put you within the driver’s seat relating to your WordPress websites settings!
Configs streamline every little thing, so that you don’t have to regulate settings for every web site that you’ve. They’re a superb one-and-done resolution.
You’ll want to give them a spin right this moment on limitless websites with our supported plugins and Uptime. Should you don’t have The Hub and wish to take a look at all that was coated, join a free 7-day trial. You’ll additionally get entry to all of our award-winning premium plugins, 24-7 assist, and extra!
Now that you understand how to make use of them, there’s nothing else to configure out.


Subscribe to MarketingSolution.
Receive web development discounts & web design tutorials.
Now! Lets GROW Together!