
We can’t speak about net improvement with out speaking about Responsive Design. It’s only a given today and has been for a few years. Media queries are part of Responsive Design and so they aren’t going anyplace. Because the introduction of media queries (actually a long time in the past), CSS has advanced to the factors that there are plenty of methods that may assist us drastically scale back the utilization of media queries we use. In some instances, I’ll present you how one can change a number of media queries with just one CSS declaration. These approaches may end up in much less code, be simpler to take care of, and be extra tied to the content material at hand.
Let’s first check out some extensively used strategies to construct responsive layouts with out media queries. No surprises right here — these strategies are associated to flexbox and grid.
Utilizing flex and flex-wrap
Within the above demo, flex: 400px units a base width for every ingredient within the grid that is the same as 400px. Every ingredient wraps to a brand new line if there isn’t sufficient room on the at the moment line to carry it. In the meantime, the weather on every line develop/stretch to fill any remaining area within the container that’s leftover if the road can’t match one other 400px ingredient, and so they shrink again down so far as 400px if one other 400px ingredient can certainly squeeze in there.
Let’s additionally keep in mind that flex: 400px is a shorthand equal to flex: 1 1 400px (flex-grow: 1, flex-shrink: 1, flex-basis: 400px).
What now we have thus far:
✔️ Solely two strains of code❌ Constant ingredient widths within the footer❌ Management the variety of gadgets per row❌ Management when the gadgets wrap
Utilizing auto-fit and minmax
Just like the earlier technique, we’re setting a base width—due to repeat(auto-fit, minmax(400px, 1fr))—and our gadgets wrap if there’s sufficient area for them. This time, although we’re reaching for CSS Grid. Meaning the weather on every line additionally develop to fill any remaining area, however in contrast to the flexbox configuration, the final row maintains the identical width as the remainder of the weather.
So, we improved one in all necessities and solved one other, but in addition launched a brand new subject since our gadgets can’t shrink under 400px which can result in some overflow.
✔️ Just one line of code✔️ Constant ingredient widths within the footer❌ Management the variety of gadgets per row❌ Gadgets develop, however don’t shrink❌ Management when the gadgets wrap
Each of the methods we simply checked out are good, however we additionally now see they arrive with a number of drawbacks. However we are able to overcome these with some CSS trickery.
Management the variety of gadgets per row
Let’s take our first instance and alter flex: 400px to flex: max(400px, 100%/3 – 20px).
Resize the display and spot that every row by no means has greater than three gadgets, even on an excellent large display. We’ve got restricted every line to a most of three parts, which means every line solely incorporates between one and three gadgets at any given time.
Let’s dissect the code:
When the display width will increase, the width of our container additionally will increase, which means that 100%/3 will get larger than 400px sooner or later.Since we’re utilizing the max() perform because the width and are dividing 100% by 3 in it, the most important any single ingredient could be is simply one-third of the general container width. So, we get a most of three parts per row.When the display width is small, 400px takes the lead and we get our preliminary conduct.
You may also be asking: What the heck is that 20px worth within the system?
It’s twice the grid template’s hole worth, which is 10px occasions two. When now we have three gadgets on a row, there are two gaps between parts (one on every on the left and proper sides of the center ingredient), so for N gadgets we should always use max(400px, 100%/N – (N – 1) * hole). Sure, we have to account for the hole when defining the width, however don’t fear, we are able to nonetheless optimize the system to take away it!
We are able to use max(400px, 100%/(N + 1) + 0.1%). The logic is: we inform the browser that every merchandise has a width equal to 100%/(N + 1) so N + 1 gadgets per row, however we add a tiny share ( 0.1%)—thus one of many gadgets wraps and we finish with solely N gadgets per row. Intelligent, proper? No extra worrying concerning the hole!
Now we are able to management the most variety of gadgets per row which give us a partial management over the variety of gadgets per row.
The identical will also be utilized to the CSS Grid technique as properly:
Observe that right here I’ve launched customized properties to manage the completely different values.
We’re getting nearer!
✔️ Just one line of code✔️ Constant ingredient widths within the footer⚠️ Partial management of the variety of gadgets per row❌ Gadgets develop, however don’t shrink❌ Management when the gadgets wrap
Gadgets develop, however don’t shrink
We famous earlier that utilizing the grid technique might result in overflow if the bottom width is larger than the container width. To beat this we modify:
max(400px, 100%/(N + 1) + 0.1%)
…to:
clamp(100%/(N + 1) + 0.1%, 400px, 100%)
Breaking this down:
When the display width is huge, 400px is clamped to 100%/(N + 1) + 0.1%, sustaining our management of the utmost variety of gadgets per row.When the display width is small, 400px is clamped to 100% so our gadgets by no means exceed the container width.
We’re getting even nearer!
✔️ Just one line of code✔️ Constant ingredient widths within the footer⚠️ Partial management of the variety of gadgets per row✔️ Gadgets develop and shrink❌ Management when the gadgets wrap
Management when the gadgets wrap
To this point, we’ve had no management over when parts wrap from one line to a different. We don’t actually know when it occurs as a result of it relies upon quite a lot of issues, like the bottom width, the hole, the container width, and many others. To manage this, we’re going to change our final clamp() system, from this:
clamp(100%/(N + 1) + 0.1%, 400px, 100%)
…to:
clamp(100%/(N + 1) + 0.1%, (400px – 100vw)*1000, 100%)
I can hear you screaming about that crazy-looking math, however bear with me. It’s simpler than you may suppose. Right here’s what’s occurring:
When the display width (100vw) is larger than 400px, (400px – 100vw) ends in a adverse worth, and it will get clamped right down to 100%/(N + 1) + 0.1%, which is a optimistic worth. This offers us N gadgets per row.When the display width (100vw) is lower than 400px, (400px – 100vw) is a optimistic worth and multiplied by a giant worth that’s clamped to the 100%. This ends in one full-width ingredient per row.
Hey, we made our first media question with out a actual media question! We’re updating the variety of gadgets per row from N to 1 due to our clamp() system. It must be famous that 400px behave as a breakpoint on this case.
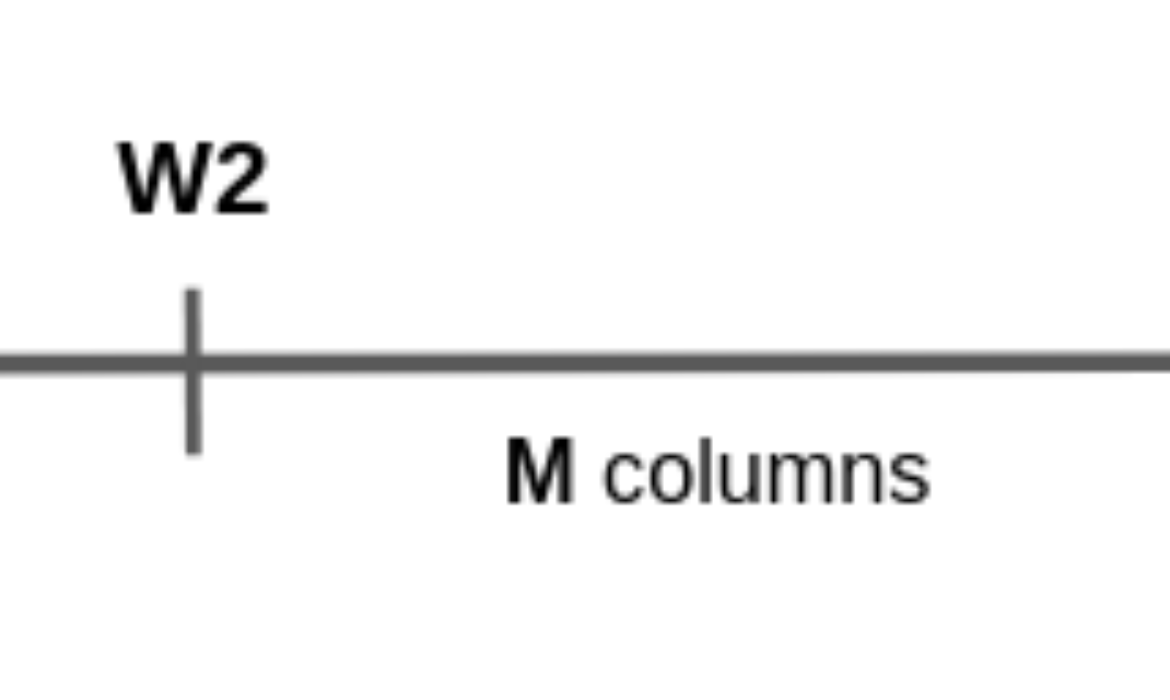
What about: from N gadgets per row to M gadgets per row?
We are able to completely try this by updating our container’s clamped width:
clamp(100%/(N + 1) + 0.1%, (400px – 100vw)*1000, 100%/(M + 1) + 0.1%)
I believe you in all probability get the trick by now. When the display width is larger than 400px we fall into the primary rule (N gadgets per row). When the display width is smaller than 400px, we fall into the second rule (M gadgets per row).
There we go! We are able to now management the variety of gadgets per row and when that quantity ought to change—utilizing solely CSS customized properties and one CSS declaration.
✔️ Just one line of code✔️ Constant ingredient widths within the footer✔️ Full management of the variety of gadgets per row✔️ Gadgets develop and shrink✔️ Management when the gadgets wrap
Extra examples!
Controlling the variety of gadgets between two values is sweet, however doing it for a number of values is even higher! Let’s strive going from N gadgets per row to M gadgets per row, down to at least one merchandise pre row.
Our system turns into:
clamp(clamp(100%/(N + 1) + 0.1%, (W1 – 100vw)*1000,100%/(M + 1) + 0.1%), (W2 – 100vw)*1000, 100%)
A clamp() inside a clamp()? Sure, it begins to get a giant prolonged and complicated however nonetheless straightforward to grasp. Discover the W1 and W2 variables in there. Since we’re altering the variety of gadgets per rows between three values, we’d like two “breakpoints” (from N to M, and from M to 1).
Right here’s what’s occurring:
When the display width is smaller than W2, we clamp to 100%, or one merchandise per row.When the display width is bigger than W2, we clamp to the primary clamp().In that first clamp, when the display width is smaller than W1, we clamp to 100%/(M + 1) + 0.1%), or M gadgets per row.In that first clamp, when the display width is larger than W1, we clamp to 100%/(N + 1) + 0.1%), or N gadgets per row.
We made two media queries utilizing just one CSS declaration! Not solely this, however we are able to regulate that declaration due to the CSS customized properties, which suggests we are able to have completely different breakpoints and a unique variety of columns for various containers.
What number of media queries do now we have within the above instance? Too many to rely however we won’t cease there. We are able to have much more by nesting one other clamp() to get from N columns to M columns to P columns to at least one column. (😱)
clamp(
clamp(
clamp(100%/(var(–n) + 1) + 0.1%, (var(–w1) – 100vw)*1000,
100%/(var(–m) + 1) + 0.1%),(var(–w2) – 100vw)*1000,
100%/(var(–p) + 1) + 0.1%),(var(–w3) – 100vw)*1000,
100%), 1fr))
from N columns to M columns to P columns to 1 column
As I discussed on the very starting of this text, now we have a responsive structure with none single media queries whereas utilizing only one CSS declaration—positive, it’s a prolonged declaration, however nonetheless counts as one.
A small abstract of what now we have:
✔️ Just one line of code✔️ Constant ingredient widths within the footer✔️ Full management of the variety of gadgets per row✔️ Gadgets develop and shrink✔️ Management when the gadgets wrap✔️ Straightforward to replace utilizing CSS customized properties
Let’s simulate container queries
Everybody is worked up about container queries! What makes them neat is that they think about the width of the ingredient as a substitute of the viewport/display. The thought is that a component can adapt based mostly on the width of its mum or dad container for extra fine-grain management over how parts reply to completely different contexts.
Container queries aren’t formally supported anyplace on the time of this writing, however we are able to definitely mimic them with our technique. If we modify 100vw with 100% all through the code, issues are based mostly on the .container ingredient’s width as a substitute of the viewport width. So simple as that!
Resize the under containers and see the magic in play:
The variety of columns change based mostly on the container width which suggests we’re simulating container queries! We’re mainly doing that simply by altering viewport models for a relative share worth.
Extra methods!
Now that we are able to management the variety of columns, let’s discover extra methods that permit us to create conditional CSS based mostly on both the display dimension (or the ingredient dimension).
Conditional background shade
Some time in the past somebody on StackOverflow requested whether it is potential to vary the colour of a component based mostly on its width or peak. Many stated that it’s unimaginable or that it might require a media question.
However I’ve discovered a trick to do it with out a media question:
div {
background:
linear-gradient(inexperienced 0 0) 0 / max(0px,100px – 100%) 1px,
pink;
}
We’ve got a linear gradient layer with a width equal to max(0px,100px – 100%) and a peak equal to 1px. The peak doesn’t actually matter for the reason that gradient repeats by default. Plus, it’s a one shade gradient, so any peak will do the job.100% refers back to the ingredient’s width. If 100% computes to a price larger than 100px, the max() provides us 0px, which implies that the gradient doesn’t present, however the comma-separated pink background does.If 100% computes to a price smaller than 100px, the gradient does present and we get a inexperienced background as a substitute.
In different phrases, we made a situation based mostly on the width of the ingredient in comparison with 100px!
The identical logic could be based mostly on a component’s peak as a substitute by rearranging the place that 1px worth goes: 1px max(0px,100px – 100%). We are able to additionally think about the display dimension through the use of vh or vw as a substitute of %. We are able to even have greater than two colours by including extra gradient layers.
div {
background:
linear-gradient(purple 0 0) 0 /max(0px,100px – 100%) 1px,
linear-gradient(blue 0 0) 0 /max(0px,300px – 100%) 1px,
linear-gradient(inexperienced 0 0) 0 /max(0px,500px – 100%) 1px,
pink;
}
Toggling a component’s visibility
To point out/cover a component based mostly on the display dimension, we typically attain for a media question and plop a traditional show: none in there. Right here is one other concept that simulates the identical conduct, solely with out a media question:
div {
max-width: clamp(0px, (100vw – 500px) * 1000, 100%);
max-height: clamp(0px, (100vw – 500px) * 1000, 1000px);
overflow: hidden;
}
Primarily based on the display width (100vw), we both get clamped to a 0px worth for the max-height and max-width (which means the ingredient is hidden) or get clamped to 100% (which means the ingredient is seen and by no means higher than full width). We’re avoiding utilizing a share for the max-height because it fails. That’s why we’re utilizing a giant pixel worth (1000px).
Discover how the inexperienced parts disappear on small screens:
It must be famous that this technique will not be equal to the toggle of the show worth. It’s extra of a trick to present the ingredient 0×0 dimensions, making it invisible. It will not be appropriate for all instances, so use it with warning! It’s extra a trick for use with ornamental parts the place we gained’t have accessibility points. Chris wrote about how to cover content material responsibly.
It’s necessary to notice that I’m utilizing 0px and never 0 inside clamp() and max(). The latter makes invalidates property. I gained’t dig into this however I’ve answered a Stack Overflow query associated to this quirk if you would like extra element.
Altering the place of a component
The next trick is helpful after we cope with a set or completely positioned ingredient. The distinction right here is that we have to replace the place based mostly on the display width. Just like the earlier trick, we nonetheless depend on clamp() and a system that appears like this: clamp(X1,(100vw – W)*1000, X2).
Principally, we’re going to swap between the X1 and X2 values based mostly on the distinction, 100vw – W, the place W is the width that simulates our breakpoint.
Let’s take an instance. We would like a div positioned on the left edge (high: 50%; left:0) when the display dimension is smaller than 400px, and place it someplace else (say high: 10%; left: 40%) in any other case.
div {
–c:(100vw – 400px); /* we outline our situation */
high: clamp(10%, var(–c) * -1000, 50%);
left: clamp(0px, var(–c) * 1000, 40%);
}
First, I’ve outlined the situation with a CSS customized property to keep away from the repetition. Observe that I additionally used it with the background shade switching trick we noticed earlier—we are able to both use (100vw – 400px) or (400px – 100vw), however take note of the calculation later as each don’t have the identical signal.
Then, inside every clamp(), we all the time begin with the smallest worth for every property. Don’t incorrectly assume that we have to put the small display worth first!
Lastly, we outline the signal for every situation. I picked (100vw – 400px), which implies that this worth might be adverse when the display width is smaller than 400px, and optimistic when the display width is larger than 400px. If I would like the smallest worth of clamp() to be thought of under 400px then I do nothing to the signal of the situation (I maintain it optimistic) but when I would like the smallest worth to be thought of above 400px I must invert the signal of the situation. That’s why you see (100vw – 400px)*-1000 with the highest property.
OK, I get it. This isn’t the extra simple idea, so let’s do the other reasoning and hint our steps to get a greater thought of what we’re doing.
For high, now we have clamp(10%,(100vw – 400px)*-1000,50%) so…
if the display width (100vw) is smaller than 400px, then the distinction (100vw – 400px) is a adverse worth. We multiply it with one other huge adverse worth (-1000 on this case) to get a giant optimistic worth that will get clamped to 50%: Meaning we’re left with high: 50% when the display dimension is smaller than 400px.if the display width (100vw) is larger than 400px, we finish with: high: 10% as a substitute.
The identical logic applies to what we’re declaring on the left property. The one distinction is that we multiply with 1000 as a substitute of -1000 .
Right here’s a secret: You don’t actually need all that math. You may experiment till you get it good values, however for the sake of the article, I would like to elucidate issues in a approach that results in constant conduct.
It must be famous {that a} trick like this works with any property that accepts size values (padding, margin, border-width, translate, and many others.). We aren’t restricted to altering the place, however different properties as properly.
Demos!
Most of you’re in all probability questioning if any of those ideas are in any respect sensible to make use of in a real-world use case. Let me present you a number of examples that may (hopefully) persuade you that they’re.
Progress bar
The background shade altering trick makes for an important progress bar or any related ingredient the place we have to present a unique shade based mostly on development.
That demo is a reasonably easy instance the place I outline three ranges:
Pink: [0% 30%]Orange: [30% 60%]Inexperienced: [60% 100%]
There’s no wild CSS or JavaScript to replace the colour. A “magic” background property permits us to have a dynamic shade that modifications based mostly on computed values.
Editable content material
It’s widespread to present customers a option to edit content material. We are able to replace shade based mostly on what’s entered.
Within the following instance, we get a yellow “warning” when coming into greater than three strains of textual content, and a pink “warning” if we go above six strains. This may a option to scale back JavaScript that should detect the peak, then add/take away a specific class.
Timeline structure
Timelines are nice patterns for visualizing key moments in time. This implementation makes use of three methods to get one with none media queries. One trick is updating the variety of columns, one other is hiding some parts on small screens, and the final one is updating the background shade. Once more, no media queries!
When the display width is under 600px, the entire pseudo parts are eliminated, altering the structure from two columns to at least one column. Then the colour updates from a blue/inexperienced/inexperienced/blue sample to a blue/inexperienced/blue/inexperienced one.
Responsive card
Right here’s a responsive card method the place CSS properties replace based mostly on the viewport dimension. Usually, we would anticipate the structure to transition from two columns on giant screens to at least one column on small screens, the place the cardboard picture is stacked both above or under the content material. On this instance, nonetheless, we modify the place, width, peak, padding, and border radius of the picture to get a completely completely different structure the place the picture sits beside the cardboard title.
Speech bubbles
Want some nice-looking testimonials on your services or products? These responsive speech bubbles work nearly anyplace, even with out media queries.
Mounted button
You already know these buttons which are generally mounted to the left or proper fringe of the display, often for used to hyperlink up a contact for or survey? We are able to have a type of on giant screens, then remodel it right into a persistent round button mounted to the bottom-right nook on small screens for extra handy faucets.
Mounted alert
Yet one more demo, this time for one thing that would work for these GDPR cookie notices:
Conclusion
Media queries have been a core ingredient for responsive designs for the reason that time period responsive design was coined years in the past. Whereas they definitely aren’t going anyplace, we coated a bunch of newer CSS options and ideas that permit us to rely much less usually on media queries for creating responsive layouts.
We checked out flexbox and grid, clamp(), relative models, and mixed them collectively to do all types of issues, from altering the background of a component based mostly on its container width, transferring positions at sure display sizes, and even mimicking as-of-yet-unreleased container queries. Thrilling stuff! And all with out one @media within the CSS.
The purpose right here is to not get rid or change media queries nevertheless it’s extra to optimize and scale back the quantity of code particularly that CSS has advanced quite a bit and now now we have some highly effective instrument to create conditional kinds. In different phrases, it’s superior to see the CSS characteristic set develop in ways in which make our lives as front-enders simpler whereas granting us superpowers to manage how our designs behave like now we have by no means had earlier than.
The put up Responsive Layouts, Fewer Media Queries appeared first on CSS-Tips. You may help CSS-Tips by being an MVP Supporter.


Subscribe to MarketingSolution.
Receive web development discounts & web design tutorials.
Now! Lets GROW Together!