
We’re going to create a contact type with Subsequent.js and Netlify that shows a affirmation display screen and options enhanced spam detection.
Subsequent.js is a robust React framework for growing performant React functions that scale. By integrating a Subsequent.js website with Netlify’s expertise, we are able to shortly get a working contact type up and operating with out having to write down any server-side code.
Not solely is it a comparatively quick course of to arrange varieties to be processed by Netlify, but it surely’s additionally free to get began (with as much as 100 free submissions/per website hosted on Netlify). Type submissions mechanically undergo Netlify’s built-in spam filter which makes use of Akismet and there are additionally choices that may be configured to extend the extent of spam detection.
Creating the contact type
Throughout the Subsequent.js software we should always create a ContactForm part to render the contact type within the contact web page. In case you’d like for this way to render at /contact, then the ContactForm part under with labels and enter fields must be used throughout the pages/contact.js file.
const ContactForm = (
<type
title=”contact-form”
methodology=”POST”
motion=”contact/?success=true”
>
<label htmlFor=”title”>Title *</label>
<enter
id=”title”
title=”title”
required
kind=”textual content”
/>
<label htmlFor=”firm”>Firm *</label>
<enter id=”firm” title=”firm” required kind=”textual content” />
<label htmlFor=”electronic mail”>E-mail Deal with *</label>
<enter id=”electronic mail” kind=”electronic mail” title=”electronic mail” required />
<label htmlFor=”message”>Message *</label>
<textarea id=”message” title=”message” required></textarea>
<button kind=”submit”>Submit</button>
</type>
);
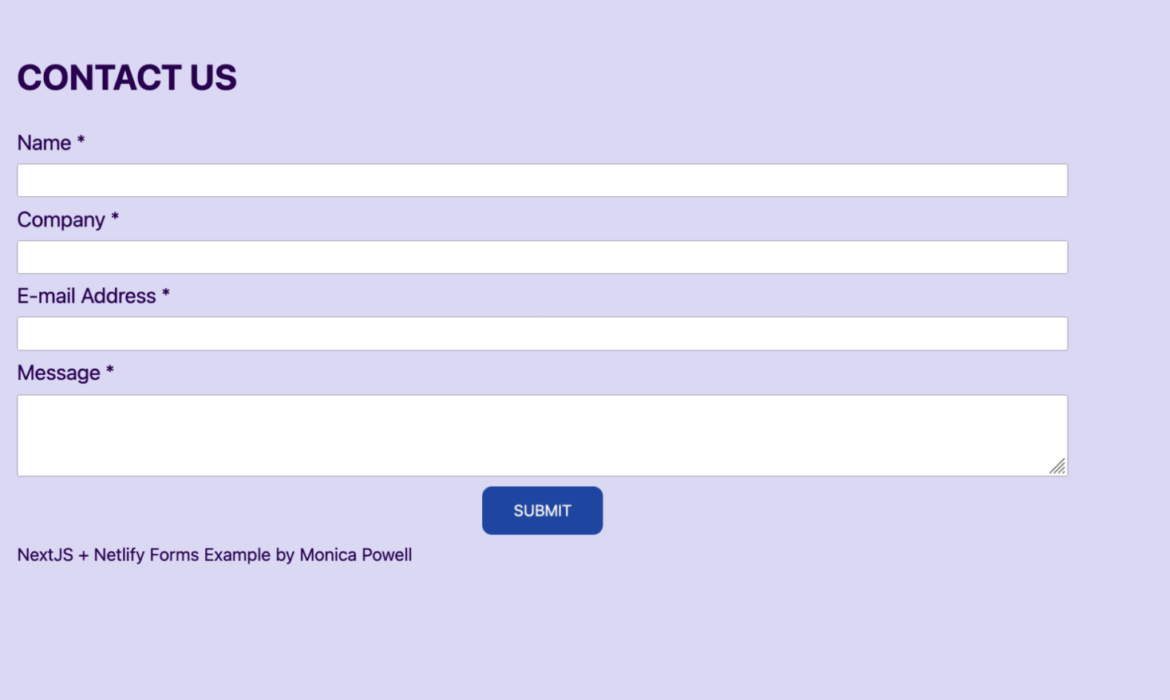
The above markup is required to render a type with a discipline for Title, Firm, E-mail tackle and message with a submit button. When submitting the shape, primarily based on the worth of the shape’s motion, it ought to redirect to contact/?success=true from /contact. Proper now there’s not but a distinction between the web page’s look with and with out the success question parameter, however we’ll replace that later.
Our Contact.js file appears like this up to now:
import React from “react”;
const ContactPage = () => {
const ContactForm = (/* code in above code pattern*/)
return (
<div>
<h1>Contact Us</h1>
{ContactForm}
</div>
);
};
export default ContactPage;
Now that we now have the fundamental type arrange, the true magic will occur after we add extra info for Netlify to auto-recognize the shape throughout future website deployments. To perform this we should always replace the shape to have the attribute data-netlify=”true” and a hidden enter discipline that comprises the title of our contact type. In Netlify, as soon as we navigate to our website within the dashboard after which click on on the “varieties” tab we can view our type responses primarily based on the title that we’ve put in our hidden discipline. It’s necessary that you probably have a number of varieties inside a website that they’ve distinctive names in order that they’re recorded correctly in Netlify.
<type
methodology=”POST”
title=”contact-form”
motion=”contact/?success=true”
data-netlify=”true”
>
<enter kind=”hidden” title=”form-name” worth=”contact-form” />
After efficiently deploying the location to Netlify with the data-netlify attribute and the form-name discipline then we are able to go to the deployed model of the location and fill out the shape. Upon submitting the shape and navigating to https://app.netlify.com/websites/site-name/varieties (the place site-name is the title of your website) then our most up-to-date type submission ought to seem if we now have efficiently arrange the shape.
Redirect to affirmation display screen
As a way to enhance the consumer expertise, we should always add some logic to redirect to a affirmation display screen on type submission when the URL adjustments to /contact/?success=true. There may be additionally the choice to redirect to a completely completely different web page because the motion when the shape is submitted however utilizing question params we are able to obtain one thing related with the Subsequent Router. We are able to accomplish this by creating a brand new variable to find out if the affirmation display screen or the shape must be seen primarily based on the question parameter. The subsequent/router which is imported with import { useRouter } from “subsequent/router”; can be utilized to retrieve the present question params.
const router = useRouter();
const confirmationScreenVisible = router.question?.success && router.question.success === “true”;
In our case, the affirmation display screen and type can by no means be seen on the similar time; subsequently, the next assertion can be utilized to find out if the shape is seen or not.
const formVisible = !confirmationScreenVisible;
To provide customers the choice to resubmit the shape, we are able to add a button to the affirmation display screen to reset the shape by clearing the question params. Utilizing router.exchange (as a substitute of router.push) not solely updates the web page however replaces the present web page within the historical past to the model with out question params.
<button onClick={() => router.exchange(“/contact”, undefined, { shallow: true })}> Submit One other Response </button>
We are able to then conditionally render the shape primarily based on whether or not or not the shape is seen with:
{formVisible ? ContactForm : ConfirmationMessage}
Placing all of it collectively, we are able to use the next code to conditionally render the shape primarily based on the question params (that are up to date when the shape is submitted):
import React, { useState } from “react”;
import { useRouter } from “subsequent/router”;
const ContactPage = () => {
const [submitterName, setSubmitterName] = useState(“”);
const router = useRouter();
const confirmationScreenVisible =
router.question?.success && router.question.success === “true”;
const formVisible = !confirmationScreenVisible;
const ConfirmationMessage = (
<React.Fragment>
<p>
Thanks for submitting this way. Somebody ought to get again to you inside 24-48 hours.
</p>
<button onClick={() => router.exchange(“/contact”, undefined, { shallow: true })}> Submit One other Response </button>
</React.Fragment>
);
const ContactForm = (/* code in first code instance */);
return (
<div>
<h1>Contact Us</h1>
{formVisible ? ContactForm : ConfirmationMessage}
</div>
);
};
export default ContactPage;
Including a hidden bot discipline
Now that the core performance of our type is working, we are able to add extra spam detection to our type along with the bottom spam detection as a result of Akismet is included with all Netlify Varieties by default. We are able to allow this by including data-netlify-honeypot=”bot-field” to our type.
<type
className=”container”
methodology=”POST”
title=”contact-form”
motion=”contact/?success=true”
data-netlify=”true”
data-netlify-honeypot=”bot-field”
>
We additionally have to create a brand new hidden paragraph that comprises a label named bot-field that comprises the enter. This discipline is “seen” to bots, however not people. When this honeypot type discipline is crammed, Netlify detects a bot after which the submission is flagged as spam.
<p hidden>
<label>
Don’t fill this out: <enter title=”bot-field” />
</label>
</p>
Additional customizations
We may discover one other spam prevention choice that Netlify helps by including reCAPTCHA 2 to a Netlify type.We may replace the shape to enable uploaded information with enter <enter kind=”file”>.We may arrange notifications for type submissions. That occurs over at https://app.netlify.com/websites/[your-site-name]/settings/varieties the place we are able to embody a customized topic discipline (which will be hidden) for electronic mail notifications.
Full code
The code for the total website code is accessible over at GitHub.
Bonus
The next code consists of the whole lot we coated in addition to the logic for setting a customized topic line with what was submitted within the title discipline.
import React, { useState } from “react”;
import { useRouter } from “subsequent/router”;
const ContactPage = () => {
const [submitterName, setSubmitterName] = useState(“”);
const router = useRouter();
const confirmationScreenVisible =
router.question?.success && router.question.success === “true”;
const formVisible = !confirmationScreenVisible;
const ConfirmationMessage = (
<React.Fragment>
<p>
Thanks for submitting this way. Somebody ought to get again to you
inside 24-48 hours.
</p>
<button onClick={() => router.exchange(“/contact”, undefined, { shallow: true })}> Submit One other Response </button>
</React.Fragment>
);
const ContactForm = (
<type
className=”container”
methodology=”POST”
title=”contact-form”
motion=”contact/?success=true”
data-netlify=”true”
data-netlify-honeypot=”bot-field”
>
<enter
kind=”hidden”
title=”topic”
worth={`You’ve got bought mail from ${submitterName}`}
/>
<enter kind=”hidden” title=”form-name” worth=”contact-form” />
<p hidden>
<label>
Don’t fill this out: <enter title=”bot-field” />
</label>
</p>
<label htmlFor=”title”>Title *</label>
<enter
id=”title”
title=”title”
required
onChange={(e) => setSubmitterName(e.goal.worth)}
kind=”textual content”
/>
<label htmlFor=”firm”>Firm *</label>
<enter id=”firm” title=”firm” required kind=”textual content” />
<label htmlFor=”electronic mail”>E-mail Deal with *</label>
<enter id=”electronic mail” kind=”electronic mail” title=”electronic mail” required />
<label htmlFor=”message”>Message *</label>
<textarea id=”message” title=”message” required/>
<button kind=”submit”>Submit</button>
</type>
);
return (
<div>
<h1>Contact Us</h1>
{formVisible ? ContactForm : ConfirmationMessage}
</div>
);
};
export default ContactPage;
The submit Methods to Create a Contact Type With Subsequent.js and Netlify appeared first on CSS-Methods. You may assist CSS-Methods by being an MVP Supporter.


Subscribe to MarketingSolution.
Receive web development discounts & web design tutorials.
Now! Lets GROW Together!