
So, you wish to give persona to your website by making it stand out from all different web sites on the market. To try this, you develop a customized design model, together with a sure mixture of colours, typography, spacing, animations, and others, and apply the model persistently all through your website.
An instance in case is that this identical web site, Smashing Journal. One of many goals of its huge redesign was to infuse the positioning with a uniquely distinctive persona. That’s why all avatars, the arrow button, and plenty of different components are all tilted, on the identical angle because the Smashing emblem is:
What about photographs? They will additionally participate within the distinctive design in order that guests looking your website will instantly acknowledge it just by trying on the content material. For example, I keep in mind The Verge’s previous daring design, which positioned hanging colours over its photographs:
Making use of model to the photographs could be achieved with CSS. Nevertheless, then the model is not going to be current when referencing the picture immediately (such because the picture shared in social media through the <meta property=”og:picture” content material=”{image-url}”> tag), making the picture devoid of persona.
The photographs embedded in social media when sharing our content material are of specific curiosity. These photographs ought to carry the persona of the positioning, for which the model should be embedded within the picture itself, as an alternative of being utilized through CSS. For example, in SmashingMag’s Twitter account, the article’s featured picture has a custom-made and constant model, giving it a novel persona:
Including the model to the photographs on our website could be accomplished manually (with Photoshop or another picture enhancing instrument), however enhancing photographs is effort-intensive. The photographs should be manipulated and re-uploaded to the positioning, for all of the potential sizes (such because the featured picture and every of the thumbnails) and all outlined units of kinds (as an example, a web page for the Black Friday gross sales might have its personal model).
It makes extra sense to automate this activity. Automation is doable when the design is predicated on a collection of transformations, to be utilized one after the opposite, resembling:
Including a watermark;
Making the picture spherical;
Rotating the picture to a sure angle;
Including a border, with a selected thickness and colour;
Including a shadow;
Cropping the picture to a sure facet ratio or mounted dimensions;
Cropping the picture across the face of the particular person;
Changing the picture to grayscale, or including hue;
Sharpening the picture.
By defining a listing of transformations, the duty to use the specified model to our photographs could be automated. Because of this, the trouble to provide a constant model all through the web site, and alter it at any time down the highway, is drastically diminished.
Making use of kinds all through the web site now turns into:
We preselect the kinds to be utilized to the photographs, for the entire website or a customized part, through configuration on the web site’s back-end;
We add the unique photographs.
Then, the photographs can be mechanically utilized transformations to provide the specified kinds, and available to be inserted into the web page through the web site’s media supervisor.
We will do precisely this through Cloudinary, a service that helps produce and ship optimum digital experiences. Being primarily based on the cloud, Cloudinary could be built-in with any website, primarily based on any stack or expertise. For this text, I’ll be utilizing its integration with WordPress and its plugin for WordPress v3.0 to reveal its transformation capabilities.
Let’s begin!
Including Transformations To The Photos
Cloudinary gives an intensive listing of transformations, together with all those I discussed earlier on and plenty of extra, to govern not solely photographs but additionally movies. Including the specified transformations to a picture’s URL, the picture could be modified in myriad methods. I’ll reveal this by making a thumbnail for a picture.
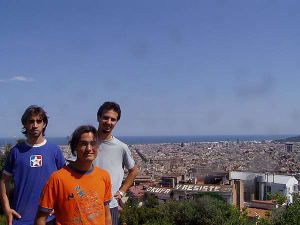
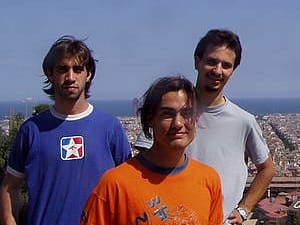
On this pic, I’m with a few buddies in sunny Barcelona:
An image of me and two buddies in sunny Barcelona (Giant preview)
This image in full measurement can be my put up’s featured picture. For the homepage, I wish to hyperlink to the put up utilizing a thumbnail 300 pixels broad. To scale the picture down, I connect transformation w_300 to the picture’s URL:
Picture
URL
The result’s this one:
Picture resized to 300px broad (Giant preview)
Being a scaled-down model of the unique picture, the individuals inside this thumbnail look small. Let’s make them larger, by cropping the picture. For that, we connect transformation c_crop after the earlier transformation:
Transformation
URL
Resized + cropped
https://res.cloudinary.com/dpelr4pk9/photographs/w_300,c_crop/v1636082490/wpPlayground/me-and-friends/me-and-friends.jpg
The result’s this one:
Picture resized and cropped (Giant preview)
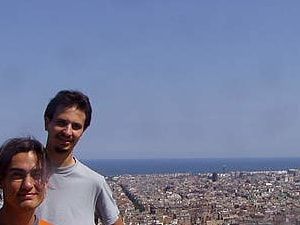
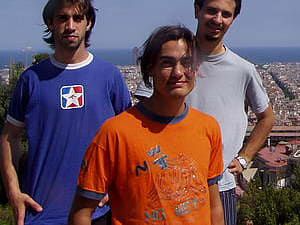
Yikes! What occurred? One in every of my buddies has been cropped out of the picture! Let’s put him again in by making use of the cropping across the south-west part of the picture through the gravity transformation g_south_west:
Transformation
URL
Resized + cropped + targeted
https://res.cloudinary.com/dpelr4pk9/photographs/w_300,c_crop,g_south_west/v1636082490/wpPlayground/me-and-friends/me-and-friends.jpg
The result’s this one:
Picture resized, cropped and targeted (Giant preview)
Okay, my pal is again, however now the heads of my two buddies have been chopped off! To repair this, Cloudinary gives a greater choice: utilizing transformation g_faces could have an AI establish the faces within the picture, and carry out the cropping round these:
Transformation
URL
Resized + cropped + targeted round faces
https://res.cloudinary.com/dpelr4pk9/photographs/w_300,c_crop,g_faces/v1636082490/wpPlayground/me-and-friends/me-and-friends.jpg
The result’s this one:
Picture resized, cropped and targeted round faces (Giant preview)
This appears to be like significantly better! Now, what would occur if there have been no individuals within the image, so we will’t use g_faces? Cloudinary gives a nonetheless higher choice: utilizing g_auto, an AI will mechanically determine which is essentially the most fascinating part of the picture, and carry out the cropping round it:
Transformation
URL
Resized + cropped + targeted round essentially the most fascinating content material
https://res.cloudinary.com/dpelr4pk9/photographs/w_300,c_crop,g_auto/v1636082490/wpPlayground/me-and-friends/me-and-friends.jpg
The result’s this one:
Picture resized, cropped and targeted round essentially the most fascinating content material (Giant preview)
Now the thumbnail appears to be like excellent.
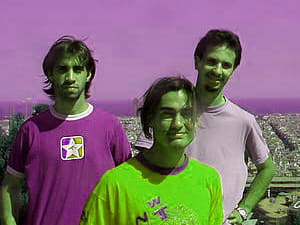
Lastly, I wish to apply some distinctive model that makes my website distinctive. I’ve determined to use the hue degree to 40, through transformation e_hue:40:
Transformation
URL
Resized + cropped + targeted + customized hue
https://res.cloudinary.com/dpelr4pk9/photographs/w_300,c_crop,g_auto,e_hue:40/v1636082490/wpPlayground/me-and-friends/me-and-friends.jpg
The result’s this one:
Picture resized, cropped, targeted and with distinctive hue degree (Giant preview)
I lastly bought it: the transformation I wish to apply to my photographs, to acquire the thumbnails for the homepage, is w_300,c_crop,g_auto,e_hue:40.
Serving The Most Optimum Photos
Along with utilizing picture transformations for styling, we will use them to compress photographs with the intention to load them sooner. Certainly, decreasing the dimensions of the photographs is exceptionally necessary with the intention to enhance the efficiency of the positioning.
Cloudinary is right to optimize efficiency, for 2 important causes:
The photographs are served through a CDN, positioned close to the consumer looking the positioning, drastically decreasing the latency of the request;
The service mechanically compresses the photographs to essentially the most optimum model, sparing this effort to the crew.
To be able to ship essentially the most optimum model of the picture, Cloudinary gives a few useful transformations:
f_auto: Mechanically makes use of essentially the most appropriate picture format, together with AVIF, WebP, PNG and JPG.
q_auto: Mechanically calculates and serves one of the best tradeoff between visible high quality and file measurement.
For example, if the browser helps the new AVIF format, then the served picture can be of kind picture/avif, producing vital financial savings in file measurement whereas not lowering the visible high quality. In any other case, it’s going to serve picture/webp if supported, or fall again to picture/png or picture/jpg (or another format).
Within the screenshot under, I’ve appended transformation f_auto,q_auto to the picture from earlier on, and loaded it in Firefox and Safari. Whereas in Safari the picture is retrieved as picture/jp2, in Firefox it’s served as picture/webp, thus transferring fewer bytes:
Reworking Photos In WordPress
Cloudinary has lately launched v3.0 of its WordPress plugin, with a number of useful new options. Let’s use this plugin to mechanically apply transformations to the photographs on a WordPress website.
If we’re not Cloudinary customers but, we will create an account without cost. When putting in the plugin, we might want to present the connection data of our Cloudinary account:
As soon as put in, the plugin’s dashboard will present statistics of the transformations, bandwidth and storage the web site is utilizing:
Within the “Basic settings” web page we will configure if to synchronize the uploaded photographs to Cloudinary mechanically or manually, underneath what folder to save lots of the photographs for the positioning (which is especially helpful if we’re utilizing Cloudinary for multiple website), and the place to host the photographs.
By default, photographs are hosted in each the Cloudinary cloud and the WordPress server, giving us the possibility to disable the Cloudinary plugin at any time with none knowledge loss:
Within the “Picture Settings” web page, we will outline world transformations to use to all photographs. By default, all photographs have properties “Picture format” and “Picture high quality” set to “Auto”, which (as defined earlier on) will produce essentially the most optimum model of the picture in keeping with the particular system and browser:
On this web page, we will additionally outline “Extra picture transformations”, to be utilized to all photographs. For example, I can outline right here transformation e_hue:40 to use a hue degree of 40 to all the photographs on my website.
We can be extra selective when making use of the model. We will outline transformations for a selected tag or class, which can be utilized to the media components added to the put up with that tag or class:
The opposite pages underneath the “Cloudinary” menu allow us to configure the overall choices of the plugin, in order that we will do all the following:
Outline transformations for movies (along with photographs);
Use lazy loading, which improves efficiency by loading a picture solely when it seems throughout the viewport;
Outline breakpoints for responsive photographs, which improves efficiency by permitting the browser to load the smallest picture that matches throughout the system’s display screen;
Configure Cloudinary’s Gallery block for the WordPress editor.
Making use of Transformations To Particular person Photos
Along with defining transformations to be utilized throughout the positioning, or for a selected tag or class, we will additionally apply transformations individually to a sure picture, proper when inserting the picture into the put up.
When opening the Media Supervisor, there can be a brand new tab “Cloudinary”. Clicking there we will browse all the photographs hosted in our account, and apply customized transformations to them. Because of this, a brand new picture can be created on the WordPress website, to be added to the put up as standard:
Making use of a person transformation (Giant preview)
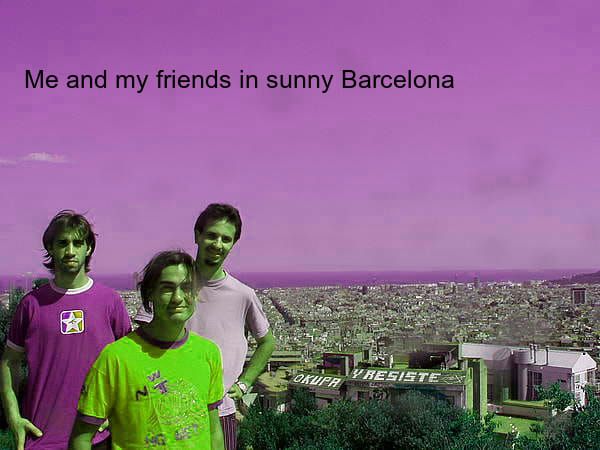
I additionally wish to add an overlay caption “Me and my buddies in sunny Barcelona” on the picture. To realize this, the transformation l_text:Arial_25:Me and my buddies in sunny Barcelona,g_north_west,y_70,x_25 will add an overlay textual content and place it on a selected place on prime of the picture:
Inserting an overlay textual content on the picture (Giant preview)
Now, for the reason that reworked picture is one more picture on the WordPress website, we will additionally use the WordPress editor so as to add the overlay textual content. For this, we will remodel the picture right into a Cowl block and add a caption:
Along with the WordPress editor, Cloudinary’s plugin can also be absolutely suitable with all well-liked web page builders, together with Elementor and Divi.
Conclusion
If we wish to make our web sites profitable, we have to pay particular consideration to 2 considerations:
Design
You’ll want to have the web site stand out from all different web sites on the market by giving it a novel persona.
Velocity
Be sure that the web site is as quick as potential for an optimum consumer expertise, and to attain the very best Core Internet Vitals in order that it could index greater in Google.
In each accounts, Cloudinary can assist us out. All it takes so as to add a customized design for our photographs is to pick out the specified transformations, and the picture (optimized to the particular browser and system) can be served from a CDN with knowledge facilities all around the world — delivering a super-fast expertise.
In case you have a WordPress website, the newest model of the plugin supplies an enhanced expertise, together with seamless integration with the WordPress editor, full compatibility with the foremost web page builders, a brand new dashboard offering stats on the utilization of the service, and improved options to optimize your website. Test it out!


Subscribe to MarketingSolution.
Receive web development discounts & web design tutorials.
Now! Lets GROW Together!