
Not too long ago, whereas searching for some concepts on what to code as I’ve zero creative sense so the one factor I can do is use fairly issues that different individuals have provide you with and remake them with clear and compact code… I got here throughout these sweet ghost buttons!
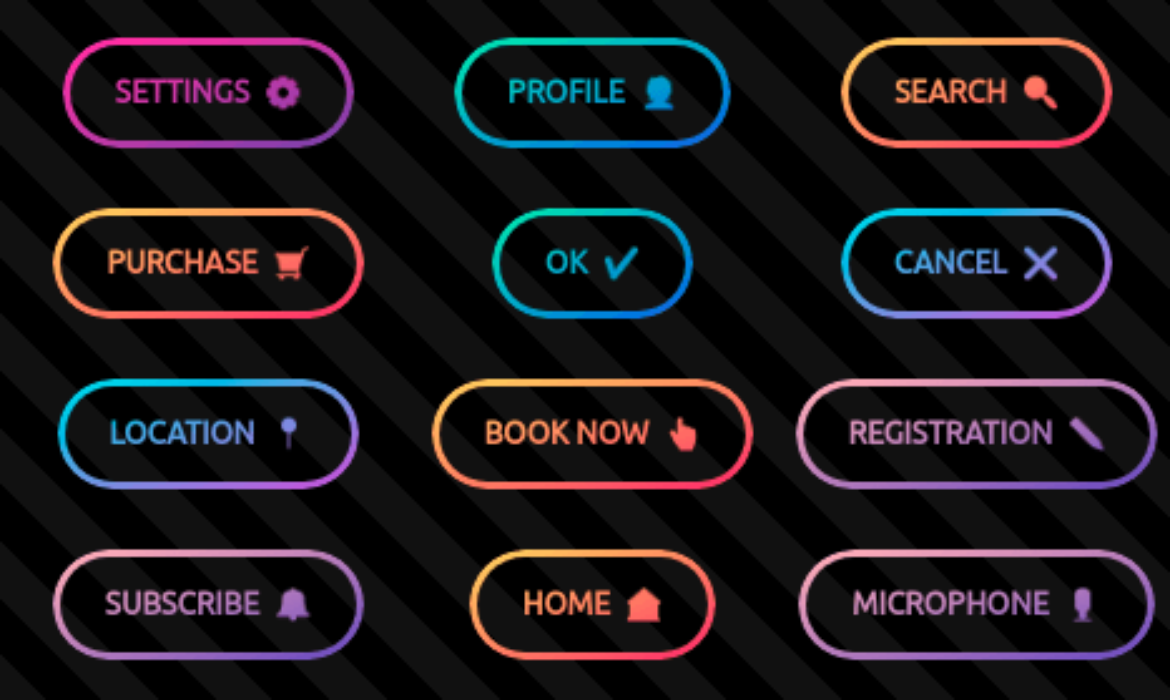
They appeared like the proper selection for a cool little factor I may rapidly code. Lower than fifteen minutes later, this was my Chromium end result:
The pure CSS sweet ghost buttons.
I believed the method was price sharing, so on this article, we’ll be going by means of how I first did it and what different choices we’ve got.
The place to begin
A button is created with… are you prepared for this? A button component! This button component has a data-ico attribute through which we drop an emoji. It additionally has a cease listing customized property, –slist, set within the model attribute.
<button data-ico=”👻” model=”–slist: #ffda5f, #f9376b”>boo!</button>
After writing the article, I discovered that Safari has a bunch of issues with clipping to textual content, specifically, it doesn’t work on button components, or on components with show: flex (and maybe grid too?), to not point out the textual content of a component’s youngsters. Sadly, this implies all the strategies offered right here fail in Safari. The one workaround is to use all of the button types from right here on a span component nested contained in the button, protecting its guardian’s border-box. And, in case this helps anybody else who, like me, is on Linux with out bodily entry to an Apple gadget (until you depend the iPhone 5 somebody on the fourth flooring — who you don’t need to trouble with stuff like this greater than twice a month anyway — purchased lately), I’ve additionally discovered to make use of Epiphany sooner or later.
For the CSS half, we add the icon in an ::after pseudo-element and use a grid structure on the button in an effort to have good alignment for each the textual content and the icon. On the button, we additionally set a border, a padding, a border-radius, use the cease listing, –slist, for a diagonal gradient and prettify the font.
button {
show: grid;
grid-auto-flow: column;
grid-gap: .5em;
border: strong .25em clear;
padding: 1em 1.5em;
border-radius: 9em;
background:
linear-gradient(to proper backside, var(–slist))
border-box;
font: 700 1.5em/ 1.25 ubuntu, sans-serif;
text-transform: uppercase;
&::after { content material: attr(data-ico) }
}
There’s one factor to make clear concerning the code above. On the highlighted line, we set each the background-origin and the background-clip to border-box. background-origin each places the 0 0 level for background-position within the top-left nook of the field it’s set to and offers us the field whose dimensions the background-size is relative to.
That’s, if background-origin is about to padding-box, the 0 0 level for background-position is within the high left-corner of the padding-box. If background-origin is about to border-box, the 0 0 level for background-position is within the top-left nook of the border-box. If background-origin is about to padding-box, a background-size of fifty% 25% means 50% of the padding-box width and 25% of the padding-box peak. If background-origin is about to border-box, the identical background-size of fifty% 25% means 50% of the border-box width and 25% of the border-box peak.
The default worth for background-origin is padding-box, which means {that a} default-sized 100% 100% gradient will cowl the padding-box after which repeat itself beneath the border (the place we can not see it if the border is absolutely opaque). Nevertheless, in our case, the border is absolutely clear and we would like our gradient to stretch throughout your entire border-box. This implies we have to change the background-origin worth to border-box.
The end result after making use of the bottom types (dwell demo).
The straightforward, however sadly non-standard Chromium answer
This includes utilizing three masks layers and compositing them. In case you want a refresher on masks compositing, you possibly can take a look at this crash course.
Be aware that within the case of CSS masks layers, solely the alpha channel issues, as each pixel of the masked component will get the alpha of the corresponding masks pixel, whereas the RGB channels don’t affect the end in any approach, so they might be any legitimate worth. Beneath, you possibly can see the impact of a purple to clear gradient overlay versus the impact of utilizing the very same gradient as a masks.
Gradient overlay vs. the identical gradient masks (dwell demo).
We’re going to begin with the underside two layers. The primary one is a completely opaque layer, absolutely protecting your entire border-box, which means that it has an alpha of 1 completely in all places. The opposite one can also be absolutely opaque, however restricted (by utilizing mask-clip) to the padding-box, which signifies that, whereas this layer has an alpha of 1 all throughout the padding-box, it’s absolutely clear within the border space, having an alpha of 0 there.
When you have a tough time picturing this, trick is to consider a component’s structure bins as nested rectangles, the best way they’re illustrated under.
The structure bins (dwell demo).
In our case, the underside layer is absolutely opaque (the alpha worth is 1) throughout your entire orange field (the border-box). The second layer, that we place on high of the primary one, is absolutely opaque (the alpha worth is 1) all throughout the pink field (the padding-box) and absolutely clear (with an alpha of 0) within the space between the padding restrict and the border restrict.
One actually cool factor concerning the limits of those bins is that nook rounding is decided by the border-radius (and, within the case of the padding-box, by the border-width as effectively). That is illustrated by the interactive demo under, the place we will see how the nook rounding of the border-box is given by the border-radius worth, whereas the nook rounding of the padding-box is computed because the border-radius minus the border-width (restricted at 0 in case the distinction is a unfavourable worth).
Now let’s get again to our masks layers, one being absolutely opaque all throughout your entire border-box, whereas the one on high of it’s absolutely opaque throughout the padding-box space and absolutely clear within the border space (between the padding restrict and the border restrict). These two layers get composited utilizing the exclude operation (known as xor within the non-standard WebKit model).
The 2 base layers (dwell demo).
The title of this operation is fairly suggestive within the scenario the place the alphas of the 2 layers are both 0 or 1, as they’re in our case — the alpha of the primary layer is 1 in all places, whereas the alpha of the second layer (that we place on high of the primary) is 1 contained in the padding-box and 0 within the border space between the padding restrict and the border restrict.
On this scenario, it’s fairly intuitive that the guidelines of boolean logic apply — XOR-ing two an identical values provides us 0, whereas XOR-ing two totally different ones provides us 1.
All throughout the padding-box, each the primary layer and the second have an alpha of 1, so compositing them utilizing this operation provides us an alpha of 0 for the ensuing layer on this space. Nevertheless, within the border space (outdoors the padding restrict, however contained in the border restrict), the primary layer has an alpha of 1, whereas the second has an alpha of 0, so we get an alpha of 1 for the ensuing layer on this space.
That is illustrated by the interactive demo under, the place you possibly can swap between viewing the 2 masks layers separated in 3D and viewing them stacked and composited utilizing this operation.
Placing issues into code, we’ve got:
button {
/* identical base types */
–full: linear-gradient(pink 0 0);
-webkit-mask: var(–full) padding-box, var(–full);
-webkit-mask-composite: xor;
masks: var(–full) padding-box exclude, var(–full);
}
Earlier than we transfer additional, let’s focus on a couple of fine-tuning particulars concerning the CSS above.
First off, because the absolutely opaque layers could also be something (the alpha channel is mounted, all the time 1 and the RGB channels don’t mater), I normally make them pink — solely three characters! In the identical vein, utilizing a conic gradient as a substitute of a linear one would additionally save us one character, however I not often ever try this since we nonetheless have cellular browsers that help masking, however not conic gradients. Utilizing a linear one ensures we’ve got help all throughout the board. Nicely, save for IE and pre-Chromium Edge however, then once more, not a lot cool shiny stuff works in these anyway.
Second, we’re utilizing gradients for each layers. We’re not utilizing a plain background-color for the underside one as a result of we can not set a separate background-clip for the background-color itself. If we have been to have the background-image layer clipped to the padding-box, then this background-clip worth would additionally apply to the background-color beneath — it might be clipped to the padding-box too and we’d haven’t any technique to make it cowl your entire border-box.
Third, we’re not explicitly setting a mask-clip worth for the underside layer because the default for this property is exactly the worth we would like on this case, border-box.
Fourth, we will embody the usual mask-composite (supported by Firefox) within the masks shorthand, however not the non-standard one (supported by WebKit browsers).
And eventually, we all the time set the usual model final so it overrides any non-standard model which will even be supported.
The results of our code to date (nonetheless cross-browser at this level) appears to be like like under. We’ve additionally added a background-image on the foundation in order that it’s apparent we’ve got actual transparency throughout the padding-box space.
The end result after masking out your entire padding-box (dwell demo).
This isn’t what we would like. Whereas we’ve got a pleasant gradient border (and by the best way, that is my most well-liked methodology of getting a gradient border since we’ve got actual transparency all throughout the padding-box and never simply a canopy), we at the moment are lacking the textual content.
So the following step is so as to add again the textual content utilizing one more masks layer on high of the earlier ones, this time one which’s restricted to textual content (whereas additionally making the precise textual content absolutely clear in order that we will see the gradient background by means of it) and XOR this third masks layer with the results of XOR-ing the primary two (end result that may be seen within the screenshot above).
The interactive demo under permits viewing the three masks layers each separated in 3D in addition to stacked and composited.
Be aware that the textual content worth for mask-clip is non-standard, so, sadly, this solely works in Chrome. In Firefox, we simply don’t get any masking on the button anymore and having made the textual content clear, we don’t even get sleek degradation.
button {
/* identical base types */
-webkit-text-fill-color: clear;
–full: linear-gradient(pink 0 0);
-webkit-mask: var(–full) textual content, var(–full) padding-box, var(–full);
-webkit-mask-composite: xor;
/* sadly, nonetheless identical end result as earlier than 🙁 */
masks: var(–full) padding-box exclude, var(–full);
}
If we don’t need to make our button unusable this fashion, we should always put the code that applies the masks and makes the textual content clear in a @helps block.
button {
/* identical base types */
@helps (-webkit-mask-clip: textual content) {
-webkit-text-fill-color: clear;
–full: linear-gradient(pink 0 0);
-webkit-mask: var(–full) textual content, var(–full) padding-box, var(–full);
-webkit-mask-composite: xor;
}
}
The ultimate end result utilizing the masking-only methodology (dwell demo).
I actually like this methodology, it’s the only we’ve got at this level and I’d actually want textual content was a typical worth for mask-clip and all browsers supported it correctly.
Nevertheless, we even have a couple of different strategies of reaching the sweet ghost button impact, and though they’re both extra convoluted or extra restricted than the non-standard Chromium-only one we’ve simply mentioned, they’re additionally higher supported. So let’s check out these.
The additional pseudo-element answer
This includes setting the identical preliminary types as earlier than, however, as a substitute of utilizing a masks, we clip the background to the textual content space.
button {
/* identical base types */
background:
linear-gradient(to proper backside, var(–slist))
border-box;
-webkit-background-clip: textual content;
background-clip: textual content;
-webkit-text-fill-color: clear
}
Identical to earlier than, we have to additionally make the precise textual content clear, so we will see by means of it to the pastel gradient background behind it that’s now clipped to its form.
Knockout button textual content (dwell demo).
Alright, we’ve got the gradient textual content, however now we’re lacking the gradient border. So we’re going so as to add it utilizing a completely positioned ::earlier than pseudo-element that covers your entire border-box space of the button and inherits the border, border-radius and background from its guardian (save for the background-clip, which will get reset to border-box).
$b: .25em;
button {
/* identical as earlier than */
place: relative;
border: strong $b clear;
&::earlier than {
place: absolute;
z-index: -1;
inset: -$b;
border: inherit;
border-radius: inherit;
background: inherit;
background-clip: border-box;
content material: ”;
}
}
inset: -$b is a shorthand for:
high: -$b;
proper: -$b;
backside: -$b;
left: -$b
Be aware that we’re utilizing the border-width worth ($b) with a minus signal right here. The 0 worth would make the margin-box of the pseudo (an identical to the border-box on this case since we’ve got no margin on the ::earlier than) solely cowl the padding-box of its button guardian and we would like it to cowl your entire border-box. Additionally, the optimistic path is inwards, however we have to go outwards by a border-width to get from the padding restrict to the border restrict, therefore the minus signal — we’re going within the unfavourable path.
We’ve additionally set a unfavourable z-index on this positively positioned component since we don’t need it to be on high of the button textual content and stop us from deciding on it. At this level, textual content choice is the one approach we will distinguish the textual content from the background, however we’ll quickly repair that!
The end result after including the gradient pseudo (dwell demo).
Be aware that since pseudo-element content material isn’t selectable, the choice solely consists of the button’s precise textual content content material and never the emoji within the ::after pseudo-element as effectively.
The following step is so as to add a two layer masks with an exclude compositing operation between them in an effort to go away simply the border space of this pseudo-element seen.
button {
/* identical as earlier than */
&::earlier than {
/* identical as earlier than */
–full: linear-gradient(pink 0 0);
-webkit-mask: var(–full) padding-box, var(–full);
-webkit-mask-composite: xor;
masks: var(–full) padding-box exclude, var(–full);
}
}
That is just about what we did for the precise button in one of many intermediate levels of the earlier methodology.
The ultimate end result utilizing the additional pseudo methodology (dwell demo).
I discover this to be the very best strategy usually after we need one thing cross-browser and that doesn’t embody IE or pre-Chromium Edge, none of which ever supported masking.
The border-image answer
At this level, a few of you could be screaming on the display that there’s no want to make use of the ::earlier than pseudo-element after we may use a gradient border-image to create this form of a ghost button — it’s a tactic that has labored for over three quarters of a decade!
Nevertheless, there’s a really large drawback with utilizing border-image for pill-shaped buttons: this property doesn’t play good with border-radius, as it may be seen within the interactive demo under. As quickly as we set a border-image on a component with border-radius, we lose the nook rounding of the border, even by means of, humorous sufficient, the background will nonetheless respect this rounding.
Nonetheless, this can be a easy answer within the case the place don’t want nook rounding or the specified nook rounding is at most the dimensions of the border-width.
Within the no nook rounding case, save for dropping the now pointless border-radius, we don’t want to alter the preliminary types a lot:
button {
/* identical base types */
–img: linear-gradient(to proper backside, var(–slist));
border: strong .25em;
border-image: var(–img) 1;
background: var(–img) border-box;
-webkit-background-clip: textual content;
background-clip: textual content;
-webkit-text-fill-color: clear;
}
The end result could be seen under, cross-browser (needs to be supported supported even in pre-Chromium Edge).
The no nook rounding end result utilizing the border-image methodology (dwell demo).
The trick with the specified nook rounding being smaller than the border-width depends on the best way border-radius works. After we set this property, the radius we set represents the rounding for the corners of the border-box. The rounding for the corners of the padding-box (which is the interior rounding of the border) is the border-radius minus the border-width if this distinction is optimistic and 0 (no rounding) in any other case. This implies we’ve got no interior rounding for the border if the border-radius is smaller than or equal to the border-width.
On this scenario, we will use the inset() operate as a clip-path worth because it additionally affords the potential of rounding the corners of the clipping rectangle. In case you want a refresher on the fundamentals of this operate, you possibly can take a look at the illustration under:
How the inset() operate works.
inset() cuts out every thing outdoors a clipping rectangle outlined by the distances to the sides of the component’s border-box, specified the identical approach we’d specify margin, border or padding (with one, two, three or 4 values) and the nook rounding for this rectangle, specified the identical approach we’d specify border-radius (any legitimate border-radius worth can also be legitimate right here).
In our case, the distances to the sides of the border-box are all 0 (we don’t need to chop something off any of the sides of the button), however we’ve got a rounding that must be at most at large because the border-width in order that not having any interior border rounding is sensible.
$b: .25em;
button {
/* identical as earlier than */
border: strong $b clear;
clip-path: inset(0 spherical $b)
}
Be aware that the clip-path can also be going to chop out any outer shadows we could add on the button component, whether or not they’re added by way of box-shadow or filter: drop-shadow().
The small nook rounding end result utilizing the border-image methodology (dwell demo).
Whereas this system can not obtain the tablet form look, it does have the benefit of getting nice help these days and it might be all we’d like in sure conditions.
The three options mentioned to date could be seen compiled within the demo under, which additionally comes with a YouTube hyperlink the place you possibly can see me code every of them from scratch if you happen to desire to study by watching issues being constructed on video reasonably than studying about them.
All these strategies create actual transparency within the padding-box outdoors the textual content, so that they work for any background we could have behind the button. Nevertheless, we even have a few different strategies which may be price mentioning, despite the fact that they arrive with restrictions on this division.
The duvet answer
Identical to the border-image strategy, it is a fairly restricted tactic. It doesn’t work until we’ve got a strong or a set background behind the button.
It includes layering backgrounds with totally different background-clip values, similar to the duvet method for gradient borders. The one distinction is that right here we add yet another gradient layer on high of the one emulating the background behind our button component and we clip this high layer to textual content.
$c: #393939;
html { background: $c; }
button {
/* identical as earlier than */
–grad: linear-gradient(to proper backside, var(–slist));
border: strong .25em clear;
border-radius: 9em;
background: var(–grad) border-box,
linear-gradient($c 0 0) /* emulate bg behind button */,
var(–grad) border-box;
-webkit-background-clip: textual content, padding-box, border-box;
-webkit-text-fill-color: clear;
}
Sadly, this strategy fails in Firefox on account of an outdated bug — simply not making use of any background-clip whereas additionally making the textual content clear produces a pill-shaped button with no seen textual content.
The all background-clip cowl answer (dwell demo).
We may nonetheless make it cross-browser by utilizing the duvet methodology for the gradient border on a ::earlier than pseudo and background-clip: textual content on the precise button, which is mainly only a extra restricted model of the second answer we mentioned — we nonetheless want to make use of a pseudo, however, since we use a canopy, not a masks, it solely works if we’ve got a strong or mounted background behind the button.
$b: .25em;
$c: #393939;
html { background: $c; }
button {
/* identical base types */
–grad: linear-gradient(to proper backside, var(–slist));
border: strong $b clear;
background: var(–grad) border-box;
-webkit-background-clip: textual content;
background-clip: textual content;
-webkit-text-fill-color: clear;
&::earlier than {
place: absolute;
z-index: -1;
inset: -$b;
border: inherit;
border-radius: inherit;
background: linear-gradient($c 0 0) padding-box,
var(–grad) border-box;
content material: ”;
}
}
On the intense aspect, this extra restricted model must also work in pre-Chromium Edge.
The duvet answer on a pseudo for a strong background behind the button (dwell demo).
Beneath, there’s additionally the mounted background model.
$f: url(balls.jpg) 50%/ cowl mounted;
html { background: $f; }
button {
/* identical as earlier than */
&::earlier than {
/* identical as earlier than */
background: $f padding-box,
var(–grad) border-box
}
}
The duvet answer on a pseudo for a set background behind the button (dwell demo).
Total, I don’t assume that is the very best tactic until we each match into the background limitation and we have to reproduce the impact in browsers that don’t help masking, however help clipping the background to the textual content, corresponding to pre-Chromium Edge.
The mixing answer
This strategy is one other restricted one because it gained’t work until, for every gradient pixel that’s seen, its channels have values which might be both all greater or all smaller than than the corresponding pixel of the background beneath the button. Nevertheless, this isn’t the worst limitation to have because it ought to most likely result in our web page having higher distinction.
Right here, we begin by making the components the place we need to have the gradient (i.e. the textual content, icon and border) both white or black, relying on whether or not we’ve got a darkish theme with a light-weight gradient or a light-weight theme with a darkish gradient, respectively. The remainder of the button (the realm across the textual content and icon, however contained in the border) is the inverse of the beforehand chosen colour (white if we set the colour worth to black and black in any other case).
In our case, we’ve got a fairly gentle gradient button on a darkish background, so we begin with white for the textual content, icon and border, and black for the background. The hex channel values of our two gradient stops are ff (R), da (G), 5f (B) and f9 (R), 37 (G), 6b (B), so we’d be protected with any background pixels whose channel values are at most as large as min(ff, f9) = f9 for pink, min(da, 37) = 37 for inexperienced and min(5f, 6b) = 5f for blue.
This implies having a background-color behind our button with channel values which might be smaller or equal to f9, 37 and 5f, both by itself as a strong background, or beneath a background-image layer we mix with utilizing the multiply mix mode (which all the time produces a end result that’s at the least as darkish because the darker of the 2 layers). We’re setting this background on a pseudo-element since mixing with the precise physique or the html doesn’t work in Chrome.
$b: .25em;
physique::earlier than {
place: mounted;
inset: 0;
background: url(fog.jpg) 50%/ cowl #f9375f;
background-blend-mode: multiply;
content material: ”;
}
button {
/* identical base types */
place: relative; /* so it exhibits on high of physique::earlier than */
border: strong $b;
background: #000;
colour: #fff;
&::after {
filter: brightness(0) invert(1);
content material: attr(data-ico);
}
}
Be aware that making the icon absolutely white means making it first black with brightness(0) after which inverting this black with invert(1).
The black and white button (dwell demo).
We then add a gradient ::earlier than pseudo-element, similar to we did for the primary cross-browser methodology.
button {
/* identical types as earlier than */
place: relative;
&::earlier than {
place: absolute;
z-index: 2;
inset: -$b;
border-radius: inherit;
background: linear-gradient(to proper backside, var(–slist);
pointer-events: none;
content material: ”;
}
}
The one distinction is that right here, as a substitute of giving it a unfavourable z-index, we give it a optimistic z-index. That approach it’s not simply over the precise button, but additionally over the ::after pseudo and we set pointer-events to none in an effort to enable the mouse to work together with the precise button content material beneath.
The end result after including a gradient pseudo on high of the black and white button (dwell demo).
Now the following step is to maintain the black components of our button, however substitute the white components (i.e., the textual content, icon and border) with the gradient. We are able to do that with a darken mix mode, the place the 2 layers are the black and white button with the ::after icon and the gradient pseudo on high of it.
For every of the RGB channels, this mix mode takes the values of the 2 layers and makes use of the darker (smaller) one for the end result. Since every thing is darker than white, the ensuing layer makes use of the gradient pixel values in that space. Since black is darker than every thing, the ensuing layer is black in all places the button is black.
button {
/* identical types as earlier than */
&::earlier than {
/* identical types as earlier than */
mix-blend-mode: darken;
}
}
The “virtually there” end result (dwell demo).
Alright, however we’d solely be carried out at this level if the background behind the button was pure black. In any other case, within the case of a background whose each pixel is darker than the corresponding pixel of the gradient on our button, we will apply a second mix mode, this time lighten on the precise button (beforehand, we had darken on the ::earlier than pseudo).
For every of the RGB channels, this mix mode takes the values of the 2 layers and makes use of the lighter (greater) one for the end result. Since something is lighter than black, the ensuing layer makes use of the background behind the button in all places the button is black. And since a requirement is that each gradient pixel of the button is lighter than the corresponding pixel of the background behind it, the ensuing layer makes use of the gradient pixel values in that space.
button {
/* identical types as earlier than */
mix-blend-mode: lighten;
}
The sunshine ghost button on high of a darkish background (dwell demo).
For a darkish gradient button on a light-weight background, we have to swap up the mix modes. That’s, use lighten on the ::earlier than pseudo and darken on the button itself. And to start with, we have to make sure the background behind the button is gentle sufficient.
Let’s say our gradient is between #602749 and #b14623. The channel values of our gradient stops are 60 (R), 27 (G), 49 (B) and b1 (R), 46 (G), 23 (R), so the background behind the button must have channel values which might be at the least max(60, b1) = b1 for pink, max(27, 46) = 46 for inexperienced and max(49, 23) = 49 for blue.
This implies having a background-color on our button with channel values which might be greater or equal to b1, 46 and 49, both by itself as a strong background, or beneath a background-image layer, makes use of a display mix mode (which all the time produces a end result that’s at the least as gentle because the lighter of the 2 layers).
We additionally must make the button border, textual content and icon black, whereas setting its background to white:
$b: .25em;
part {
background: url(fog.jpg) 50%/ cowl #b14649;
background-blend-mode: display;
}
button {
/* identical as earlier than */
border: strong $b;
background: #fff;
colour: #000;
mix-blend-mode: darken;
&::earlier than {
/* identical as earlier than */
mix-blend-mode: lighten
}
&::after {
filter: brightness(0);
content material: attr(data-ico);
}
}
The icon within the ::after pseudo-element is made black by setting filter: brightness(0) on it.
The darkish ghost button on high of a light-weight background (dwell demo).
We even have the choice of mixing all of the button layers as part of its background, each for the gentle and darkish theme, however, as talked about earlier than, Firefox simply ignores any background-clip declaration the place textual content is part of a listing of values and never the one worth.
Nicely, that’s it! I hope you’re having (or had) a scary Halloween. Mine was positively made horrific by all of the bugs I obtained to find… or rediscover, together with the truth that they haven’t been mounted in the intervening time.
The put up CSS-ing Sweet Ghost Buttons appeared first on CSS-Tips. You’ll be able to help CSS-Tips by being an MVP Supporter.


Subscribe to MarketingSolution.
Receive web development discounts & web design tutorials.
Now! Lets GROW Together!