
The browser has lengthy been a medium for artwork and design. From Lynn Fisher’s joyful A Single Div creations to Diana Smith’s staggeringly detailed CSS work, wildly inventive, extremely expert builders have — through the years — constantly pushed net applied sciences to their limits and crafted revolutionary, inspiring visuals.
CSS, nonetheless, has by no means actually had an API devoted to… properly, simply drawing stuff! As demonstrated by the gifted of us above, it definitely can render most issues, however it’s not all the time straightforward, and it’s not all the time sensible for manufacturing websites/purposes.
Lately, although, CSS was gifted an thrilling new set of APIs referred to as Houdini, and one in every of them — the Paint API — is particularly designed for rendering 2D graphics. For us net folks, that is extremely thrilling. For the primary time, now we have a piece of CSS that exists for the only objective of programmatically creating pictures. The doorways to a mystical new world are properly and really open!
On this tutorial, we might be utilizing the Paint API to create three (hopefully!) lovely, generative patterns that could possibly be used so as to add a scrumptious spoonful of character to a variety of internet sites/purposes.
Spellbooks/textual content editors on the prepared, buddies, let’s do some magic!
Supposed viewers
This tutorial is ideal for people who’re snug writing HTML, CSS, and JavaScript. A bit familiarity with generative artwork and a few information of the Paint API/HTML canvas might be helpful however not important. We are going to do a fast overview earlier than we get began. Talking of which…
Earlier than we begin
For a complete introduction to each the Paint API and generative artwork/design, I like to recommend popping over to the first entry on this sequence. In case you are new to both topic, this might be a fantastic place to start out. When you don’t really feel like navigating one other article, nonetheless, listed below are a few key ideas to be conversant in earlier than shifting on.
In case you are already conversant in the CSS Paint API and generative artwork/design, be happy to skip forward to the subsequent part.
What’s generative artwork/design?
Generative artwork/design is any work created with a component of probability. We outline some guidelines and permit a supply of randomness to information us to an consequence. For instance, a rule could possibly be “if a random quantity is bigger than 50, render a crimson sq., whether it is lower than 50, render a blue sq.*,”* and, within the browser, a supply of randomness could possibly be Math.random().
By taking a generative method to creating patterns, we will generate near-infinite variations of a single concept — that is each an inspiring addition to the inventive course of and a implausible alternative to thrill our customers. As an alternative of displaying folks the identical imagery each time they go to a web page, we will show one thing particular and distinctive for them!
What’s the CSS Paint API?
The Paint API offers us low-level entry to CSS rendering. By “paint worklets” (JavaScript courses with a particular paint() perform), it permits us to dynamically create pictures utilizing a syntax nearly equivalent to HTML canvas. Worklets can render a picture wherever CSS expects one. For instance:
.worklet-canvas {
background-image: paint(workletName);
}
Paint API worklets are quick, responsive, and play ever so properly with current CSS-based design methods. In brief, they’re the good factor ever. The one factor they’re missing proper now could be widespread browser help. Right here’s a desk:
This browser help knowledge is from Caniuse, which has extra element. A quantity signifies that browser helps the function at that model and up.
Desktop
ChromeFirefoxIEEdgeSafari65NoNo79No
Cell / Pill
Android ChromeAndroid FirefoxAndroidiOS Safari95No95No
A bit skinny on the bottom! That’s OK, although. Because the Paint API is nearly inherently ornamental, we will use it as a progressive enhancement if it’s out there and supply a easy, reliable fallback if not.
What we’re making
On this tutorial, we might be studying the way to create three distinctive generative patterns. These patterns are fairly easy, however will act as an exquisite springboard for additional experimentation. Right here they’re in all their glory!
The demos on this tutorial presently solely work in Chrome and Edge.
“Tiny Specks”
“Bauhaus”
“Voronoi Arcs”
Earlier than shifting on, take a second to discover the examples above. Attempt altering the customized properties and resizing the browser window — watch how the patterns react. Are you able to guess how they may work with out peeking on the JavaScript?
Getting arrange
To save lots of time and get rid of the necessity for any customized construct processes, we might be working completely in CodePen all through this tutorial. I’ve even created a “starter Pen” that we will use as a base for every sample!
I do know, it’s not a lot to take a look at… but.
Within the starter Pen, we’re utilizing the JavaScript part to write down the worklet itself. Then, within the HTML part, we load the JavaScript instantly utilizing an inner <script> tag. As Paint API worklets are particular employees (code that runs on a separate browser thread), their origin should1 exist in a standalone .js file.
Let’s break down the important thing items of code right here.
When you have written Paint API worklets earlier than, and are conversant in CodePen, you’ll be able to skip forward to the subsequent part.
Defining the worklet class
First issues first: Let’s take a look at the JavaScript tab. Right here we outline a worklet class with a easy paint() perform:
class Worklet {
paint(ctx, geometry, props) {
const { width, top } = geometry;
ctx.fillStyle = “#000”;
ctx.fillRect(0, 0, width, top);
}
}
I like to think about a worklet’s paint() perform as a callback. When the worklet’s goal aspect updates (modifications dimensions, modifies customized properties), it re-runs. A worklet’s paint() perform robotically has a number of parameters handed when it executes. On this tutorial, we have an interest within the first three:
ctx — a 2D drawing context similar to that of HTML canvasgeometry — an object containing the width/top dimensions of the worklet’s goal elementprops — an array of CSS customized properties that we will “watch” for modifications and re-render once they do. These are an effective way of passing values to color worklets.
Our starter worklet renders a black sq. that covers all the width/top of its goal aspect. We are going to utterly rewrite this paint() perform for every instance, however it’s good to have one thing outlined to examine issues are working.
Registering the worklet
As soon as a worklet class is outlined, it must be registered earlier than we will use it. To take action, we name registerPaint within the worklet file itself:
if (typeof registerPaint !== “undefined”) {
registerPaint(“workletName”, Worklet);
}
Adopted by CSS.paintWorklet.addModule() in our “important” JavaScript/HTML:
<script id=”register-worklet”>
if (CSS.paintWorklet) {
CSS.paintWorklet.addModule(‘https://codepen.io/georgedoescode/pen/bGrMXxm.js’);
}
</script>
We’re checking registerPaint is outlined earlier than operating it right here, as our pen’s JavaScript will all the time run as soon as on the primary browser thread — registerPaint solely turns into out there as soon as the JavaScript file is loaded right into a worklet utilizing CSS.paintWorklet.addModule(…).
Making use of the worklet
As soon as registered, we will use our worklet to generate a picture for any CSS property that expects one. On this tutorial, we are going to give attention to background-image:
.worklet-canvas {
background-image: paint(workletName);
}
Package deal imports
You could discover a few package deal imports dangling on the high of the starter pen’s worklet file:
import random from “https://cdn.skypack.dev/random”;
import seedrandom from “https://cdn.skypack.dev/seedrandom”;
Are you able to guess what they’re?
Random quantity turbines!
All three of the patterns we’re creating on this tutorial rely closely on randomness. Paint API worklets ought to, nonetheless, (nearly) all the time be deterministic. Given the identical enter properties and dimensions, a worklet’s paint() perform ought to all the time render the identical factor.
Why?
The Paint API could wish to use a cached model of a worklet’s paint() output for higher efficiency. Introducing an unpredictable aspect to a worklet renders this unattainable!A worklet’s paint() perform re-runs every time the aspect it applies to modifications dimensions. When coupled with “pure” randomness, this may end up in vital flashes of content material — a possible accessibility difficulty for some of us.
For us, all this renders Math.random() a bit of ineffective, as it’s completely unpredictable. As a substitute, we’re pulling in random (a superb library for working with random numbers) and seedrandom (a pseudo-random quantity generator to make use of as its base algorithm).
As a fast instance, right here’s a “random circles” worklet utilizing a pseudo-random quantity generator:
And right here’s the same worklet utilizing Math.random(). Warning: Resizing the aspect ends in flashing imagery.
There’s a bit of resize deal with within the bottom-right of each of the above patterns. Attempt resizing each parts. Discover the distinction?
Organising every sample
Earlier than starting every of the next patterns, navigate to the starter Pen and click on the “Fork” button within the footer. Forking a Pen creates a replica of the unique the second you click on the button. From this level, it’s yours to do no matter you want.
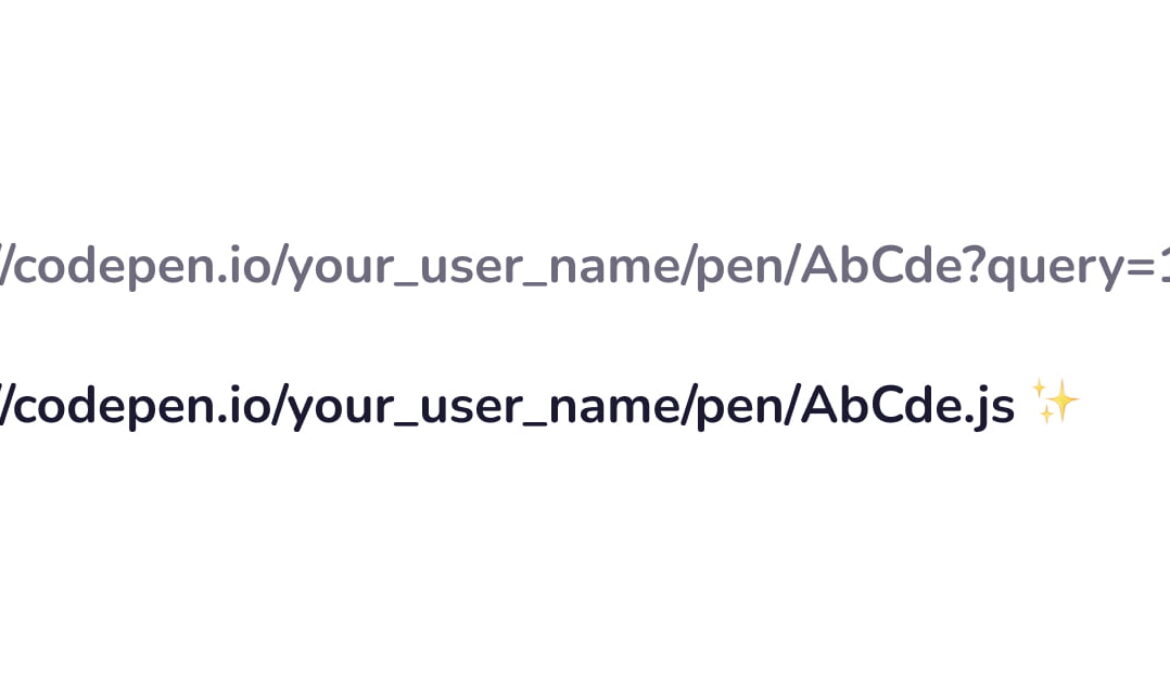
After you have forked the starter Pen, there’s a crucial further step to finish. The URL handed to CSS.paintWorklet.addModule have to be up to date to level to the brand new fork’s JavaScript file. To seek out the trail on your fork’s JavaScript, take a peek on the URL proven in your browser. You wish to seize your fork’s URL with all question parameters eliminated, and append .js — one thing like this:
Beautiful. That’s the ticket! After you have the URL on your JavaScript, be sure you replace it right here:
<script id=”register-worklet”>
if (CSS.paintWorklet) {
// ⚠️ hey pal! replace the URL beneath every time you fork this pen! ⚠️
CSS.paintWorklet.addModule(‘https://codepen.io/georgedoescode/pen/QWMVdPG.js’);
}
</script>
When working with this setup, it’s possible you’ll often must manually refresh the Pen in an effort to see your modifications. To take action, hit CMD/CTRL + Shift + 7.
Sample #1 (Tiny Specks)
OK, we’re able to make our first sample. Fork the starter Pen, replace the .js file reference, and settle in for some generative enjoyable!
As a fast reminder, right here’s the completed sample:
Updating the worklet’s identify
As soon as once more, first issues first: Let’s replace the starter worklet’s identify and related references:
class TinySpecksPattern {
// …
}
if (typeof registerPaint !== “undefined”) {
registerPaint(“tinySpecksPattern”, TinySpecksPattern);
}
.worklet-canvas {
/* … */
background-image: paint(tinySpecksPattern);
}
Defining the worklet’s enter properties
Our “Tiny Specks” worklet will settle for the next enter properties:
–pattern-seed — a seed worth for the pseudo-random quantity generator–pattern-colors — the out there colours for every speck–pattern-speck-count — what number of particular person specks the worklet ought to render–pattern-speck-min-size — the minimal measurement for every speck–pattern-speck-max-size — the utmost measurement for every speck
As our subsequent step, let’s outline the inputProperties our worklet can obtain. To take action, we will add a getter to our TinySpecksPattern class:
class TinySpecksPattern {
static get inputProperties() {
return [
“–pattern-seed”,
“–pattern-colors”,
“–pattern-speck-count”,
“–pattern-speck-min-size”,
“–pattern-speck-max-size”
];
}
// …
}
Alongside some customized property definitions in our CSS:
@property –pattern-seed {
syntax: “<quantity>”;
initial-value: 1000;
inherits: true;
}
@property –pattern-colors {
syntax: “<coloration>#”;
initial-value: #161511, #dd6d45, #f2f2f2;
inherits: true;
}
@property –pattern-speck-count {
syntax: “<quantity>”;
initial-value: 3000;
inherits: true;
}
@property –pattern-speck-min-size {
syntax: “<quantity>”;
initial-value: 0;
inherits: true;
}
@property –pattern-speck-max-size {
syntax: “<quantity>”;
initial-value: 3;
inherits: true;
}
We’re utilizing the Properties and Values API right here (one other member of the Houdini household) to outline our customized properties. Doing so affords us two priceless advantages. First, we will outline wise defaults for the enter properties our worklet expects. A tasty sprinkle of developer expertise! Second, by together with a syntax definition for every customized property, our worklet can interpret them intelligently.
For instance, we outline the syntax <coloration># for –pattern-colors. In flip, this enables us to cross an array of comma-separated colours to the worklet in any legitimate CSS coloration format. When our worklet receives these values, they’ve been transformed to RGB and positioned in a neat little array. With no syntax definition, worklets interpret all props as easy strings.
Just like the Paint API, the Properties and Values API additionally has restricted browser help.
The paint() perform
Superior! Right here’s the enjoyable bit. Now we have created our “Tiny Speck” worklet class, registered it, and outlined what enter properties it could actually count on to obtain. Now, let’s make it do one thing!
As a primary step, let’s filter out the starter Pen’s paint() perform, maintaining solely the width and top definitions:
paint(ctx, geometry, props) {
const { width, top } = geometry;
}
Subsequent, let’s retailer our enter properties in some variables:
const seed = props.get(“–pattern-seed”).worth;
const colours = props.getAll(“–pattern-colors”).map((c) => c.toString());
const rely = props.get(“–pattern-speck-count”).worth;
const minSize = props.get(“–pattern-speck-min-size”).worth;
const maxSize = props.get(“–pattern-speck-max-size”).worth;
Subsequent, we must always initialize our pseudo-random quantity generator:
random.use(seedrandom(seed));
Ahhh, predictable randomness! We’re re-seeding seedrandom with the identical seed worth each time paint() runs, leading to a constant stream of random numbers throughout renders.
Lastly, let’s paint our specks!
First off, we create a for-loop that iterates rely instances. In each iteration of this loop, we’re creating one particular person speck:
for (let i = 0; i < rely; i++) {
}
As the primary motion in our for-loop, we outline an x and y place for the speck. Someplace between 0 and the width/top of the worklet’s goal aspect is ideal:
const x = random.float(0, width);
const y = random.float(0, top);
Subsequent, we select a random measurement (for the radius):
const radius = random.float(minSize, maxSize);
So, now we have a place and a measurement outlined for the speck. Let’s select a random coloration from our colours to fill it with:
ctx.fillStyle = colours[random.int(0, colors.length – 1)];
Alright. We’re all set. Let’s use ctx to render one thing!
The very first thing we have to do at this level is save() the state of our drawing context. Why? We wish to rotate every speck, however when working with a 2D drawing context like this, we can’t rotate particular person gadgets. To rotate an object, now we have to spin all the drawing house. If we don’t save() and restore() the context, the rotation/translation in each iteration will stack, leaving us with a really messy (or empty) canvas!
ctx.save();
Now that now we have saved the drawing context’s state, we will translate to the speck’s heart level (outlined by our x/y variables) and apply a rotation. Translating to the middle level of an object earlier than rotating ensures the thing rotates round its heart axis:
ctx.translate(x, y);
ctx.rotate(((random.float(0, 360) * 180) / Math.PI) * 2);
ctx.translate(-x, -y);
After making use of our rotation, we translate again to the top-left nook of the drawing house.
We select a random worth between 0 and 360 (levels) right here, then convert it into radians (the rotation format ctx understands).
Superior! Lastly, let’s render an ellipse — that is the form that defines our specks:
ctx.beginPath();
ctx.ellipse(x, y, radius, radius / 2, 0, Math.PI * 2, 0);
ctx.fill();
Right here’s a easy pen displaying the type of our random specks, a bit of nearer up:
Excellent. Now, all we have to do is restore the drawing context:
ctx.restore();
That’s it! Our first sample is full. Let’s additionally apply a background-color to our worklet canvas to complete off the impact:
.worklet-canvas {
background-color: #90c3a5;
background-image: paint(tinySpecksPattern);
}
Subsequent steps
From right here, strive altering the colours, shapes, and distribution of the specks. There are tons of of instructions you possibly can take this sample! Right here’s an instance utilizing little triangles moderately than ellipses:
Onwards!
Sample #2 (Bauhaus)
Good work! That’s one sample down. Onto the subsequent one. As soon as once more, fork the starter Pen and replace the worklet’s JavaScript reference to get began.
As a fast refresher, right here’s the completed sample we’re working towards:
Updating the worklet’s identify
Identical to we did final time, let’s kick issues off by updating the worklet’s identify and related references:
class BauhausPattern {
// …
}
if (typeof registerPaint !== “undefined”) {
registerPaint(“bauhausPattern”, BauhausPattern);
}
.worklet-canvas {
/* … */
background-image: paint(bauhausPattern);
}
Beautiful.
Defining the worklet’s enter properties
Our “Bauhaus Sample” worklet expects the next enter properties:
–pattern-seed — a seed worth for the pseudo-random quantity generator–pattern-colors — the out there colours for every form within the pattern–pattern-size — the worth used to outline each the width and top of a sq. sample area–pattern-detail — the variety of columns/rows to divide the sq. sample into
Let’s add these enter properties to our worklet:
class BahausPattern {
static get inputProperties() {
return [
“–pattern-seed”,
“–pattern-colors”,
“–pattern-size”,
“–pattern-detail”
];
}
// …
}
…and outline them in our CSS, once more, utilizing the Properties and Values API:
@property –pattern-seed {
syntax: “<quantity>”;
initial-value: 1000;
inherits: true;
}
@property –pattern-colors {
syntax: “<coloration>#”;
initial-value: #2d58b5, #f43914, #f9c50e, #ffecdc;
inherits: true;
}
@property –pattern-size {
syntax: “<quantity>”;
initial-value: 1024;
inherits: true;
}
@property –pattern-detail {
syntax: “<quantity>”;
initial-value: 12;
inherits: true;
}
Wonderful. Let’s paint!
The paint() perform
Once more, let’s filter out the starter worklet’s paint perform, leaving solely the width and top definition:
paint(ctx, geometry, props) {
const { width, top } = geometry;
}
Subsequent, let’s retailer our enter properties in some variables:
const patternSize = props.get(“–pattern-size”).worth;
const patternDetail = props.get(“–pattern-detail”).worth;
const seed = props.get(“–pattern-seed”).worth;
const colours = props.getAll(“–pattern-colors”).map((c) => c.toString());
Now, we will seed our pseudo-random quantity generator similar to earlier than:
random.use(seedrandom(seed));
Superior! As you might need observed, the setup for Paint API worklets is all the time considerably related. It’s not probably the most thrilling course of, however it’s a superb alternative to mirror on the structure of your worklet and the way different builders could use it.
So, with this worklet, we create a fixed-dimension sq. sample crammed with shapes. This fixed-dimension sample is then scaled up or right down to cowl the worklet’s goal aspect. Consider this habits a bit like background-size: cowl in CSS!
Right here’s a diagram:
To attain this habits in our code, let’s add a scaleContext perform to our worklet class:
scaleCtx(ctx, width, top, elementWidth, elementHeight) {
const ratio = Math.max(elementWidth / width, elementHeight / top);
const centerShiftX = (elementWidth – width * ratio) / 2;
const centerShiftY = (elementHeight – top * ratio) / 2;
ctx.setTransform(ratio, 0, 0, ratio, centerShiftX, centerShiftY);
}
And name it in our paint() perform:
this.scaleCtx(ctx, patternSize, patternSize, width, top);
Now, we will work to a set of mounted dimensions and have our worklet’s drawing context robotically scale every little thing for us — a helpful perform for plenty of use circumstances.
Subsequent up, we’re going to create a 2D grid of cells. To take action, we outline a cellSize variable (the dimensions of the sample space divided by the variety of columns/rows we wish):
const cellSize = patternSize / patternDetail;
Then, we will use the cellSize variable to “step-through” the grid, creating equally-spaced, equally-sized cells so as to add random shapes to:
for (let x = 0; x < patternSize; x += cellSize) {
for (let y = 0; y < patternSize; y += cellSize) {
}
}
Inside the second nested loop, we will start to render stuff!
First off, let’s select a random coloration for the present form:
const coloration = colours[random.int(0, colors.length – 1)];
ctx.fillStyle = coloration;
Subsequent, let’s retailer a reference to the present cell’s heart x and y place:
const cx = x + cellSize / 2;
const cy = y + cellSize / 2;
On this worklet, we’re positioning all of our shapes relative to their heart level. Whereas we’re right here, let’s add some utility features to our worklet file to assist us shortly render center-aligned form objects. These can reside exterior of the Worklet class:
perform circle(ctx, cx, cy, radius) {
ctx.beginPath();
ctx.arc(cx, cy, radius, 0, Math.PI * 2);
ctx.closePath();
}
perform arc(ctx, cx, cy, radius) {
ctx.beginPath();
ctx.arc(cx, cy, radius, 0, Math.PI * 1);
ctx.closePath();
}
perform rectangle(ctx, cx, cy, measurement) {
ctx.beginPath();
ctx.rect(cx – measurement / 2, cy – measurement / 2, measurement, measurement);
ctx.closePath();
}
perform triangle(ctx, cx, cy, measurement) {
const originX = cx – measurement / 2;
const originY = cy – measurement / 2;
ctx.beginPath();
ctx.moveTo(originX, originY);
ctx.lineTo(originX + measurement, originY + measurement);
ctx.lineTo(originX, originY + measurement);
ctx.closePath();
}
I gained’t go into an excessive amount of element right here, however right here’s a diagram visualizing how every of those features work:
When you get caught on the graphics rendering a part of any of the worklets on this tutorial, take a look at the MDN docs on HTML canvas. The syntax/utilization is nearly equivalent to the 2D graphics context out there in Paint API worklets.
Cool! Let’s head again over to our paint() perform’s nested loop. The following factor we have to do is select what form to render. To take action, we will choose a random string from an array of potentialities:
const shapeChoice = [“circle”, “arc”, “rectangle”, “triangle”][
random.int(0, 3)
];
We will additionally choose a random rotation quantity in a really related means:
const rotationDegrees = [0, 90, 180][random.int(0, 2)];
Excellent. We’re able to render!
To begin, let’s save our drawing context’s state, similar to within the earlier worklet:
ctx.save();
Subsequent, we will translate to the middle level of the present cell and rotate the canvas utilizing the random worth we simply selected:
ctx.translate(cx, cy);
ctx.rotate((rotationDegrees * Math.PI) / 180);
ctx.translate(-cx, -cy);
Now we will render the form itself! Let’s cross our shapeChoice variable to a change assertion and use it to resolve which form rendering perform to run:
change (shapeChoice) {
case “circle”:
circle(ctx, cx, cy, cellSize / 2);
break;
case “arc”:
arc(ctx, cx, cy, cellSize / 2);
break;
case “rectangle”:
rectangle(ctx, cx, cy, cellSize);
break;
case “triangle”:
triangle(ctx, cx, cy, cellSize);
break;
}
ctx.fill();
Lastly, all we have to do is restore() our drawing context prepared for the subsequent form:
ctx.restore();
With that, our Bauhaus Grids worklet is full!
Subsequent steps
There are such a lot of instructions you possibly can take this worklet. How might you parameterize it additional? Might you add a “bias” for particular shapes/colours? Might you add extra form sorts?
All the time experiment — following together with the examples we’re creating collectively is a superb begin, however one of the best ways to be taught is to make your individual stuff! In case you are caught for inspiration, take a peek at some patterns on Dribbble, look to your favourite artists, the structure round you, nature, you identify it!
As a easy instance, right here’s the identical worklet, in a wholly totally different coloration scheme:
Sample #3 (Voronoi Arcs)
To this point, now we have created each a chaotic sample and one which aligns strictly to a grid. For our final instance, let’s construct one which sits someplace between the 2.
As one final reminder, right here’s the completed sample:
Earlier than we leap in and write any code, let’s check out how this worklet… works.
A short introduction to Voronoi tessellations
As instructed by the identify, this worklet makes use of one thing referred to as a Voronoi tessellation to calculate its structure. A Voronoi tessellation (or diagram) is, briefly, a solution to partition an area into non-overlapping polygons.
We add a set of factors to a 2D house. Then for every level, calculate a polygon that comprises solely it and no different factors. As soon as calculated, the polygons can be utilized as a type of “grid” to place something.
Right here’s an animated instance:
The fascinating factor about Voronoi-based layouts is that they’re responsive in a moderately uncommon means. Because the factors in a Voronoi tessellation transfer round, the polygons robotically re-arrange themselves to fill the house!
Attempt resizing the aspect beneath and watch what occurs!
Cool, proper?
If you need to be taught extra about all issues Voronoi, I’ve an article that goes in-depth. For now, although, that is all we’d like.
Updating the worklet’s identify
Alright, of us, we all know the deal right here. Let’s fork the starter Pen, replace the JavaScript import, and alter the worklet’s identify and references:
class VoronoiPattern {
// …
}
if (typeof registerPaint !== “undefined”) {
registerPaint(“voronoiPattern”, VoronoiPattern);
}
.worklet-canvas {
/* … */
background-image: paint(voronoiPattern);
}
Defining the worklet’s enter properties
Our VoronoiPattern worklet expects the next enter properties:
–pattern-seed — a seed worth for the pseudo-random quantity generator–pattern-colors — the out there colours for every arc/circle within the pattern–pattern-background — the sample’s background coloration
Let’s add these enter properties to our worklet:
class VoronoiPattern {
static get inputProperties() {
return [“–pattern-seed”, “–pattern-colors”, “–pattern-background”];
}
// …
}
…and register them in our CSS:
@property –pattern-seed {
syntax: “<quantity>”;
initial-value: 123456;
inherits: true;
}
@property –pattern-background {
syntax: “<coloration>”;
inherits: false;
initial-value: #141b3d;
}
@property –pattern-colors {
syntax: “<coloration>#”;
initial-value: #e9edeb, #66aac6, #e63890;
inherits: true;
}
Good! We’re all set. Overalls on, buddies — allow us to paint.
The paint() perform
First, let’s filter out the starter worklet’s paint() perform, retaining solely the width and top definitions. We will then create some variables utilizing our enter properties, and seed our pseudo-random quantity generator, too. Identical to in our earlier examples:
paint(ctx, geometry, props) {
const { width, top } = geometry;
const seed = props.get(“–pattern-seed”).worth;
const background = props.get(“–pattern-background”).toString();
const colours = props.getAll(“–pattern-colors”).map((c) => c.toString());
random.use(seedrandom(seed));
}
Earlier than we do the rest, let’s paint a fast background coloration:
ctx.fillStyle = background;
ctx.fillRect(0, 0, width, top);
Subsequent, let’s import a helper perform that can permit us to shortly prepare dinner up a Voronoi tessellation:
import { createVoronoiTessellation } from “https://cdn.skypack.dev/@georgedoescode/generative-utils”;
This perform is basically a wrapper round d3-delaunay and is a part of my generative-utils repository. You’ll be able to view the supply code on GitHub. With “traditional” knowledge constructions/algorithms equivalent to Voronoi tessellations, there isn’t a must reinvent the wheel — except you wish to, after all!
Now that now we have our createVoronoiTessellation perform out there, let’s add it to color():
const { cells } = createVoronoiTessellation({
width,
top,
factors: […Array(24)].map(() => ({
x: random.float(0, width),
y: random.float(0, top)
}))
});
Right here, we create a Voronoi Tessellation on the width and top of the worklet’s goal aspect, with 24 controlling factors.
Superior. Time to render our shapes! A lot of this code ought to be acquainted to us, due to the earlier two examples.
First, we loop via every cell within the tessellation:
cells.forEach((cell) => {
});
For every cell, the very first thing we do is select a coloration:
ctx.fillStyle = colours[random.int(0, colors.length – 1)];
Subsequent, we retailer a reference to the middle x and y values of the cell:
const cx = cell.centroid.x;
const cy = cell.centroid.y;
Subsequent, we save the context’s present state and rotate the canvas across the cell’s heart level:
ctx.save();
ctx.translate(cx, cy);
ctx.rotate((random.float(0, 360) / 180) * Math.PI);
ctx.translate(-cx, -cy);
Cool! Now, we will render one thing. Let’s draw an arc with an finish angle of both PI or PI * 2. To me and also you, a semi-circle or a circle:
ctx.beginPath();
ctx.arc(
cell.centroid.x,
cell.centroid.y,
cell.innerCircleRadius * 0.75,
0,
Math.PI * random.int(1, 2)
);
ctx.fill();
Our createVoronoiTessellation perform attaches a particular innerCircleRadius to every cell — that is the biggest attainable circle that may match at its heart with out touching any edges. Consider it as a helpful information for scaling objects to the bounds of a cell. Within the snippet above, we’re utilizing innerCircleRadius to find out the dimensions of our arcs.
Right here’s a easy pen highlighting what’s occurring right here:
Now that now we have added a “main” arc to every cell, let’s add one other one, 25% of the time. This time, nonetheless, we will set the arc’s fill coloration to our worklets background coloration. Doing so offers us the impact of a bit of gap in the course of a few of the shapes!
if (random.float(0, 1) > 0.25) {
ctx.fillStyle = background;
ctx.beginPath();
ctx.arc(
cell.centroid.x,
cell.centroid.y,
(cell.innerCircleRadius * 0.75) / 2,
0,
Math.PI * 2
);
ctx.fill();
}
Nice! All we have to do now could be restore the drawing context:
ctx.restore();
And, that’s it!
Subsequent steps
The gorgeous factor about Voronoi tessellations is that you need to use them to place something in any respect. In our instance, we used arcs, however you possibly can render rectangles, traces, triangles, no matter! Maybe you possibly can even render the outlines of the cells themselves?
Right here’s a model of our VoronoiPattern worklet that renders a lot of small traces, moderately than circles and semicircles:
Randomizing patterns
You will have observed that up till this level, all of our patterns have acquired a static –pattern-seed worth. That is tremendous, however what if we wish our patterns to be random every time they show? Properly, fortunate for us, all we have to do is ready the –pattern-seed variable when the web page hundreds to be a random quantity. One thing like this:
doc.documentElement.model.setProperty(‘–pattern-seed’, Math.random() * 10000);
We touched on this briefly earlier, however it is a beautiful means to ensure a webpage is a tiny bit totally different for everybody that sees it.
Till subsequent time
Properly, buddies, what a visit!
Now we have created three lovely patterns collectively, realized a lot of helpful Paint API methods, and (hopefully!) had some enjoyable, too. From right here, I hope you are feeling impressed to make some extra generative artwork/design with CSS Houdini! I’m unsure about you, however I really feel like my portfolio web site wants a brand new coat of paint…
Till subsequent time, fellow CSS magicians!
Oh! Earlier than you go, I’ve a problem for you. There’s a generative Paint API worklet operating on this very web page! Can you see it?
There are definitely methods round this rule, however they are often complicated and never completely appropriate for this tutorial. ⮑
The put up Creating Generative Patterns with The CSS Paint API appeared first on CSS-Tips. You’ll be able to help CSS-Tips by being an MVP Supporter.


Subscribe to MarketingSolution.
Receive web development discounts & web design tutorials.
Now! Lets GROW Together!