
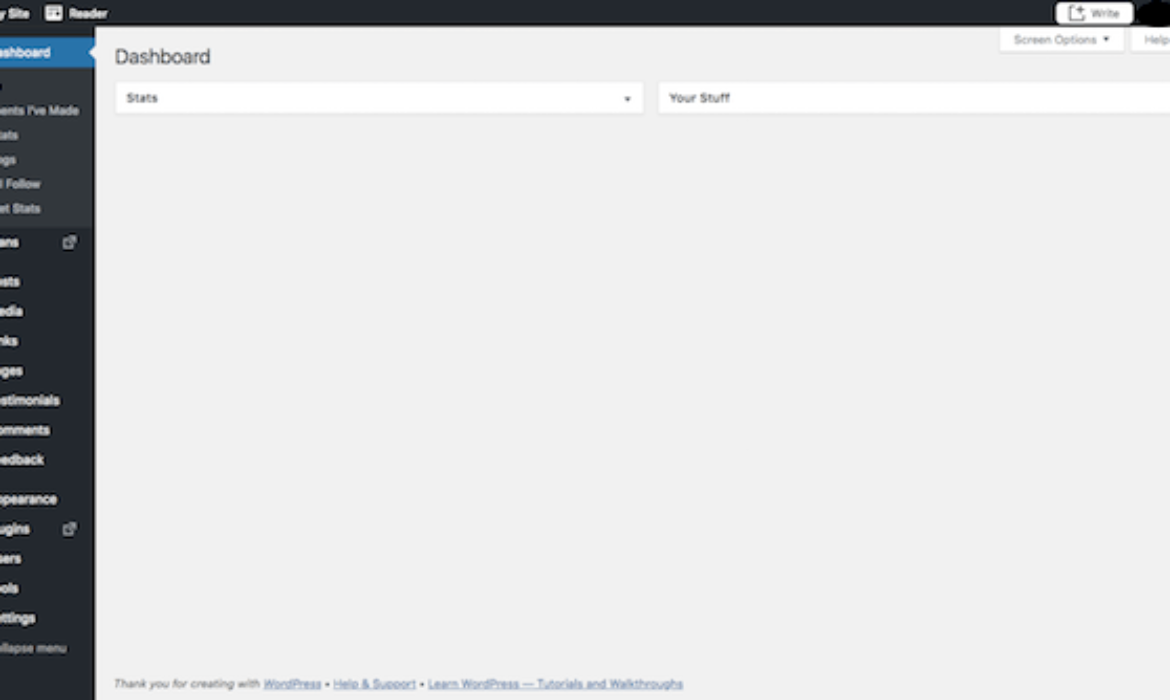
The primary time you step foot contained in the WordPress dashboard, you’ll be able to’t assist however marvel at how easy all of it seems to be. A administration sidebar on the left. A clear interface to work inside within the heart. Notifications on the high.
The WordPress Dashboard display…a clean canvas with infinite potential!
However when you begin digging deeper into WordPress, it’s possible you’ll really feel overwhelmed as you dig deeper into the layers of performance throughout the content material administration system.
There’s rather a lot to discover beneath the hood!
So, let’s discuss sensible steps right here.
What do it is advisable to do to get began in WordPress and find yourself with a web site that’s able to impress guests straight out the gate? And how are you going to do that in essentially the most environment friendly method as attainable, even with out prior expertise in WordPress? The next WordPress tutorial will stroll you thru all the mandatory steps in organising your first WordPress website.
Step 1: Select a Area
Step 2: Buy Internet Internet hosting and Area
Step 3: Set up WordPress
Step 4: Discover a WordPress Theme
Step 5: Set up Your WordPress Theme
Step 6: Configure Your WordPress Theme
Step 7: Publish Your First Pages
Step 8: Create a Menu
Step 9: Configure Your WordPress Settings
Step 10: Set up Important WordPress Plugins
WordPress Tutorial for Novices: Step-by-Step
Earlier than you even step inside WordPress, it is advisable to do some work to discover a dwelling for it. So, let’s begin with the steps it is advisable to sort out outdoors of WordPress, after which transfer contained in the platform as soon as we’ve you all arrange.
Step 1: Select a Area
It is a net area:
The web site tackle contains its area identify.
It’s going to function the URL inside your guests’ tackle bar once they go to your WordPress website. Be certain it’s:
Comparatively brief
Straightforward to recollect and kind out
Matches your model identify or is straight associated to it
Except you’ve gotten already bought a website to your web site, it’s finest to take action while you buy your webhosting plan (particularly since some plans will embody a free area).
As long as nobody has claimed the identify earlier than, you’ll have your alternative of top-level area (TLD) as effectively. A TLD is the suffix you connect to the URL like .com, .edu, .biz, and many others. There are even ones obtainable for particular industries in addition to primarily based in your geographic location (like .uk and .eu). Google has a fairly good roundup on the assorted TLDs you’ll be able to select from.
Step 2: Buy Internet Internet hosting and Area
Internet hosting does precisely what it says: it “hosts” web sites. In different phrases, webhosting firms personal and handle big net servers situated in information facilities across the nation (and, typically, the world).
It’s on these net servers the place web sites like yours sit, so that you don’t have to purchase or handle any of the server expertise your self. You pay these firms what quantities to a month-to-month or annual hire for area and bandwidth on the server. Then, you’ll be able to deal with constructing your web site in WordPress.
By way of selecting a internet hosting plan, it is best to take into consideration what you truly wish to do together with your web site.
Making a small inside and personal firm website? WordPress.com internet hosting needs to be effective.
Working a weblog? Shared internet hosting is an efficient place to start out.
Launching a brand new enterprise enterprise and wish to gather leads and/or funds? Cloud internet hosting is a brilliant alternative.
Should you anticipate heavy visitors to your established enterprise or e-commerce firm to start out, then go along with VPS.
When you begin receiving heavy visitors and are doing a lot of enterprise via your website, it’s possible you’ll wish to think about transferring to managed WordPress internet hosting.
Whichever method you select to go, you’ll be able to’t go flawed with WPMU DEV internet hosting.
Even our reasonably priced starter plan (Bronze) provides absolutely devoted managed WordPress internet hosting with blazing-fast speeds, a great deal of storage, RAM, and bandwidth that will help you develop, built-in state-of-the-art options, and 24/7 entry to stay chat help.
WPMU DEV Internet hosting is good for all of your WordPress internet hosting wants.
After all, you’ll be able to select different internet hosting suppliers to arrange a WordPress website, however we’re assured that you simply’ll discover our internet hosting service arduous to beat, particularly while you see how we evaluate with different main internet hosting suppliers.
Signing up for webhosting with WPMU DEV is simple–it’s like buying another software program or service.
You may buy our internet hosting individually ranging from simply $10 per 30 days, or in case you are simply beginning out, turn into a member utilizing our 7-day free trial and for only a few {dollars} extra, get entry to internet hosting…and every part we provide!
All it is advisable to begin with is a website identify. You don’t want anything, like an SSL certificates to spice up safety, CDN, devoted IP addresses, and many others. as we provide all of that.
If you’d like internet hosting as a part of your membership, then join right here. In any other case, when you’re buying internet hosting as a separate service, go to our internet hosting web page and choose a plan.
Select a internet hosting plan.
Enter your particulars to arrange your account and click on subsequent…
Add your particulars
Enter your cost info, click on the Get began button, and also you’re all good to go.
Enter your cost data and click on Get began.
Your account can be mechanically created and your account particulars can be despatched to your electronic mail.
Step 3: Set up WordPress
There are a selection of the way to put in WordPress. Most webhosting service will give you an easy-to-use one-click set up course of that simplifies the entire course of.
With WPMU DEV internet hosting, we make issues even easier by mechanically putting in and configuring WordPress for you while you create a brand new website (and we provide you with totally different choices to create your website too!)
Let’s undergo an instance…
First, log into your WPMU DEV account and go to The Hub (our WordPress administration console and your webhosting HQ):
Log into your account and go to The Hub.
The Hub allows you to handle your whole WordPress websites (even when they’re not hosted with WPMU DEV).
To create a brand new WordPress website in The Hub, click on on the (+) button
Click on on the button so as to add a brand new web site.
You’ll be offered with totally different choices for including a website, comparable to connecting an externally hosted website, migrating your website from one other host, making a model new website from scratch or from a template, or cloning your website from an current website.
For this instance, choose Create New…
Let’s create a brand new website.
You’ll be offered with The Hub’s website creation wizard. Let’s undergo the steps…
First, choose the kind of website you wish to create. Let’s select a model new website.
Let’s create a model new website from scratch.
Subsequent, you can be requested to create a short lived web site URL. Decide any identify you want. This identify will show as xxxx.tempurl.host (the place xxxx is the identify you select). Tip: when you’re organising a number of websites, use your area because the prefix (e.g. ‘yourdomain.tempurl.host’).
Create a short lived URL to your new web site.
Subsequent, arrange your WordPress admin account. This can be your website’s login particulars.
Arrange your WordPress website admin account.
Final step, select a server location the place your website can be hosted. We presently have 10 information facilities situated world wide, so choose the one closest to the place most of your guests are situated.
Select your server location.
That’s it, your website can be put in with WordPress and your server configurations can be optimized…all that is mechanically carried out in mere minutes.
Your new website can be mechanically created in mere minutes.
Your WordPress website is now fully put in, arrange and able to go.
Word: The one step left to do is to attach your area identify together with your new website in your internet hosting account. As soon as that is carried out, your area identify will exchange the non permanent web site URL.
To finish this step, see our tutorial on methods to configure your DNS and Nameservers.
Upon getting accomplished the set up and created your WordPress login credentials, it’s time to step inside.
You may entry your WordPress admin space simply through The Hub.
Entry your WordPress admin space from The Hub.
Alternatively, you’ll be able to log into your WordPress admin space out of your net browser.
Here’s what your admin login display will seem like:
The WordPress login display.
Except you modify your login area (which you ultimately ought to for safety causes), your admin login can be situated at www.yourdomainname.com/wp-login.php.
Step 4: Discover a WordPress Theme
Chances are you’ll be tempted to start out combing via the assorted settings and pages within the WordPress menu, however maintain on that for now. The very first thing it is advisable to do right here is to discover a theme to your website.
A WordPress theme is a pre-designed and pre-coded interface template for WordPress. Principally, it saves you the difficulty (and cash) of getting to design your personal web site from-scratch or to pay another person to do it for you.
While you log into WordPress for the primary time, WordPress will mechanically assign their newest theme to your website.
The WordPress.org free theme listing comprises 1000’s of free themes for WordPress.
There’s completely nothing flawed with utilizing this theme, particularly because it’s constructed by WordPress builders. Nonetheless, it’s a really fundamental theme and one which’s unlikely going to be helpful if you wish to do something greater than weblog or create a easy website for a neighborhood enterprise.
The Twenty Seventeen theme for WordPress.
If you wish to use a WordPress theme that works higher to your area of interest, don’t be afraid to go searching and to discover the most effective and most reliable WordPress theme to your functions.
Remember that each theme requires some configuration. Additionally, not each theme works the identical method. Some make the most of a fundamental textual content editor (which appears to be like much like the clean web page in Microsoft Phrase) whereas others use a web page builder or visible editor. So, switching from one theme to a different will power you to perform a little rework if or while you make a swap. If you wish to spare your self the attainable trouble, then don’t transfer on to the subsequent steps till you’ve discovered the right WordPress theme to your website.
Step 5: Set up Your WordPress Theme
While you discover that good WordPress theme, it’s time set up it in WordPress.
Free WordPress Themes
Should you’re utilizing a free theme from the WordPress repository, here’s what it is advisable to do:
Inside WordPress, go to the Look tab and click on on “Themes”.
Go to Look – Themes.
On the high of the web page, click on on “Add New”. It will take you to the WordPress repository from inside WordPress. Use this feature so that you don’t must do any handbook set up.
When you’re within the repository, do a seek for the WordPress theme you wish to use. Hover over it, and click on the “Set up” button.
Choose a theme and click on Set up.
When it’s carried out putting in, you then must activate it so as to publish it to your WordPress website. Click on on “Activate” (in the identical spot the place the “Set up” button was) and watch for it to take you again into the principle WordPress dashboard.
Premium WordPress Themes
Should you’ve determined to buy a premium WordPress theme, the method will differ as third-party theme builders and marketplaces don’t sync on to WordPress. Here’s what it is advisable to do:
Go to your WordPress theme’s web page and buy the file. When you’ve carried out this, you’ll be taken to a display the place you’ll be able to obtain the theme file. It’s going to look one thing like this:
You’ll find many premium WordPress themes on in style theme marketplaces.
If there may be an possibility for it, obtain the “Installable WordPress Recordsdata Solely”. This offers you a zipped folder you’ll be able to then add straight into WordPress.
To do that, return into WordPress, discover the Look tab, and go to “Themes”. Click on on “Add New” on the high. Solely, this time, you’ll choose the “Add Theme” possibility.
Click on the Add Theme button.
Choose the zip file out of your pc and click on Set up Now. Together with your new theme uploaded into WordPress, now you can activate and publish it to the positioning.
Step 6: Configure Your WordPress Theme
Upon activation, you’ll wish to spend a while configuring your theme. You are able to do this beneath the Look tab after which click on “Customise”.
Click on on Customise to open the WordPress theme customizer.
Finally, it’s as much as you to determine how a lot or little of your theme you wish to customise. Nonetheless, it is best to no less than take a while now to undergo every of the modules and acquaint your self with what you’ve gotten the ability to alter.
WordPress Theme Customizer.
Web site Id is a crucial one to fill in, so ensure you have a look at that first.
Colours permits to replace your website to your model’s shade palette (when you’ve got one).
Widgets lets you add content material to your footer.
And Menus refers to your website’s navigation–one thing I’m going to cowl in Step 8 so there’s nothing to do right here simply but.
Step 7: Publish Your First Pages
There are two kinds of “pages” you’ll be able to create to your web site:
1. Web page
WordPress Pages display.
These are conventional net pages that exist inside the principle navigation of a website. The About web page, Contact web page, and particular person companies pages all are made utilizing the Web page function in WordPress.
2. Put up
WordPress Posts display.
These are weblog submit “pages” that may solely exist throughout the weblog in your web site, until you designate the house web page to function the weblog feed (I’ll speak about that in Step 9).
Now, the beauty of WordPress is that the interface is constant no matter whether or not you’re making a web page or a submit. There are totally different settings it is advisable to apply to every, however the principle space wherein you’re employed stays the identical, which makes it a workspace that’s straightforward to get used to.
WordPress Edit Put up display.
After all, when you work in a theme that makes use of a web page builder or a visible builder software to create content material, that is going to look just a little totally different.
A web page builder software lets you create “blocks” of content material to your website inside WordPress. As soon as the blocks are in place, you’ll be able to then populate them with corresponding content material.
A visible builder software works equally in that it lets you create blocks of content material to your website–nonetheless, it does it on the entrance finish of the particular website so you’ll be able to see your modifications in actual time. There are many drag and drop web page builders on the market, however listed below are a few of our favorites.
No matter which content material creation software your WordPress theme makes use of, it’s time to create content material to your website.
Should you’re operating a weblog, merely get began writing your first Posts. When you hit the Publish button, your blogs will go stay on the designated Weblog web page.
For a conventional web site, you’ll in all probability wish to construct out the next pages:
Homepage
About web page
Companies or merchandise web page(s)
Contact web page
As your web site grows, you’ll be able to create different pages. For now, these will suffice. Get some content material on them, publish the pages, after which let’s work on getting them onto your web site.
Step 8: Create a Menu
Whereas while you hit the “Publish” button on a Put up and it goes straight onto your weblog, a Web page must be added to your website’s navigation (or menu) if you’d like it to indicate up.
So, the very first thing to do is to create these pages to your website (which you probably did in Step 7).
Subsequent, you’ll wish to go to the Look tab and choose “Menus”. That is the place you’ll construct and handle your website’s navigation.
Choose Menus from the WordPress Look menu.
There may be form of rather a lot occurring right here, so let’s take this one step at a time.
First, let’s have a look at the menu choice dropdown.
WordPress Menus display.
Except you’ve gotten a necessity for a mega menu or a number of menu choices in your website, you probably gained’t also have a alternative right here. Nonetheless, in case your theme mechanically creates secondary or footer menus for you, make sure to choose the one you truly wish to create/edit right here.
Subsequent, let’s have a look at the sidebar choices.
Add hyperlinks to posts, pages, customized submit sorts, different taxonomies, and exterior URLs to your menu.
While you develop these tabs, you’ll be offered with pages, posts, and different kinds of content material that exist already in your website (which is why it is advisable to no less than begin on Step 7 earlier than doing this step). For essentially the most half, you’ll be working throughout the Pages tab to create your menus. Nonetheless, when you do have customized hyperlinks or different content material sorts you wish to add to the navigation, know that this software lets you make that occur.
Now, it’s time to create your menu.
WordPress allows you to create totally different menus to make use of in your chosen theme.
As a way to get pages to indicate up beneath the Menu Construction part, click on the checkbox subsequent to the web page (or pages) you wish to add to the sidebar. Then click on on the “Add to Menu” button. You’ll see these pages then present up beneath Menu Construction.
Inside this interface, now you can drag-and-drop your pages and design your menu to look nonetheless you’d prefer it to. Along with putting pages in a customized order, you can even create a hierarchy. So, let’s say you needed “Portfolio” to look solely when somebody hovers over the About tab, merely drag that web page inward in order that it turns into a subitem:
Create nested menus.
You can too change the web page labels that seem within the navigation. As an example, let’s say you referred to as the web page “Portfolio” in WordPress so your workers would know the place to place examples of your work. Nonetheless, on the customer-facing aspect of the web site, you suppose it will be clearer when you referred to as the web page “Pattern Work”. You may rename it right here.
Change menu navigation labels.
One different factor to level out right here is the Menu Settings field on the backside.
Menu Settings part.
If you realize that you simply’ll be including new pages often to your web site and don’t wish to must repeat this course of each time, you’ll be able to click on on the “Robotically add new top-level pages to this menu” choice to streamline your course of.
While you’re carried out organising your menu, save your modifications.
Step 9: Configure Your WordPress Settings
I sometimes advise new WordPress customers to depart the settings setup till this stage of the method. Lots of the settings supplied by WordPress management issues associated to your pages and posts, and that’s not essentially one thing you’d perceive till you’ve truly created them to your website.
So, now that you simply’ve carried out that, it’s time to undergo your settings one-by-one and ensure your WordPress website is configured to work precisely as you need it to.
Common
Common Settings display.
Web site Title: That is what’s going to seem in somebody’s browser tab once they arrive at your website.
Tagline: This may be modified while you create content material to your dwelling web page, so this isn’t a required subject.
WordPress Tackle: That is the URL of your predominant website.
Web site Tackle: For many of you, this may match the WordPress Tackle. Nonetheless, in case you are organising one thing like Multisite that requires every website have its personal sub-domain, you’ll specify that right here.
E-mail Tackle: That is for the principle admin of your website, to allow them to obtain all associated notifications relating to it.
Membership: If you’d like individuals to subscribe to your website for updates, click on this field.
New Person Default Function: Preserve this to Subscriber or Buyer in order that they will’t achieve entry to the backend of your website.
The remainder of the knowledge pertains so far and time configurations.
Writing
Writing Settings display.
Default Put up Class: Should you’re together with a weblog in your website, it is best to finally are available in right here and take away the “Uncategorized” class. You’ll need every new submit to be assigned a class and eradicating the default setting will make it simpler on your self sooner or later.
Default Put up Format: For essentially the most half, “Normal” ought to suffice until you’re utilizing your weblog to share video, audio, or picture galleries.
Put up through electronic mail: If you’d like to have the ability to write WordPress posts and electronic mail them to your website (which I wouldn’t advise), you’ll be able to allow this setting right here.
Replace Companies: Go away this subject be until you’ve gotten a personal weblog and don’t need individuals to know when you’ve gotten new content material obtainable.
Studying
Studying Settings display.
Your homepage shows: You could have two selections when organising a website in WordPress. You may let your homepage function the principle weblog roll, in order that guests first encounter “Your newest posts”. Or you’ll be able to create a full-blown web site and let “A static web page” you created function the house web page.
A static web page: If you choose this second possibility, you’ll must designate a web page to be your homepage and a web page to mechanically show your posts on.
Weblog pages present at most: Should you present a abstract of your weblog posts (see possibility under), you’ll be able to show as much as 10 posts per web page. Should you present the complete textual content, attempt to restrict this to three posts.
Syndication feeds present the latest: When your weblog reveals up in somebody’s RSS (syndication) feed, this setting permits you to decide on what number of current posts they’ll see initially.
For every article in a feed, present: That is as much as you to determine, although I believe a abstract might be finest for enhancing the general look on a predominant weblog web page’s feed. It additionally offers guests a purpose to click on via and go to one other web page (which is nice for website positioning).
Search engine visibility: Except your web site is non-public, don’t test this field.
Dialogue
Dialogue Settings display.
Default article settings: The primary setting refers to backlink notifications. The second setting refers to pingbacks and trackbacks. The third has to do with permitting feedback in your weblog.
Different remark settings: Should you do need guests to depart feedback, you’ll be able to set necessities on who they’re in addition to how feedback seem.
E-mail me at any time when: Staying engaged with individuals who take the time to remark in your content material is an efficient factor. Examine these so you’ll be able to extra simply keep on high of that.
Earlier than a remark seems: Should you’re apprehensive about spam or abusive feedback coming via, replace these settings.
Remark Moderation/Blacklist: You may determine extra particularly who’s allowed to depart a remark (as long as it’s moderated) and who isn’t.
Avatars: Should you’re not operating a membership website that permits customers to create a full customized profile, make sure to replace these settings to present your feedback part just a little persona.
Media
Media Settings display.
Should you’ve designed a customized WordPress website, you could have a necessity for customized media file sizes. In utilizing this setting, you’ll be able to streamline the media add and sizing course of. That method, visible content material mechanically goes into your pages on the proper dimension and also you don’t have to fret about making changes of it in your design software program or compromising visibility of the picture as soon as it’s in WordPress.
Step 10: Set up Important WordPress Plugins
Putting in WordPress plugins is the ultimate step within the WordPress setup course of.
By way of what a WordPress plugin is, it’s a bit of software program that hooks into WordPress. As for what it does? Nicely, plugins can do rather a lot of various issues. They might help you:
Combine a social media feed into your website.
Resize and compress photos.
Block spammers and hackers.
Create a discussion board.
Add a cost gateway.
Translate your website.
And far, rather more.
So, how do you select which of them you want?
The WordPress.org plugin listing offers customers with 1000’s of free plugins.
Whereas it’s tempting to look via the WordPress repository that presently homes over 50,000 free plugins and set up the entire ones that appear actually cool or worthwhile, watch out. WordPress plugins are like another form of file or software program you layer on high of your website. With extra weight, comes slower loading occasions–and that’s not one thing you need to your consumer expertise.
That’s why it is advisable to select your plugins correctly. To start out, let’s have a look at absolutely the plugin necessities each WordPress website wants:
Google Analytics plugins: Monitoring customer exercise in your WordPress website is crucial. Nonetheless, getting the Google Analytics monitoring pixel in your website isn’t at all times that straight-forward. These plugins will handle it.
website positioning plugins: These plugins are nice as they supply steerage on what it is advisable to do on every web page or submit to optimize it for search.
Caching (pace) plugins: Folks don’t have a lot persistence anymore and also you don’t need your website to check that, so that you’ll want considered one of these plugins.
Picture optimization plugins: Each web site makes use of photos, whether or not they’re your personal high-resolution images or actually cool inventory pictures and illustrations you discovered on the internet. If you wish to hold them wanting sharp and loading quick, you want considered one of these.
Safety plugins: With WordPress being so in style world wide, it’s usually a standard goal for hackers. A safety plugin will provide help to create a stronger protection towards them.
Contact kind plugins: Should you’re publishing a website to the online, then you definitely most positively need individuals to not solely go to it, however to interact with you thru it. A contact kind is a necessary piece required for that interplay to happen.
CRM plugins: Discover out every part it is advisable to find out about your web site guests. For instance, with HubSpot’s WordPress Plugin, you’ll be able to see all of the pages somebody has visited, stay chat together with your guests whereas they’re shopping your web site, and ship them advertising and marketing emails — and all of that free of charge.
As for getting these plugins onto your website, effectively, that’s the straightforward half.
Should you’re putting in WordPress as a WPMU DEV Member, we mechanically set up the WPMU DEV Dashboard plugin onto your website.
This not solely offers you entry to your membership and our 24/7 help, it additionally lets you simply arrange our total suite of plugins (overlaying many of the important plugin classes listed above) with only one click on.
For instance:
Google Analytics plugins: Beehive Professional (set up the free Beehive plugin when you’re not a member).
website positioning plugins: SmartCrawl Professional (or get the free SmartCrawl website positioning plugin if not a member).
Caching (pace) plugins: Hummingbird Professional (or get Hummingbird free if not a member).
Picture optimization plugins: Smush Professional (or get Smush free if not a member).
Safety plugins: Defender Professional (or get free Defender safety if not a member).
Contact kind plugins: Forminator Professional (or get Forminator free if not a member)
E-mail Advertising/Choose-in plugins: Hustle Professional (or get Hustle free if not a member)
Automated website backups: Snapshot Professional (WPMU DEV members solely)
And extra.
If putting in different plugins, the method is nearly equivalent to WordPress theme set up.
Inside WordPress, go to the Plugins tab on the left and choose Add New. It will take you to the WordPress repository with out forcing you to depart your website.
Go to Plugins – Add New.
As soon as inside, you are able to do a search on the correct for the plugin you wish to set up. You’ll have to do that course of one-by-one for every of your plugins.
Subsequent to the plugin identify, you’ll see an “Set up Now” button. Click on it.
Click on on Set up Now.
It will set up the plugin. Subsequent, click on on Activate.
Click on on the Activate button.
The plugin is now activated.
WordPress lets you realize the plugin has been activated.
Some plugins would require some configuration earlier than you should utilize them and can mechanically redirect you to their settings web page to take action. Different plugins are able to exit of the field. No matter which form of plugin you’ve simply put in, you’ll be capable to discover it right here beneath “Put in Plugins”:
View all of the plugins put in in your website within the Plugins display.
Plugins in blue are presently activated. Plugins in white aren’t inactive. To activate a plugin, click on the “Activate” button under it. To “Deactivate” or “Delete”, do the identical. And, for plugins which have settings you’ll be able to configure, you’ll be able to click on that button if it’s obtainable.
It’s additionally essential to notice that a few of your plugins will generate their very own new tab on the sidebar. Take WP Smush, for example. Should you’ve chosen to make use of this picture optimization plugin, you’ll now discover that it’s put in a brand new possibility in your sidebar:
Putting in new plugin in your website also can add new menu entries to the admin menu.
So, make sure to look out for these new tabs after activation as they maintain useful settings and options you’ll wish to begin accessing straight away.
Wrapping Up
WordPress is the undisputed champ of content material administration techniques, which is why there’s by no means been a greater time to discover ways to use it. In simply 10 steps (and a few cautious analysis and planning), you may get your first WordPress web site up and operating! Good luck!
Editor’s Word: This submit has been up to date for accuracy and relevancy. [Originally Published: July 2018 / Revised: August 2021]


Subscribe to MarketingSolution.
Receive web development discounts & web design tutorials.
Now! Lets GROW Together!